Here’s an idea…there is a place to specify the number of passes inside the cut operation settings…try setting that to 2 on the next one before you send it to print.
If it works, do that for your future prints.
If you try to send a second print after specifying only one the first time, you have to make sure of two things…
The material on the bed cannot move from it’s original position.
The design on the screen cannot move from it’s original position.
That’s actually harder to pull off than most people would think, since the instinct is to pick the cutout up to test it. If you can’t do it, just specify two runs up front.
(Or you can adjust the speed down a little before the print and get the complete cut in one pass.)
Just a thought, when did you last clean your lenses and mirrors? Not cutting through reliably is usually my first sign that I’ve gone too long between wiping things down.
Make sure you get ALL of these:
The camera lens on the lid
The laser lens that you have to remove with the blue tool
The two windows on either side of the laser lens
The mirror on the side of the print head
The mirror in the left side of the Glowforge
And less frequently, the mirror in the top of the printhead.
It doesn’t matter (as far as positioning) - like the example I gave in the other post a few mins ago. The material height field only impacts the bed image, or how the material is presented - it doesn’t actually move the design elements in the overlay.
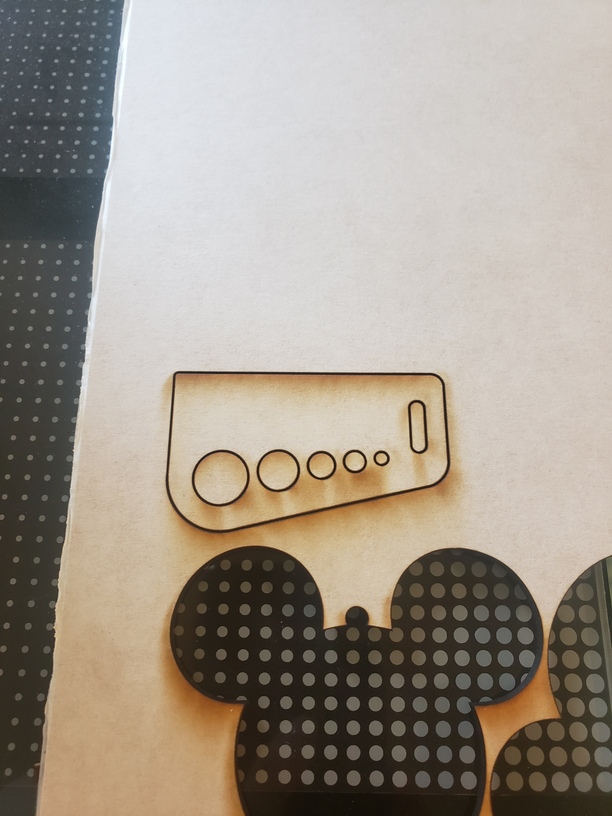
If I were the OP, I would try doing one item, use set focus exactly where you want to print it, and give it a try (after making sure that all of the optics are clean). The latest picture looks like warped material to me, gauging from how the cut-through progressively worsens as it gets further down the sheet.
As far as the cuts not lining up, it could be a belt tension issue where the fast movement from when it goes to scan the material causes the head to lose position. The first pass would be evident to how it lines up with the image overlay, but not necessarily hurt anything. The second pass though, would throw the entire cut off from the first pass.
I’m sorry about the ongoing trouble and the frustration due to lost time. The advice @geek2nurse provided about checking and cleaning all of your optics is a great idea. Would you let me know if you’ve tried that already?
Also, did you get a chance to check your unit’s belt tension and run a short test print with the Gift of Good Measure using the steps from my previous post?
Is there a way to expedite shipping on PG materials? I’ve come to realize that every order I put in i have about 25% of the material that I either cant use because its warped or isn’t cut all the way through so it’s wasted. So I will need to put in another order to be prepared for the holiday coming up.
We have not announced anything like that yet, and do not currently offer expedited shipping from the shop.
Earlier my colleague Ivan inquired about cleaning your optics, and checking the belts tension. Would it be possible to review these items, and a run a short test print with the Gift of Good Measure using these steps:
Turn off your Glowforge, then turn it back on
We included an extra piece of Proofgrade Draftboard with your materials shipment for troubleshooting. Place Proofgrade Draftboard in the bed and load the Gift of Good Measure design.
Set the score and engrave steps to ‘ignore.’ Print the Gift of Good measure using the default settings. Allow the print to finish.
When the print finishes, leave the lid closed and wait until the fans stop and the picture of the bed updates.
Check the completed print:
If the Gift of Good Measure fails to cut, please let us know the date and time of the print
If the Gift of Good Measure cuts successfully, please try another print of the design you saw the issue with, and let us know the results.
If the issue still occurs, please let us know the date and time of the finished print. Please also include photos of the front and back of the print.
It’s been a little while since I’ve seen any replies on this thread so I’m going to close it. If you still need help with this please either start a new thread or email support@glowforge.com.