I just got my Glow Forge, I’ve been trying to cut out designs with it, it will go through the motions but there is never a mark on the material.
Using proofgrade. Not warped at all.
Used their designs and mine.
What am I doing wrong?!??
I just got my Glow Forge, I’ve been trying to cut out designs with it, it will go through the motions but there is never a mark on the material.
Using proofgrade. Not warped at all.
Used their designs and mine.
What am I doing wrong?!??
When the job is running, does the laser tube light up with pink-purplish flashes on the left end…ala Frankenstein? 
No it doesn’t do anything, the head of the printer just moves around but nothing besides that happens
Okay, you might need to check that the ribbon cable is okay. I’m away from my desk now, but someone can direct you to the instructions for it, or I’ll post a link as soon as I get back to it.
(Got about another ten to fifteen minutes to go.)
Can you take a screenshot of the app when you’re running the job?
If you go into the settings it’s possible to “tell” the GF that you want to do manual settings which causes it to reduce power to 1 as a precaution (which won’t mark anything)
Okay, here’s the link to the instructions on how to check the pins:
Make sure the cable is not twisted (it should unroll easily all the way left and right when you move it by hand with the machine turned off.) And after you check the pins, you want to make sure you click the cable all the way into the head.
Thanks for letting us know about this. Can you make sure the mirror inside your Glowforge printer head is installed correctly? Here are the instructions to check:
Turn off your Glowforge
Open the lid and gently move the Printer Head to the center of the laser arm
The top of the Printer Head is held on by strong magnets. Grasping only the top, pull up carefully to remove it and set it aside.

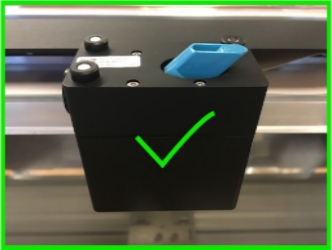
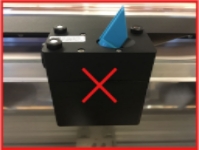
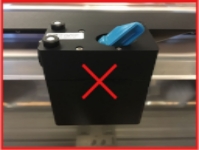
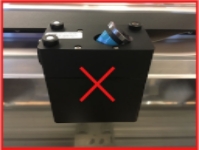
Tap the blue handle once. This will help ensure that the mirror is resting properly in place.
Replace the top of the printer head.
Close the lid of your Glowforge and turn it on.
If the mirror is installed correctly, please run the following test to help us investigate further:
Thank you in advance!
If the mirror is out of alignment to a degree sufficient to keep it from exiting the bottom of the print head, you’d have to wonder where the beam went and how much damage was done in its passing and why there’s no obvious sign of its passing…
Would the absence of any damage on the printhead suggest the laser isn’t lasing at all, or at least that the laser isn’t getting as far as the printhead?
Unfortunately, the machine was faulty. So bummed as I have waited so long for it! I will be receiving a new machine. Here’s to hoping the next one goes without any issues!!