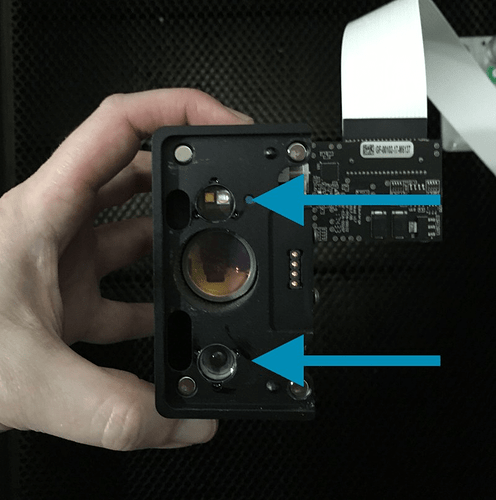
After I received my replacement Dragon, I am noticing the I am not getting consistently through cuts on PG materials - and before you ask, yes I cleaned all the lenses, yes the material is flat AND held down with Pins to be sure. Recently ran the calibration after the speed up update, and everything seems to be working fine EXCEPT for this not cutting issue. Med Walnut Ply has been the worst - have already wasted 2 sheets. The issues does not seem to be in any one area, although edges of the material seem to be affected the most…
I am about to start a huge Christmas gift project using Cherry Med Plywood, and cannot afford the time to have to go back and recut everything with a knife! Nor, do I want the veneer to peel off the plywood if I don’t get it cut though.
The whole point of PF materials for me is that I don’t have to worry about the settings!
What do I need to do to get this resolved!?
Test on a small area with adjusted settings, generally a reduction in speed by ‘about’ 10 pts. Once you find a setting that works reliably, you can move on to larger jobs.
Natural materials have variances that cause this, and it crops up a lot with the change of seasons.
Is it more humid now than when you last ran your previous unit? Or was it while you had the materials? Often the relative humidity affects material–e.g. absorbs moisture out of the air. Not enough that we notice, but enough to affect the laser. Or if it’s higher humidity in your room than say 30%, then that can also affect the laser’s effective power… which is why many have to adjust the speed a bit.
Yes, it’s annoying, but unless you’re in the same environment as the lab the PG settings were established, your results will vary… (and I’m only 20 miles from GF mothership, and sometimes I have to adjust…
My studio and materials are climate controlled and have not changed from before my machine swap out. And actuually drier in FL at this time of year then during the summer!
Adjust from where? These are Proofgrade so I don’t set anything. Is there a chart of what the base settings are somewhere?
On the left, click the object you want to adjust the settings for.
You’ll see “MANUAL” with an arrow next to it. Click that.
Adjust.
Don’t click “back” when you’re done adjusting. Just click outside of the settings window. (Click the object on the left again if you’d like.)
You’ll now see the settings you’ve chosen underneath that object.
… and if you have proofgrade material selected, you can see what the various default settings are by selecting engrave, cut or score and the proofgrade option, then clicking on the little arrow to the right.
Support may also ask you to measure the thickness of the materials with calipers. Sometimes the materials aren’t as uniform as they could be, despite all efforts to make them so.
If it is any consolation, I too have just had a replacement unit. All settings to be about 10% less effective - including all PG settings which used to work fine.
I’ve been making stuff for well over a year, so fully up to date on pins, levels, magnets, cleaning etc.
On my machine it appears to be slightly worse on the left hand side. The only think I can think which would do that is the machine bed not being quite level, but I’ve checked that as best I can and all seems ok.
For me, I’ve reset all my standard settings to a slightly slower speed to ensure I always get a cut, rather than 99% of a cut.
Left side for me as well… will start setting all cuts to a bit slower and see how it goes… thanks!
I’m sorry that your Glowforge is having trouble cutting through Proofgrade materials. Thank you for the information on what you’ve checked so far.
So that we can investigate this for you, please follow the steps below to run a test print:
- Turn off your Glowforge, then turn it back on.
- We included an extra piece of Proofgrade Draftboard with your materials shipment for troubleshooting. Place Proofgrade Draftboard in the bed and load the Gift of Good Measure design.
- Set the score and engrave steps to ‘ignore.’ Print the Gift of Good measure using the default settings. Allow the print to finish.
- When the print finishes, leave the lid closed and wait until the fans stop and the picture of the bed updates.
- Check the completed print:
- If the Gift of Good Measure fails to cut, take a photo of the front and back of the print and attach these photos to your reply.
- If the Gift of Good Measure cuts successfully, please try another print of the design you saw the issue with, and let us know the results.
Thank you for running this test for us. If the print fails to cut through correctly, in addition to sending us a photo of the front and back of the print, please send photos of all your cleaned optical components, with special attention to any damage you might find. We’ll need photos of the following:
- Both windows
- The printer head window, on the left hand side of the printer head
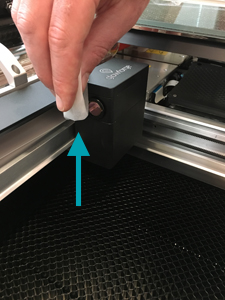
- The laser window on the inside left of the Glowforge
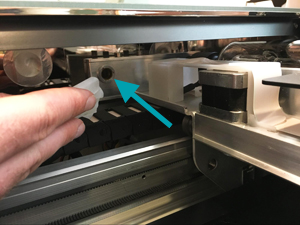
- The printer head window, on the left hand side of the printer head
- The printer head lens
- Both sides of the lens, top and bottom
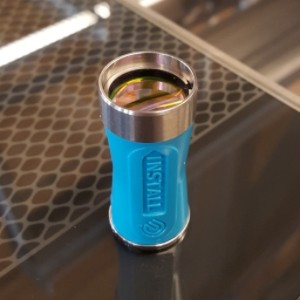
- Both sides of the lens, top and bottom
- The mirror inside the printer head
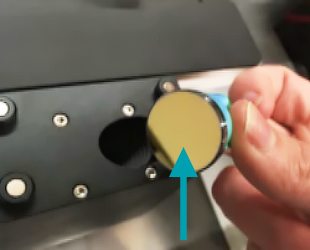
- The bottom of the printer head with your lens installed
Once we have those pictures, we’ll follow up with next steps. Thank you!
It’s been a little while since I’ve seen any replies on this thread so I’m going to close it. If you still need help with this please either start a new thread or email support@glowforge.com.
