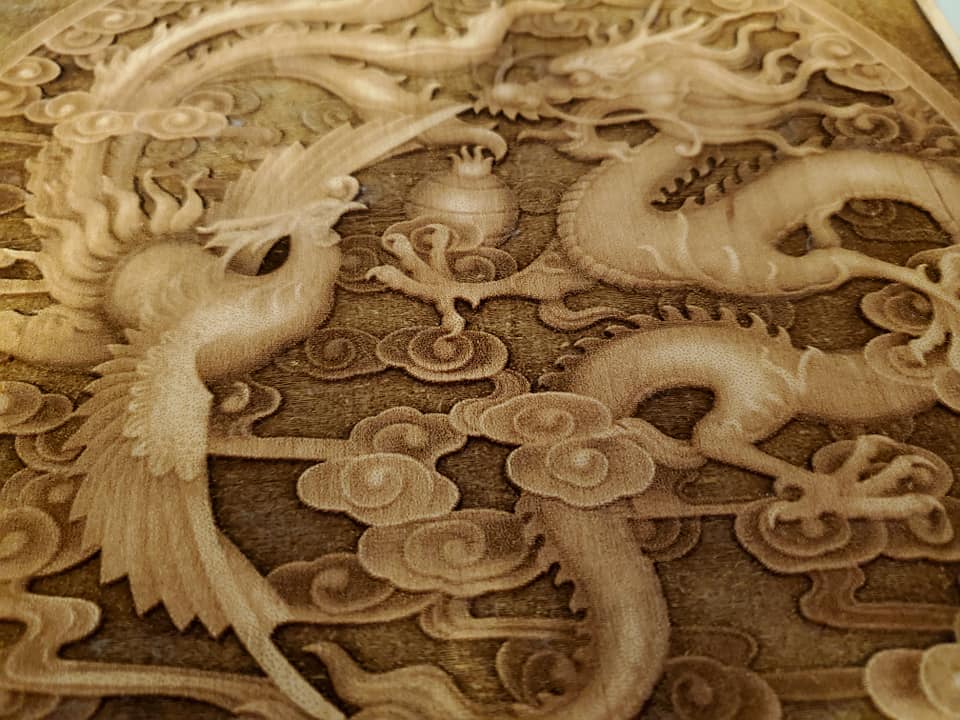
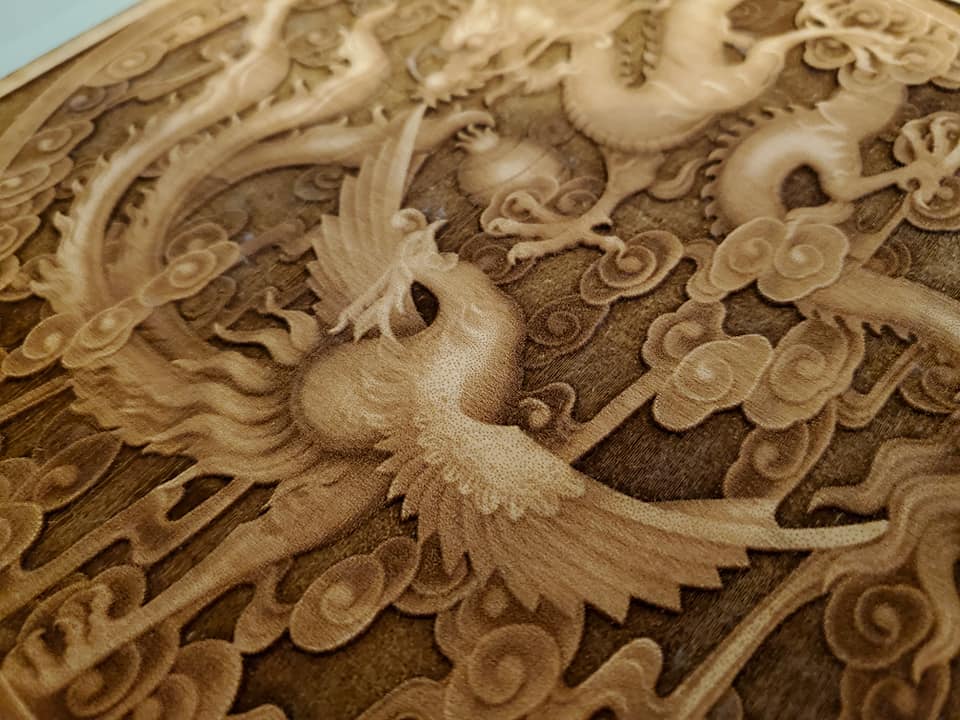
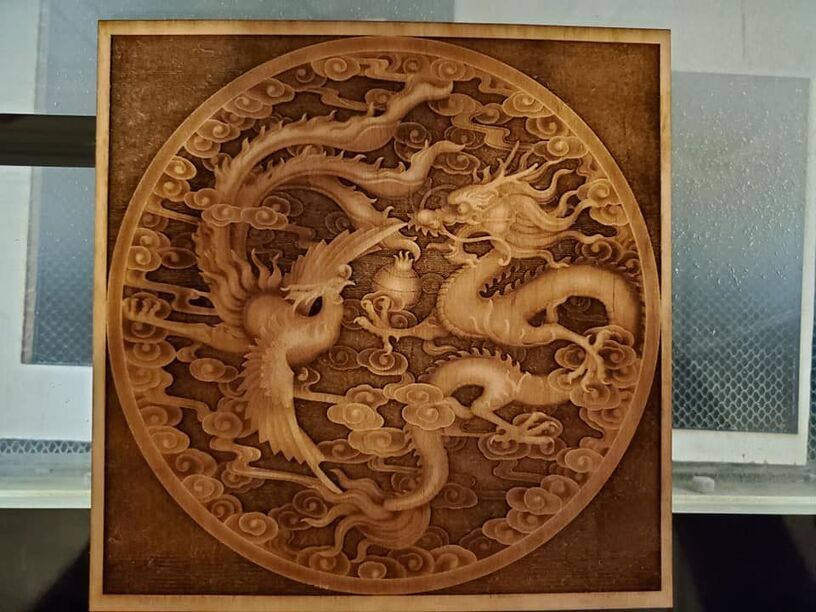
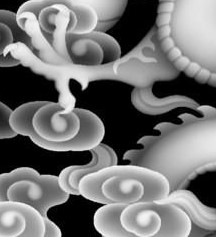
I’ve had my Glowforge Pro for about 3 weeks now and all I can say is wow! This machine has such range. I’ve been interested in 3d Oriental relief cuts for awhile, and have been experimenting with that whole process. I’ve finally gotten to the point that I felt like sharing one. This peice is about 9" X 9" and is carved in 1/8" Maple plywood. I am very pleased with the result, but hope to get tips from some of you who have been doing this for awhile. !
Wow, that is beautiful! So detailed! You look like you have those settings dialed in perfectly!!
6 Likes
Agree, that is stunning! Did you finish it with anything after the engrave?
5 Likes
You are getting great results. Since you are using plywood, are you actually cutting through the top ply of your wood? Your background looks perfectly uniform so even if you are it still looks great.
6 Likes
I am stunned at the detail and apparent depth in the piece. It looks an inch thick! We should be learning from you on how you accomplished it! 
I would suggest trying thicker solid woods, particularly maple and cherry. Harder woods with less obvious grain do best usually, and while MDF is the most extreme “no grain” it is also not very durable.
Coming into thicker Sea Glass Acrylic, reversed and inverted can also be amazing,
8 Likes
Thanks! Yes, this cut is well into the 2nd ply. However, I ran multiple passes using the Glowforge settings for Thick Maple.
3 Likes
The pictures were taken right after I cleaned it up a little. I basically just cleaned it with a toothbrush, a little Dawn detergent and water. I’ve since sprayed it with oil based clearcoat.
6 Likes
Getting the look of more depth than is really there was the ah-ha moment for me when figuring this stuff out. The trick seems to be laying down an image composed of dots first. This gives the areas subjected to less power proper shades. Follow up by running at least 2 passes at lower lpi (170 ~190). After you’ve gotten the depth almost where you want it, run a pass at a higher lpi (225 ~270). The shading layer is the magic though. It tricks the eyes into seeing more depth than is really there.
Thanks for the kind comments. I’m looking forward to sharing more projects.
16 Likes
Beautiful! Enough said! I’m envious
4 Likes
That is amazing! Really beautiful!
4 Likes
Welcome to the forum.
It is obvious that you are getting the full benefit of Glowforge ownership. Thanks for sharing this result. It is impressive.
5 Likes
Wow! You definitely have this technique figured out!
3 Likes
Would you be willing to share a small cropped section of the source file from one of the areas with the extreme variations in “depth”?
For example, this section:
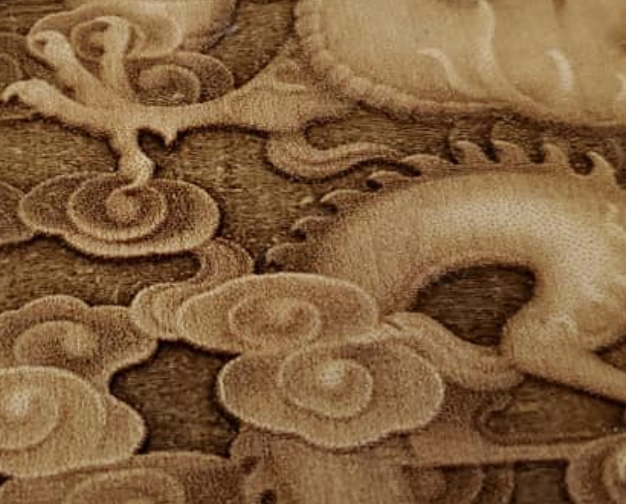
Here you go.
8 Likes
Thx!
That is much better detail than I usually see. Did you purchase the image?
No, actually I found this one in a “free” collection here: https://www.google.dk/search?q=3d+cnc+grayscale&tbm=isch&tbs=rimg%3ACdVHWeMif_1ocIjil07sNUEK-xvxHdztKHuCUO7d5Ul2wpsipMGR32FeVBQNdEMTccW9GWB-NOKJDOpgxxR4wY7uusCoSCaXTuw1QQr7GEUn1NXVlZaZWKhIJ_1Ed3O0oe4JQRB4LQfDB1lhIqEgk7t3lSXbCmyBHq5jzAuOG9cSoSCakwZHfYV5UFEUg09AVHZYPTKhIJA10QxNxxb0YR-hmbzjile1kqEglYH404okM6mBHf5oRfv_1xk4CoSCTHFHjBju66wEUn1NXVlZaZW&imgrc=pdO7DVBCvsbxWM%3A&cad=h#imgrc=HOrTr3YKxFl8FM
5 Likes
Gorgeous!!! I am looking forward to seeing a map from you.
Now this is an interesting technique.
Wow indeed! Doesn’t look like you need any tips. I’d been trying this but getting flat tops. Going to try again using your inputs. Wow again and thanks!
2 Likes