I’ve had my 'forge for around a month and a half now, and over the last few days it’s been acting peculiar. At first it just stopped cutting proofgrade material reliably. I’ve needed to do multiple passes for cuts for a while now, but I assumed it was just warped boards. However, today my machine began to experience the need to stop and cool (never done that before, even on 3+ hour jobs) and the smoke began to exit the machine from the interfaces around the front of the lid and the front door. It also started flashing a yellow button light when a job completes, but not during the job.
Finally, I noticed imperfections on the… well I’m not sure what to call this. It’s the primary lens that the laser passes through as it enters the head. So, laser comes out of the carries on the side (out of general view) and passes through the tinted window on the left side of the head. That side lens is the one I noticed imperfections in, and I’m quite certain they are new, as I inspected that part specifically when I put the machine together. Is degradation of this lens expected? I suspect it isn’t part of the heating problem, but it could be part of my cutting issue.
Is there a way for me to clean the exhaust system, aside from the general “vacuum into exhaust port” thing? I think the headsink may have material in it preventing the convective heat transfer, but I don’t see a good way to get at it.
I believe they suggest every 40 hours, but it really depends on what you’re doing with it. Heavy users with a lot of engraving might need to do it a little more frequently.
Depends on what you’re cutting too…some materials throw a lot more junk than others.
So after cleaning the machine doesn’t appear to be having the same overheating issues nor does it seem to have airflow issues (I also took a vacuum to the exhaust hub).
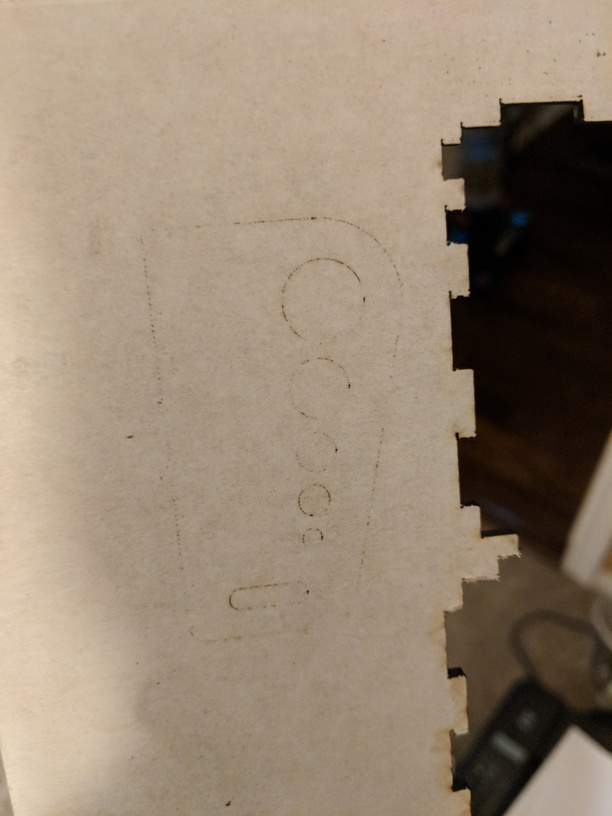
However, it is still not cutting well. I redid my cuts on some PF draft board and after two passes it is, mostly, cut well enough that I can punch it out with a little effort. But I think it is supposed to simply be cut through without issue, and the punching out process occasionally damages the material, so it is not ideal.
I’ve had this problem with PF Maple Ply, Draft Board, and Acrylic (clear, red, blue, and black). The acrylic seems to fully cut on the second pass.
To cut successfully, there are three important things to check. First, your material must lie flat. This requires a clean, properly installed crumb tray and flat materials. Second, there must be no obstructions, dirt, or damage preventing the laser light from reaching your material. Third, your design must be set up properly - for example, with lines that are fully on the material and that are set to cut. It’s hard to know which issue might be affecting your print, so please thoroughly inspect your unit for debris and check your material and design according to the suggestions in our troubleshooter.
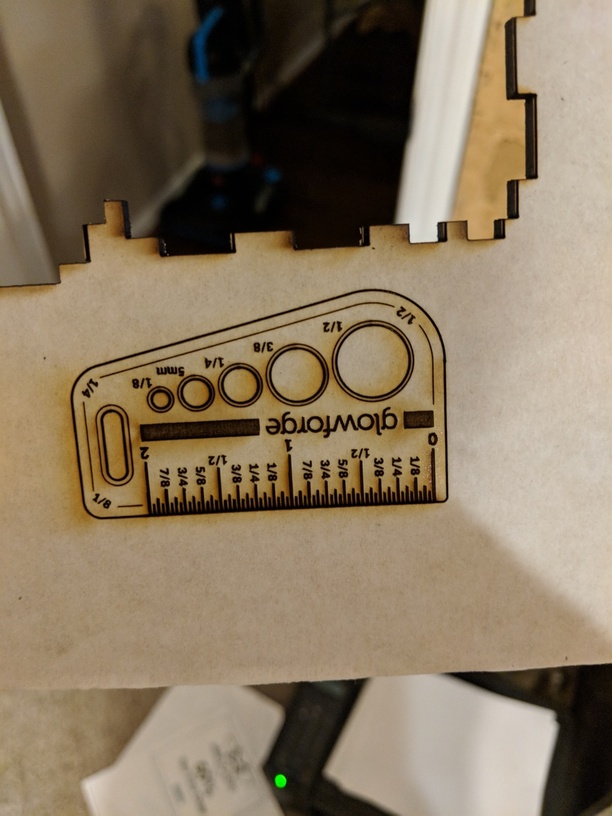
Once you’ve inspected and cleaned, please try another print. We included an extra piece of Proofgrade Draftboard with your materials shipment for troubleshooting. Please print the Gift of Good Measure on Proofgrade Draftboard and let us know the result. If it doesn’t print well, please let us know the date and time of your print and send photos of the front and back of the print.
@jaz I have cleaned the machine, including the lens and window with the provided cleaning materials. I re-cleaned the inside of the machine (I had previously cleaned it before posting) and the crumb tray. I have reinstalled the crumb tray and have ensured it is setting directly into the foot wells. I have ensured I am using flat material and have even tapped the material to the edges of the tray to ensure it remains so. I have re-run the “Gift of Good Measure” on medium proofgrade draft board; the job began at approximately 1850 central standard time, on the 5th of February, 2018.
Thanks for doing that. I was able to find the logs for the print and it looks like the speed for the cuts was a bit fast. Can you try the print one more time, being careful to use the Proofgrade settings for the correct material for each step?
Thank you so much for taking the time to run those tests, @erinberg13 . Unfortunately, it looks like your unit is experiencing an issue that we can’t resolve remotely. I want you to have a reliable unit, so I’m recommending we replace this one. I’ll be in touch via email to sort out the details.