This is hard to explain, so please bear with my ramblings. I am a glowforge and Inkscape novice. So here goes the description of my problem. Part of my Inkscape drawing fills with color when imported into Glowforge when I select Engrave, when it imported as cut. In Inkscape the lines I want to cut are red and the lines I want to engrave is in black. But when I open/create in on Glowforge, the black section shows up as cut, when I change it to engrave the entire space fills with color. I would like to post images of what I am saying but don’t know how.
Ok, so what you’re seeing is exactly what it’s supposed to do - hopefully this will make it clear ![]()
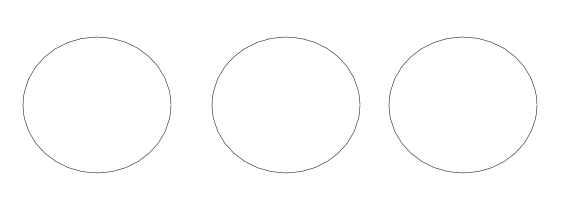
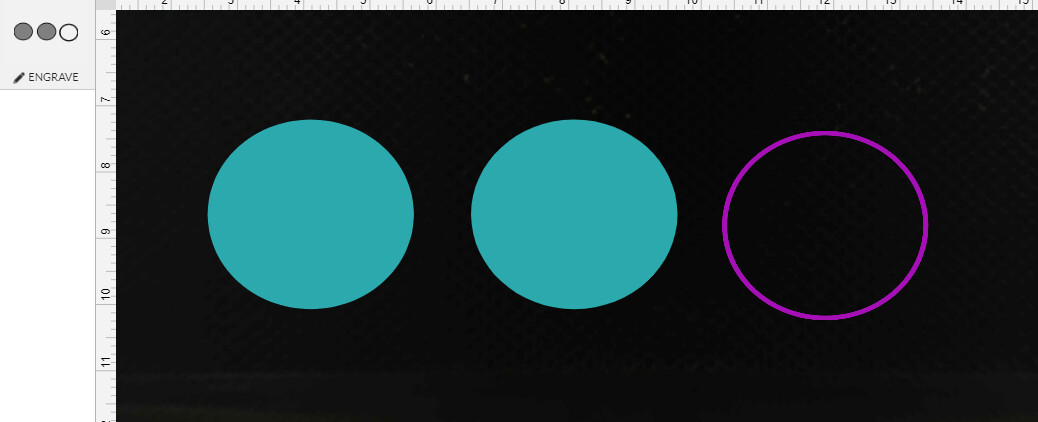
The laser sees the lines you send it. If you send a circle: you can cut out a circle, score (a cut that doesn’t make it all the way through) a circle, or engrave a circle.
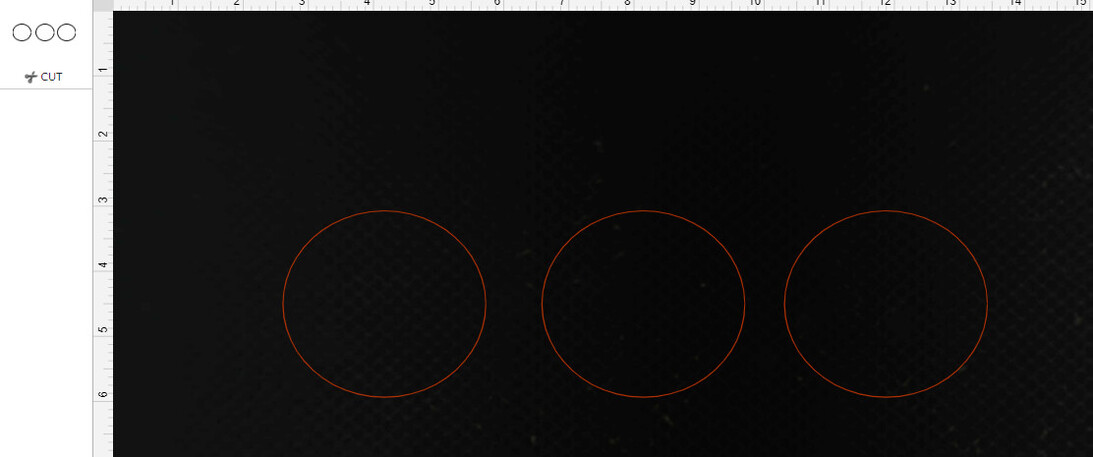
When you upload to the GFUI they default to Cut
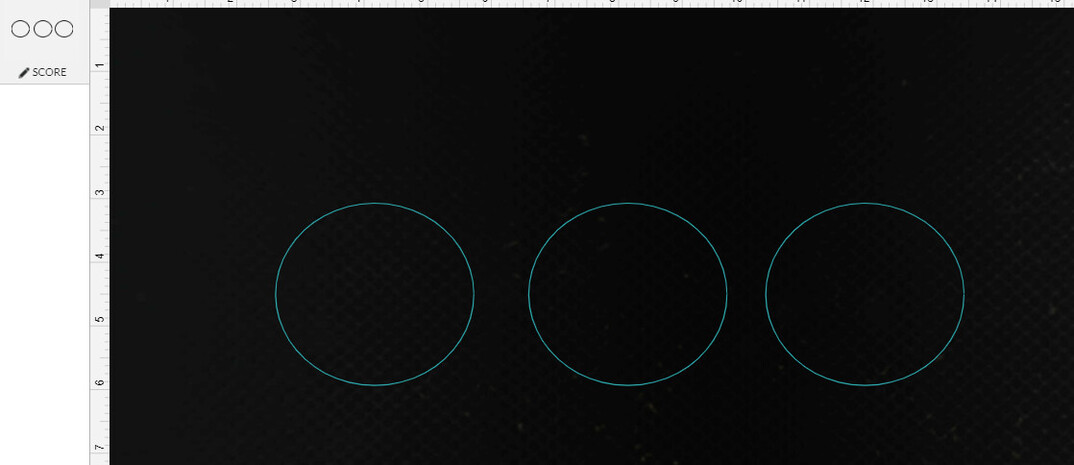
If you switch to Score they’ll look the same
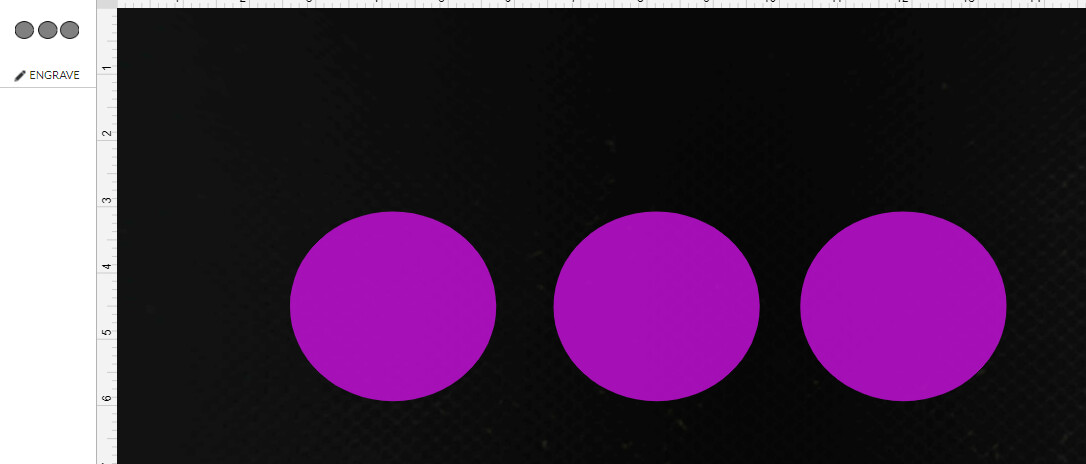
and Engrave will always fill in
If you want to engrave something that looks like the cut/score settings you need to create two circles - one smaller than the other - and combine the two so the inside one disappears:

You create that by selecting your two differently sized circles and hitting Path > Object to Path > Difference
4 Likes
It sounds like you have some open paths. If you zip the file you can drag it into the forum and someone can help.
BTW, to post images you can either click the upload icon ![]() and select the file name, drag and drop you image into the edit box here, or copy and paste it.
and select the file name, drag and drop you image into the edit box here, or copy and paste it.
1 Like
If you are using a pc with windows you can press the windows key + shift + S and it will give you options for doing a screen shot. once selected press Ctrl + V to paste it here or or right click and press paste. Your keyboard may also have a “Print screen button” next to the F12 key that will take a screen shot of the full screen, and as before paste it where you want it, but just be careful you are not also catching some personal info as well.
1 Like
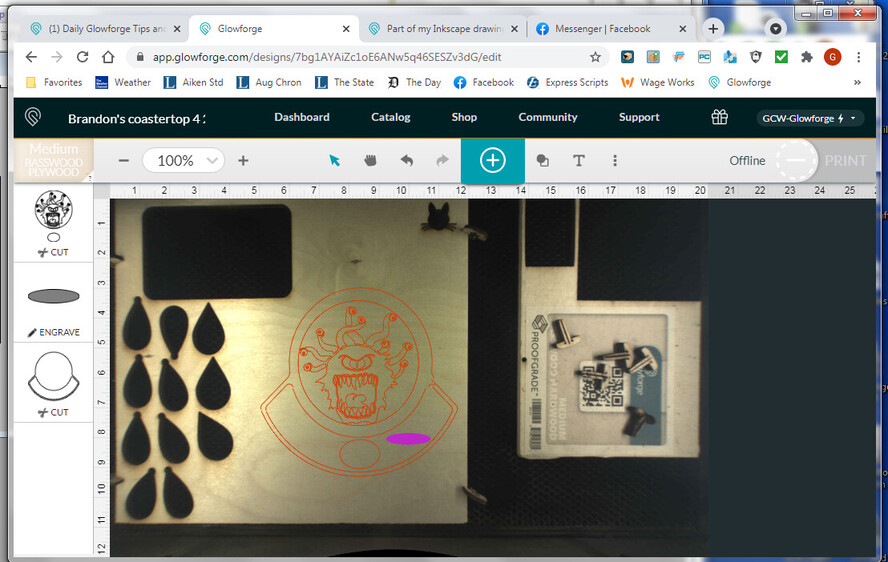
WOW!!! Thank YOU so VERY much folks, not sure I understand all that. I thought maybe Glowforge might be like other lasers when it comes to the colors of the lines, Red cut, Black engrave. If so could not find anything to allow me to select cut, engrave and score colors. Ok, I going to try to upload the images. This is my Inkscape drawing. Now this is a screenshot of the Glowforge
OOPS, can’t get screen shot to paste. Sorry. Oh, forgot to tell you great folks, I am a little old, like 79, so a bit behind the tech curve
2 Likes
If you took the screenshot using the snipping tool there is a button at the top for copy
If you took it with the screenshot button I believe you need to paste it into an art program and then hit Ctl-a, then Ctl-c in the program, and then Ctl-v to paste it in the editing box here.
Here’s screen print button image
hope that helps
It looks like you’ve got the double line around the lips and eye, but the rest of your Beholder is going to fill in. If you’re willing to attach you actual .svg I’d be happy to help out with this, but if you want to learn yourself it’s the same effect as the circles, but with much more complicated shapes.
OR - for a much simpler way, if you want to engrave it - make it into a raster, which only engraves.
To do that in Inkscape, select the black part then click Edit > Make a Bitmap Copy. The copy will show up exactly on top of your vector lines, so grab it and drag it off. Then move/delete the vector black lines, and place the raster in its place.
2 Likes
GREAT deirdrebeth!!! Yes, I can attach the actual SVG file and I truly appreciate your offer. I think I figured out how to get around this problem, I can select SCORE and manually change the settings to engrave settings. Do you think that will work just as well?
Score will still just do a single fine line even if you change the settings - you can defocus your score (manually put in a Focus Height that’s ~.25" higher or lower than your actual material height) which will do a noticeably thicker line…that might get you what you want - but as the inner circle is the same black, that’s also going to be a thick line.
When you first attach your .svg it’s going to be tiny - like 10x10 pixels, but in the edit box you can change the numbers to be 100x100 or whatever and then it’ll be visible.
THANK YOU for the info. I’m going to attach the SVG file. I would to THANK YOU for being so very kind and generous with your knowledge and skills.

1 Like
Here’s a single file that has your original (though I connected the curves so they were all one line), then one with a bitmap copy, and one with @primal_healer’s style.
You can run tests to see what you like, and how long each takes to cut.
Also, as a nice step, if you make your art board 20x12 it’ll always load the art exactly where you have it in the board, and not resize it. Your coasters are currently almost 9 1/2" across…so you may want to shrink them a bit unless they’re coasters for pitchers 
Brandon’s coastertop 4-26 2215_V2.zip (175.8 KB)
5 Likes
WOW!!! You are Fast!!! THANK YOU deirdrebeth, I truly appreciate you doing that for me. Have a GREAT Night and sleep well. Off to bed for me. Again THANK YOU!!!
1 Like
Next time you’ll be able to do it all yourself 
4 Likes
Yes, I will, Thanks to your great coaching. THANK YOU
3 Likes
Great design. @deirdrebeth is so helpful, as are everyone else around here!
1 Like