Here we are with yet MORE problems on the pass through 

My print has been stuck in “aligning” for 20 minutes or more with no movement on the machine at all. And as I stated in a previous post, there is NO WAY to retrieve a pass through print if it has a programming issue halfway through and this is a FOUR FOOT CUT!! What a waste of lumber money and time I literally can’t take all the jankety bugs in the glowforge programming with pass through…
UPDATE!
I did figure out that if you hit “cancel” it will give u the option to align manually-which would normally be a nightmare BUT you can set the focus to the top area of your last cut which makes it WAY more manageable!!
ANOTHER UPDATE
set focus DOES NOT F*CKING WORK THIS MACHINE PROGRAMMING IS A NIGHTMARE!!! Lines up perfectly on screen cuts a disaster on my $40 print:triumph:


I’m sorry for the trouble and frustration while trying to run Pro Passthrough prints, and for the material you lost during the process. I’d like our team to take a closer look into this for you.
I have a test print that you can run which will allow our team to extract the logs after it either finishes or fails to complete and then take a detailed look into what happened.
Here are the steps for the test:
Load a sheet of material into the Pro Passthrough slot and ensure that the portion sticking out of the printer is supported so the material lies flat on the crumb tray inside the printer.
Double-check that the material is completely flat against the crumb tray. A quick way to do this is to press gently on the material where it rests on the tray and feel if it moves. If not, you’re good.
It can help to use pins to hold the material flat against the tray. For example, a lot of customers use small pieces of scrap to print these pins available in the free laser design section.
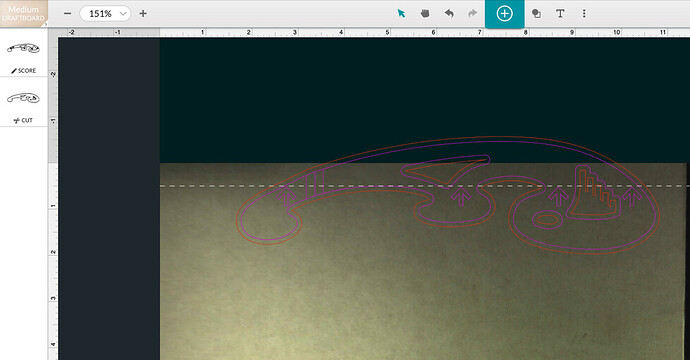
Open the Smooth Curves Stencil from your design library.
Turn on the Pro Passthrough feature in the menu bar.
Select the entire design, and arrange it so that the dotted line at the top of the work area is at the tips of the arrows in the design
Click Print and run the first section of the design.
After the first section completes, move your material through the Pro Passthrough slot so the printed area is more than 3 inches away from the front of the Glowforge.
Follow the prompts and run the 2nd portion of the test print.
Photos of the front and back of the finished print.
The date and time you ran the test along with your time zone.
A photo of the bottom of your print head showing the lens and both windows.
It’s been a few days since we’ve seen a response on this thread, so I thought I’d check in. Did you happen to get a chance to run the test print using the Pro Passthrough system?
It’s been a little while since I’ve seen any replies on this thread so I’m going to close it. If you still need help with this please either start a new thread or email support@glowforge.com.
