Passthrough alignment not refreshing bed image

So years after purchasing and receiving our Glowforge, Passthrough functionality is finally a thing. Unfortunately, I always seem to have some kind of problem with prints.

This time, I’ve got a piece of clear acrylic that I’ve covered in masking tape (so that the camera can see the cuts), and it’s a three-part cut. First part cut fine, had to align twice to get it to see and align properly. Second cut was fine, but now, on the second alignment for the third section, the Glowforge just stopped refreshing the bed image. I’ve opened the lid, re-positioned the acrylic, but clicking “Retry Alignment” just cycles back to the failure message after only one second, and the image onscreen does not match what’s on the bed:

In reality, the top edge of this piece is about in the middle of the bed. I don’t know why this is stuck like this, but I need to get this done for my client tomorrow. What’s so frustrating is that I have never successfully made a passthrough piece, after twenty attempts. Any ideas what I can do here? I’m literally inches from the last part of the cut, but am I screwed? Will I have to scrap this acrylic and start over? How do I prevent this from happening again?

I’ve been having the exact same problem. First and second cuts line up great, third one just doesn’t work.

1 Like

I’m sorry for the trouble when trying to run a Pro Passthrough print. I’ve reviewed the report you shared with us along with the data from your Pro Passthrough print. Unfortunately, due to the way in which the process was interrupted, it isn’t possible to resume the Pro Passthrough print where it stopped. I’m so sorry for the bad news, and for any inconvenience this has caused.

When Pro Passthrough ran into trouble on your unit, in the logs that I found, it looks like there may have been two things that were contributing to the issue. One was the unit having trouble staying connected to the internet and the other was it having a hard time finding enough unique features to align the next section of the design.

Regarding there being too few features in the design for the system to accurately align the next portion of the print, in order to align your design, the Glowforge looks for unique marks on the material that it can use to track how your material has moved between prints. On future prints using designs that have few features, try adding a few small shapes near the edges of your design in places where there are very few lines or features, and set them to be scored during the print. This will provide more areas for Pro Passthrough to use when aligning the print.

Regarding the possibility that your Glowforge might be having trouble staying connected, I found that your Glowforge was able to connect successfully to your network, but it may be having trouble maintaining a stable connection. When this is the case, you won’t need to go through Wi-Fi setup again, but you may see an “Offline” message or the bed image may fail to update. The most common solution to Wi-Fi challenges is to restart all the devices involved in connecting to the internet.

  1. Turn off the computer, phone, or tablet that you’re using

  2. Turn off your Glowforge

  3. Unplug your modem

  4. Unplug your Wi-Fi access point

  5. Wait one minute, then plug everything back in and turn them back on


If that doesn’t work, we have two more suggestions that often make a big difference:

  1. Improve the signal path between your Glowforge and your Wi-Fi access point
    Wi-Fi signals need a clear path. Remove physical barriers, and move devices closer together:
    • Move your Wi-Fi access point up high and make sure it’s in an open space. Avoid locating your Wi-Fi access point on the ground, under a desk, in a cabinet, or in a corner where its signal can be blocked.
    • Relocate your Wi-Fi access point closer to your Glowforge
    • Move your Glowforge closer to your Wi-Fi access point
    • Install a Wi-Fi range extender closer to your Glowforge
    • Run an ethernet cable and install a second Wi-Fi access point next to your Glowforge

  2. Reduce electronic and Wi-Fi interference
    If your unit is near other devices that use Wi-Fi or a large number of electronics, temporarily turn off other electronics and devices in the area.

Please let me know if this information helps!

Thanks for the response, Ivan. I appreciate your tips, but ultimately they’re not anything I haven’t tried before. Your first point:

the unit [was] having trouble staying connected to the internet

…brings me back to the insane requirement of an internet connection for this unit to work at all. If we lose internet access due to our ISP glitching out, or if I live in a remote rural location with spotty internet access, my expensive laser cutter becomes an expensive paperweight. I still, after all these years, cannot comprehend why internet access is required to use this device. I obviously understand the “convenience” of the company having complete access to our devices for troubleshooting purposes and data collection (not to mention complete control), but a momentary internet glitch completely ruining a print and wasting material like this is just mind-boggling to me.

Your second point:

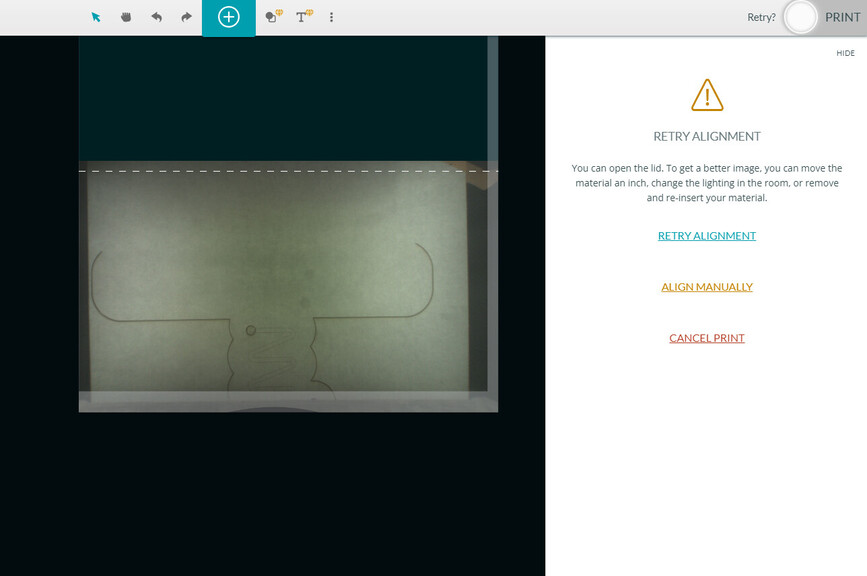
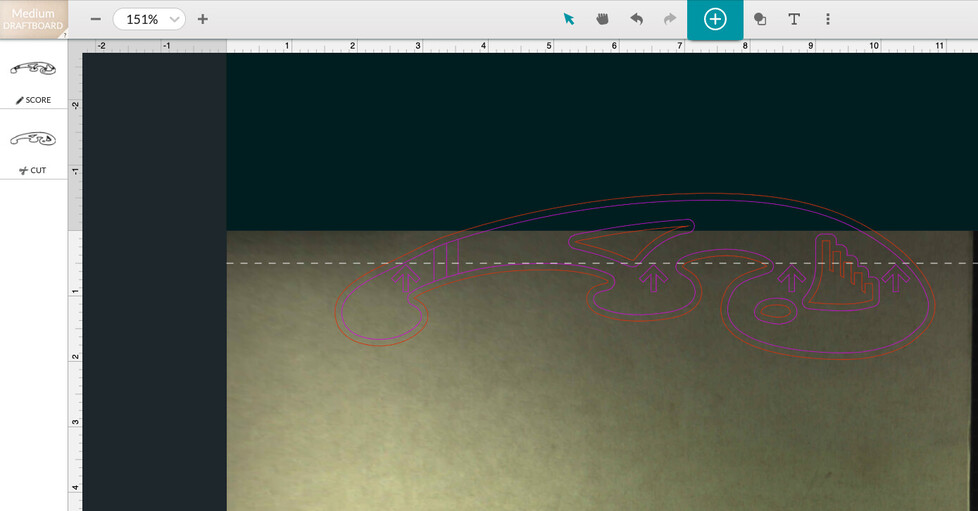
…[the Glowforge is] having a hard time finding enough unique features to align the next section of the design

…is another point of contention here. I have this issue with almost every single thing I try to cut with passthrough, and I always have to shimmy the material once or twice before the Glowforge can detect the previously cut surface. Doesn’t matter what material I use. As I mentioned in my post, I have to cover clear acrylic with a masking tape, because using the clear mask that comes with the acrylic makes it impossible to detect the cuts. Sometimes I have to highlight those paths with a pen so the camera can pick them up properly—but this would not cause the camera to cease updating the bed image. This alignment problem is understandable to a degree, but your suggestion of adding elements to the design just for alignment detection remind me of snapmarks you guys used a couple of years ago. Are we going back to that? Because those sucked.

Why is there no central hub of information for using passthrough on the Glowforge? I’ve had to cobble together my own knowledge base using various sources of information on this, from countless YouTube videos (both from Glowforge and other makers), articles, forum posts, etc. If this feature is still not ready for primetime, then don’t pretend that it is. Blaming issues like this on potential internet glitches strikes me as lazy, and suggesting that I reboot every single device I use as well as modems and wi-fi extenders is bonkers to me.

We deal with network-connected devices every day, both LAN and WAN, so connectivity issues are not foreign to me. That being said, if the Glowforge passthrough process is so sensitive as to completely ruin a print when it’s inches away from finishing because of “trouble staying connected to the internet,” then this process should be re-tooled. The always-on internet connection requirement of any device is always a red flag to me, and this was my main objection to my shop’s decision to purchase the Glowforge.

This job will have to be canceled and refunded, and we won’t be able to offer any cut pieces larger than 11"x19" to our customers - effectively rendering our “Pro” model into a basic model. I hope Glowforge can improve this process, or even re-think its internet connectivity requirement for use; as it is, attempting a passthrough cut is a risky gamble every single time, and one that so far has not produced any tangible benefits for us.

2 Likes

Hi @rico, thank you for sharing your thoughts with us.

Could you please let me know if you are still having trouble with the Pro Passthrough feature after trying Ivan’s suggestions?

I’m happy to help with next steps if you need anything else.

Hi, Chelsea. I have not attempted another passthrough cut since I had the issue with the last shape I was cutting. Ivan’s suggestions were, as I mentioned, not entirely helpful apart from being general network connectivity tips.

I attempted to finish the cut by manually aligning the cut and the material. Manual alignment on the Glowforge is, from my personal experience, a fantasy - as it was in this case. Despite the cutpath and the material lining up perfectly in the preview window, the resulting cut was 1/16" off. After snapping the material off the sheet with a rubber mallet, my co-worker spent fifteen minutes with a sander on the edges, trying to smooth out the jagged area from the mismatched cuts. The results were obviously not suitable for selling to a client.

I’m sorry to hear that you’ve had trouble with your Pro Passthrough print. Thank you for providing those additional details. Since you’ve haven’t run another Pro Passthrough print, the next step is running our standardized test print.

If you haven’t done so already, will you read the section titled “Extra Pointers” on our Pro Passthrough support page, and then follow the steps below?

Here are the steps for the test:

  1. Load a sheet of material into the Pro Passthrough slot and ensure that the portion sticking out of the printer is supported so the material lies flat on the crumb tray inside the printer.

  2. Double-check that the material is completely flat against the crumb tray. A quick way to do this is to press gently on the material where it rests on the tray and feel if it moves. If not, you’re good.

  3. It can help to use pins to hold the material flat against the tray. For example, a lot of customers use small pieces of scrap to print these pins available in the free laser design section.

  4. Open the Smooth Curves Stencil from your design library.

  5. Turn on the Pro Passthrough feature in the menu bar.

  6. Select the entire design, and arrange it so that the dotted line at the top of the work area is at the tips of the arrows in the design


  7. Click Print and run the first section of the design.

  8. After the first section completes, move your material through the Pro Passthrough slot so the printed area is more than 3 inches (7.62 cm) away from the front of the Glowforge.

  9. Follow the prompts and run the 2nd portion of the test print.

After the test print completes, please post the following:
  • Photos of the front and back of the finished print.

  • The date and time you ran the test along with your time zone.

  • A photo of the bottom of your print head showing the lens and both windows.

Thank you for running this test print for me. I’ll retrieve the data from this test print, review everything and follow up with next steps.

Attachments

Hello there. If you’re referring this post:


https://community.glowforge.com/t/passthrough-alignment-not-refreshing-bed-image/102141/7


…then you’d be incorrect in assuming everything worked out. I have
not had a chance to troubleshoot using the directions given in the
last post in the thread. Once I have some time to do that, I’ll post
in the thread again.


But I have to point out that this specific troubleshooting process
will glean no useful information, since as I mentioned in the
original post: the first “match cut” of the job worked fine, but the
second one did not (apparently due to some sort of internet
connectivity glitch). The issue is not really about the passthrough
alignment not working correctly, but the loss of connection that
leads the Glowforge to fail the automatic alignment process. This
troubleshooting process cannot fix the underlying issue that our
Glowforge must have an internet connection to function properly,
which is a silly limitation on a piece of physical hardware we own
outright.


     <br />
      
        <table style="background-image: none; border: 0px; margin: 0; padding: 0" cellspacing="0" cellpadding="0" border="0">
          <tbody>
            <tr>
              <td style="border-bottom-width: 0; border-right-color: #FBAE17; border-right-style: solid; border-right-width: 3px; border-top-width: 0; padding: 0 7px 0 0">


Ricardo
González
Creative Director
Next Day
Sign Express


p: 301.986.0310
a: 7850
Wisconsin Avenue, Bethesda, MD 20814
w: nextdaysignexpress.com


      <br />
      <br />

Thank you for the update. We’ll ensure that your forum thread stays open so you have more time to troubleshoot. I agree that looking into the connection issue is a good path forward, and running the test print after troubleshooting the connection would be a way to test if the printer maintains its connection during the entire Pro Passthrough print.

While network-specific Wi-Fi challenges may occur for a number of different reasons, we do have a few additional suggestions that may help if you haven’t tried them yet:


  • If your Wi-Fi network includes several access points, it’s possible that your Glowforge needs to re-establish its connection whenever it ‘hops’ from one access point to another. As a test, you could try creating a dedicated access point for the Glowforge to see if that helps.

  • Since Glowforge only uses the 2.4GHz frequency, a connection will be harder to establish and maintain on a crowded 2.4GHz network. Other devices using 2.4GHz, like cordless phones and microwaves, can cause interference and an unstable connection. You can consult your router settings to check the performance and traffic on your 2.4GHz network.

  • In your network settings, check the channel you’re using for the 2.4GHz band. Trying a different channel may provide a more consistent connection.

  • Though less common, DNS or name resolution conflicts may also cause intermittent connectivity problems. If you use a custom DNS configuration on your router, you might want to try default DNS settings to see if that works better.


If you’re still having trouble, there’s a test you can try that will help us narrow down the problem. If possible, could you please create a Wi-Fi hotspot with a cell phone and use that network to connect your Glowforge to Wi-Fi? This is a good way to rule out signal interference, since you can set your phone right on top of your Glowforge!


You can find instructions online to help you create a Wi-Fi hotspot using a cell phone. Make sure that you set it up to be a 2.4 GHz hotspot, since that is the frequency your Glowforge uses.


Once the Wi-Fi hotspot is broadcasting, you can connect to it by following these steps:

  1. Turn on your Glowforge.

  2. Wait 30 seconds. Then hold down the button for ten seconds until it glows teal.

  3. Go to setup.glowforge.com and then follow the steps to connect your Glowforge to Wi-Fi. When prompted to connect, select the hotspot you created.

  4. Once Wi-Fi setup is complete, go to app.glowforge.com and try a few prints.


To see the Wi-Fi setup process in more detail, go to Connect Your Glowforge to WiFi.


Please let us know how it goes!


This topic was automatically closed 30 days after the last reply. New replies are no longer allowed.