so, after many successful cuts, passthrough seems determined to hate me again. Now similar parts which are roughly square shape and about 18.5 x 18.5, which have cut successfully with one material move, are now not aligning properly. The alignment error has been consistent. It gets the vertical movement correct wrt the right hand side but but rotates the new cut slightly in either direction , leading to a gap/overlap of about +/- 0.15 inches on the left hand cut.
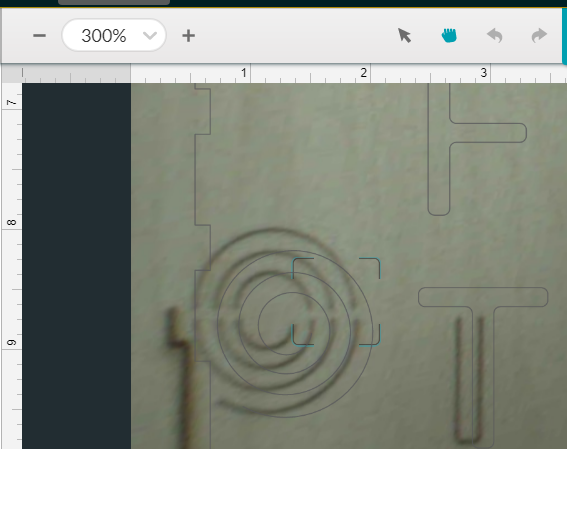
I have tried adding some detail in the seam area via a score to give the camera more with work with but this did not help. See spiral and letters in the attached image.
my forges belts and wheels seem fine and non-passthrough jobs are working fine.
I ran the camera alignment procedure and while it improved the alignment overall, it did not resolve this problem.
I am out of ideas.
To add insult to injury, early in the 2nd phase, when I noticed the misalignment as the scores were being applied, I canceled the job. ( hit the button, then canceled on teh GF UI). The GFIU offered me the option to align manually, which I selected. Then offered me the survey which I answered. However, it then cleared the job and did not offer a route to allow manual align to happen. The UI returned to the design as if I had not started the job and there was no remainder file in my dashboard. Thus, I had , no chance to even try a manual align. The work flow in this feature has always been spotty, Needs some attention to make recovery possible.
so, in one more effort to get this to work, I moved the part about 2/3 as much as allowed by the 3 inch rule after the first cut. This led to 2 passes vs 1 but the error was much smaller. Not sure if this is really a fix or just random. Would still like help
Hi @mark14. I’m sorry to hear that you’ve run into some recent trouble as you try some Passthrough prints on your Glowforge. I understand that the cutting has been fine, but the alignment between print slices is encountering some trouble. I also understand that GFUI messaged you to try manually align the design, but failed to recover the print after canceled. It’s not the best experience I would want for myself and will be glad to help get this sorted out with you.
First, could you provide me with a copy of the design files being used? I can review that for any potential causes of the alignment trouble, and factor in the troubleshooting you already attempted (Ex. trying to add elements to the design to allow for the camera to map the next print slice).
Next, could you try running in our Passthrough test print by following the steps in the support link below?
This will allow us to have that added information as we review any log files from your Glowforge to get this resolved. Thank you!
file the failed:
Note, I printed this one with the letters ignored.
2nd cut was crooked 5 times in a row. in my most recent attempt, when I shortened the distance I moved the material between cuts, it worked better, still off but far less of an issue than before.
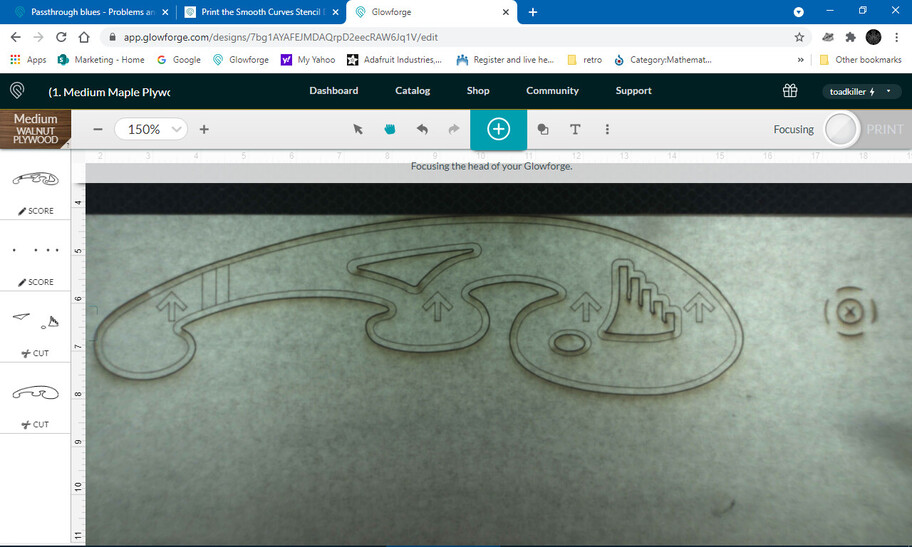
here is a screen capture of smooth curve post print from the forge. it cut almost perfectly. Slightly offset to one side by the thickness of the cut. I would not complain about this one. Cut between 2:00 and 3 :20 pm west coast time .
Thanks for running that test for us @mark14 and providing the details on your initial design.
Something which might help would be to include a few more design features for the system to use when aligning.
On prints which don’t have many lines or distinct visual features, it might help to draw a few unique symbols on your material near the area where you expect to split your design, such as a square, heart, star etc. When the Pro Passthrough feature aligns the next section of the print, it looks for unique features on the material to match where the next cut should be placed.
I tried that in the above design. Those spirals (green) are right at the point of alignment and get split in half if I move the design as far as I can to the bottom of the screen before starting the job. I also tried variations where I used the outline tool and scored a perimeter around the entire part. I also scored all those letters (as you can see in the photo attached near the top of the post.
None of that helped. Got any other ideas?
I’m sorry for the ongoing trouble. When I reviewed additional logs from your recent Pro Passthrough prints, I noticed that the height measurement taken before each print after the material was moved varied by as much as 3.5 millimeters. In addition to supporting the portion of your material that is sticking out of your unit through the Pro Passthrough slot, it may help to double-check that your material is lying flat in the bed for each print. For example, a lot of customers use small pieces of scrap to print these pins available in the free laser design section: Honeycomb bed holdown pins
Will you please let me know if this information helps on your next Pro Passthrough print?
I use such pins. The piece starts out under the rubber seals at both ends of the passthrough so it is held down fairly well by the seals. I check for bowing and use pins on the right hand side (where the honeycomb is exposed) and some adhesive tape on the left side if the material is not flat. I cannot use the pins on that side since the material is up against the edge of the tray there leaving no honeycomb. The part is as flat as all of the above methods will allow. I will add that of late the material has been of above average quality with very little warp.
After the material move, The rear edge of the material is no longer under the real seal. This means more pins and /or tape since a fair bit the mass of the sheet is now to the front of the front seal. This tends to cause the sheet to bow a bit so pins and tape are more likely. I really do try to get the part flat before proceeding, Your review of the log makes me think that the focus measurement may be the issue. Are there issues that would cause the focus to be mis-measured in this way?
I will be running some passthrough parts again later this week. I will triple check for flatness at my end.
Thank you for the additional information. Our team looks forward to hearing how your next Pro Passthrough print goes! Regarding the height measurement, I have a way that we could check to see if that system is working as expected in your Glowforge. Could you please do the following?
Load a piece of Glowforge Proofgrade onto the crumb tray and double-check that it’s flat
Use Set Focus and place the focus area on the material, so it’s not near an edge. Then watch to make sure the red dot hits the material.
Repeat this process in a couple locations on the bed
After you’ve done the above, please let me know the time and date you ran this test with Set Focus. I’ll then be able to extract the logs and check if the measurements of the Proofgrade material match what we would expect to see.
Using a sheet of PG thick walnut, I ran a series of set focus tasks today.
The sheet had a slight warp so I pinned it down with a pair of the bed pins at the top and bottom edge, near the center. it was as flat as possible.
starting at 12:32 West coast time and ending at 12:40 . I started in position 1 as shown in the diagram below and progressed to position 8.
Test positions: These cover the full width and height of cuttable area…( 1 representing front left corner, 8 back and right corner).
Thank you for running that test. I was able to locate and extract the logs from all 8 of the Set Focus runs and take a close look. Based on the Proofgrade material you had in the bed at the time, the measurements were consistent in all locations and within the expected range. This is good news as it means your unit’s Set Focus and autofocus systems are working as expected!
Please let us know how your next Pro Passthrough print attempt goes.
It’s been a little while since I’ve seen any replies on this thread so I’m going to close it. We’ve made sure to keep all of the details you’ve provided, and noted it on your account. If you’d like to reach back out, you can always contact us at support@glowforge.com, and we can pick back up right where we left off!