So, I was headed to PAX Prime again this year, and I wanted to do something on the Glowforge for a costume. I’ve always shied away from cosplay because the time and effort it would take to do anything that looked amazing, and I didn’t really want to go in something half done. @dean and @kevinmcvey had made some masks on the Glowforge, so I thought that would be a good place to start. I love this fish mask by Wintercroft, and modified it to look more like a certain character in gaming with some patience and very scientific planning. It took a bit to understand which pieces in the file were which pieces of the end product, and making new large circular cartoony eye holes was interesting across 5 different polygonal sections of the design.
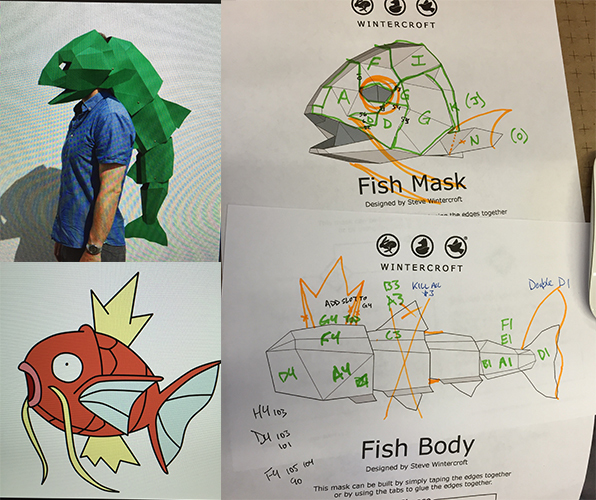
I was impressed by Wintercroft’s mask designs, they were truly low poly and low piece count (unlike another mask that I had purchased prior that had a million pieces and folds in it), and the files were very, very easy to turn laserable - I mostly just deleted text and the shading polys in Illustrator, and voila, files I could print directly with a Glowforge. The folds and designs of the mask itself are also high quality - once I had laid them all out, you could pretty easily tell what went where (even though you might have deleted all the helpful text telling you what went where), and the high degree angle folds were all along a joint, which is quite nice when you are using chipboard. I chose to do the mask with the scores in the cardboard on the inside so that it would look cleaner and found that this seemed to reinforce folds up to a certain point, past which the cardboard would want to pop the seam and rip completely apart. Fortunately, almost all the folds in this model are pretty shallow.
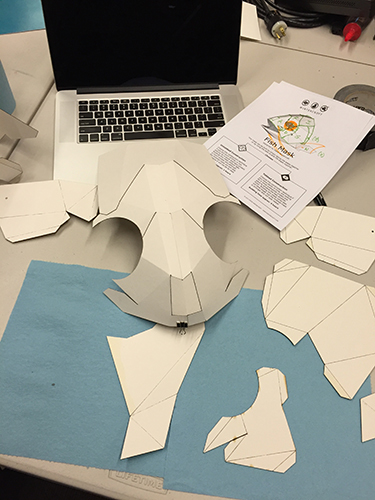
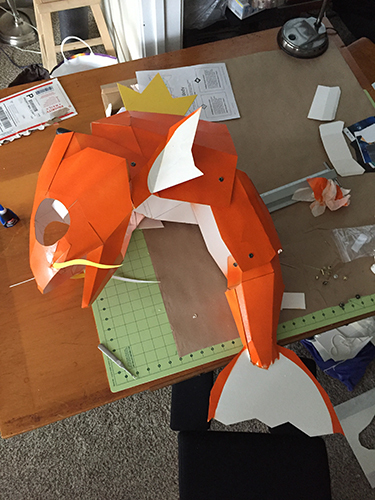
I started with the head, since that seemed the most complicated. With many tips and cheering on from @Shell , after some experimentation with the depth of the score, I had all the pieces cut out and laid out and I started the rubber cement process. By the end of the head I had done a pretty good job of efficiently brushing rubber cement on to both sides of the joint, setting that aside to dry and working on two other sets of joints. Cycling around like that I was able to keep myself pretty busy while still having time for everything to dry. Rubber cement is just delightful to work with in this situation. If you apply to both sides and let it dry completely, when you stick it together with a little pressure you have an instant permanent bond that’s pretty darn strong without having to hold it or clamp anything. If you accidentally put it somewhere you didn’t mean to, you can just rub it away with no harm.
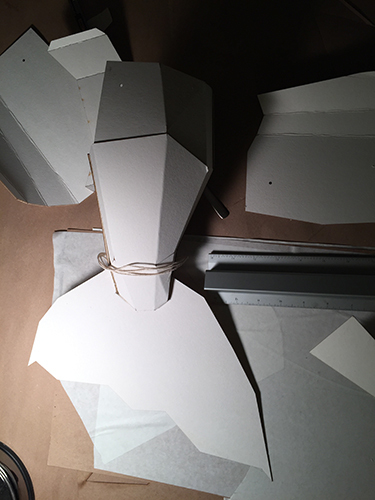
The head came together really nicely:

The second night, I did the body sections:

I cut some paper to use as spray paint mask for the fins and tail and started spray painting everything. The cardboard soaked up spray paint very, very nicely. It’s quite forgiving, even if it was early in the morning and I was definitely not using the best technique.
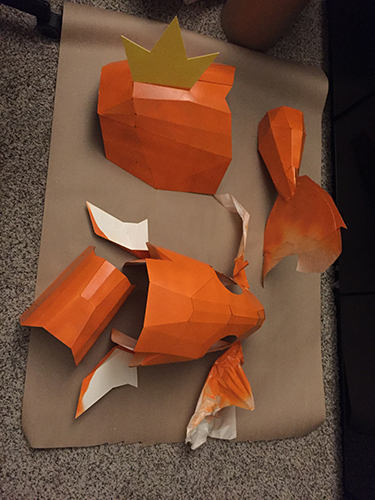
I had a little despair at this point because it was very late, I was tired, and everything looked just terrible. All I could see was a bad spray paint job and sloppy joint glues. I was convinced that I’d wake up in the morning and scrap the whole project; but I woke up in the morning, did one more quick spray paint fix, and screwed all the sections together with Chicago screws that @madebynick had and it came together just perfectly. It was like magic.
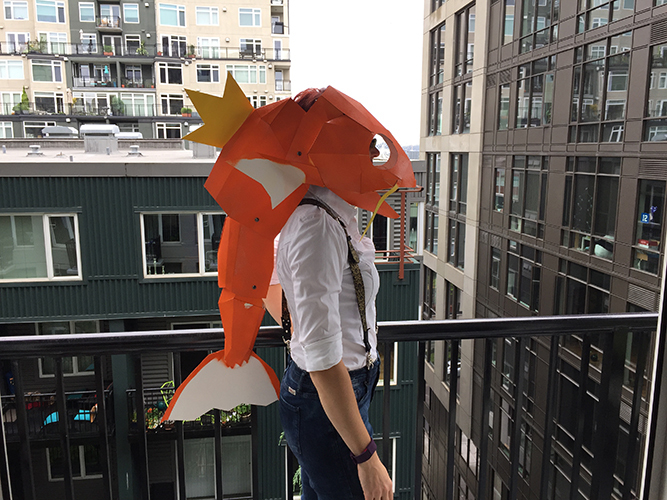
Kids (the young ones and the grownup kind) everywhere loved the mask, it was a blast wearing it around and seeing the reactions! 
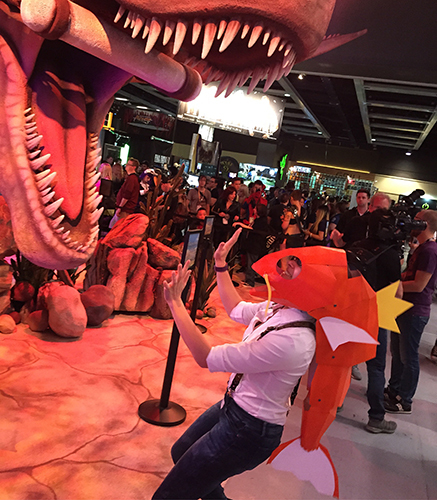
And then this happened, and everything was all worth it:


