Sigh. Me too.
2 Likes
What an amazingly nice thing for you to share with all of us! Not sure yet exactly how to use this, but needless to say, I am intrigued. I love figuring stuff out, so this is going into my folder of cool stuff to do later. Thank you very much!
2 Likes
Thank you so much!
1 Like
Thank you, always appreciate your posts…
2 Likes
Thank you. Also looking forward to Snapmarks and the rotary device.
2 Likes
Awesome idea, can’t wait to try this out once I see the magnet.
1 Like
You rotten swine - this just makes me need snap marks even more !!!
3 Likes
Ha! I know the feeling, ive been waiting since before the glowforge was made for them! (so I could make/use this! =P)
What would really be cool, is if they just built this into the tray itself. It would solve a host of problems.
If they had fiducials on the tray in view of the top cam it would allow them to grab position with the head cam and make the top cam image dewarping much much more accurate, especially close to where the fiducials are. (Im pretty sure they are trying to attempt this WITHOUT fiducials eventually, but it will be a while which is why this is super helpful in the meantime)
If that were the case, this wouldnt be necessary any more, as you could just shove your pieces up into the corner of the bed (but it is nice to have a solid physical limit like this). As the bed does have some play, the head would always home to the fiducial on the edge of the bed, so you know everything there would always be aligned to the head of the laser, which is what matters, instead of the cam up top like it does now. (this would probably be mitigated by comparing locations of the fiducials on the head and lid cams and aligning them via software).
They could eventually sell an upgraded bed, that had magnetic spots built into the sides that held something of this nature for alignment purposes (I know they want to be able to do it via software, which they might accomplish). They could also make the bed reversible to have a built in pin or slat bed on the other side for cutting things without the flashback.
Either way, the fact they are finally using the head cam now should be extremely exciting to everyone, as the potential to fix ALL alignment problems without this tool could be on the horizon. To have this functionality in another laser would cost you 10s of thousands of dollars. This is something available on the high end trotecs etc and not without a lot of extra added cost. Im so glad I made the wait for the glowforge.
19 Likes
Thank you for taking the time to solve this and sharing it with us,
2 Likes
Oh hey, @takitus, did you mean to include the adjustment pieces in your file? I can’t find them in the version I downloaded. Just the L-shaped ruler is there. I could probably reproduce them but if you have the files (and intended to share them) that would be great!
1 Like
Very nicely done! The rest us were thinking, “hey, with snapmarks you could…” and you just did it.
2 Likes
Wow, procrastination certainly has it’s perks. Like others have said, I had a very similar idea to your base ruler, but I couldn’t decide if the magnets would produce a strong enough grip to the tray and considered also adding key holes into the ruler to slot something through both the ruler and the crumb tray for added solidarity. In hindsight, I already had the answer in these: Honeycomb bed holdown pins as they could hold the ruler in place with the added benefit of the magnets.
Thanks a ton, this will help with the projects that I’ve wanted to spray paint after an engrave, but before a cut!
5 Likes
Oh hmm. I’ll chrck and reupload if not. Thanks for letting me know
1 Like
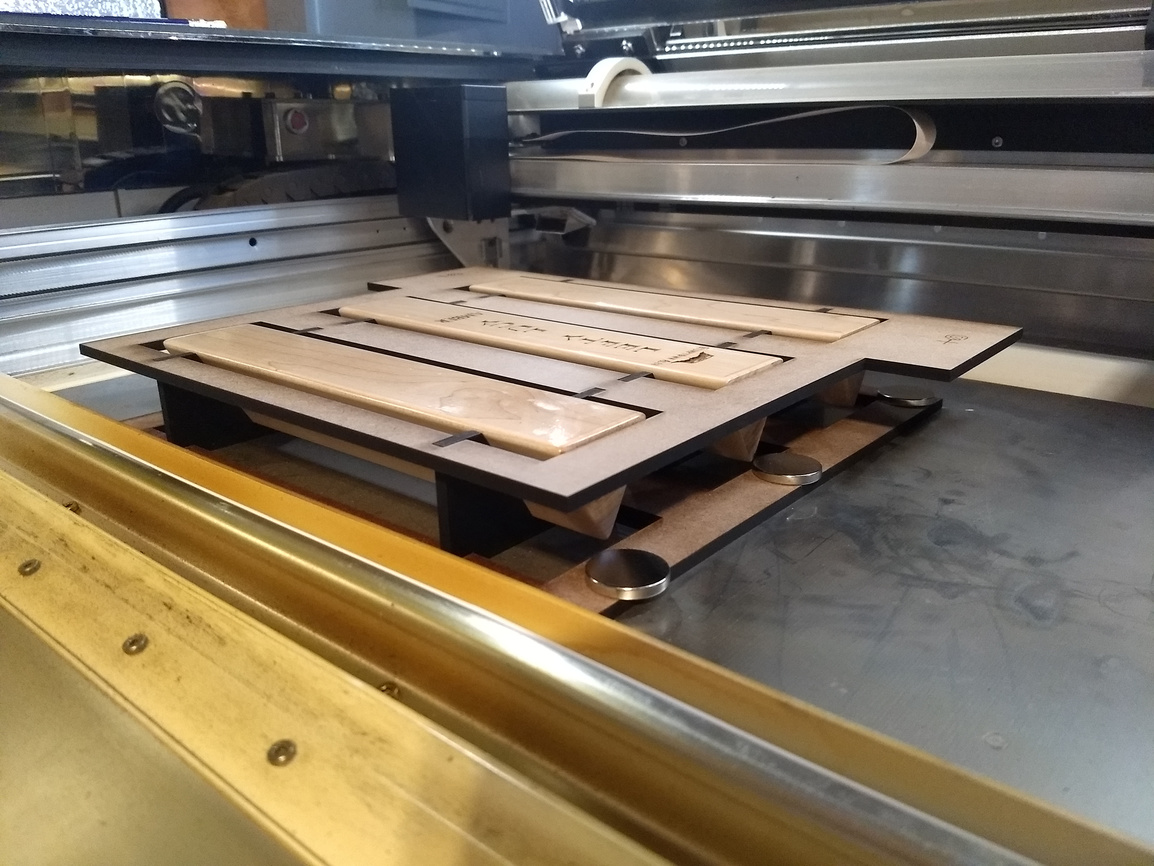
you know, this is making me realize that you can make any reusable jig with snapmarks. if you are making tokens, just engrave the snapmarks on your jig and you can use that same jig forever. just cut the first side of your circles out of anything, including scrap pieces and then use a jig to do the second side. that may sound like making too much out of something that you could do by just flipping in the same piece, but what if you’re doing one side in advance of an event, then custom engraving the second side at the event. then you can use the premade jig.
7 Likes
I’ve already done just that. I engrave THOUSANDS of small parts. I got to be part of the original test group, and I made simple jigs with snap marks on them. When I need a particular design, I toss on the jig, snap, and go to town. Saves me a bunch of time, and I get perfect alignment. It’s been awesome.
9 Likes
Nice Thank you i got a question how i can convert it to SVG
1 Like
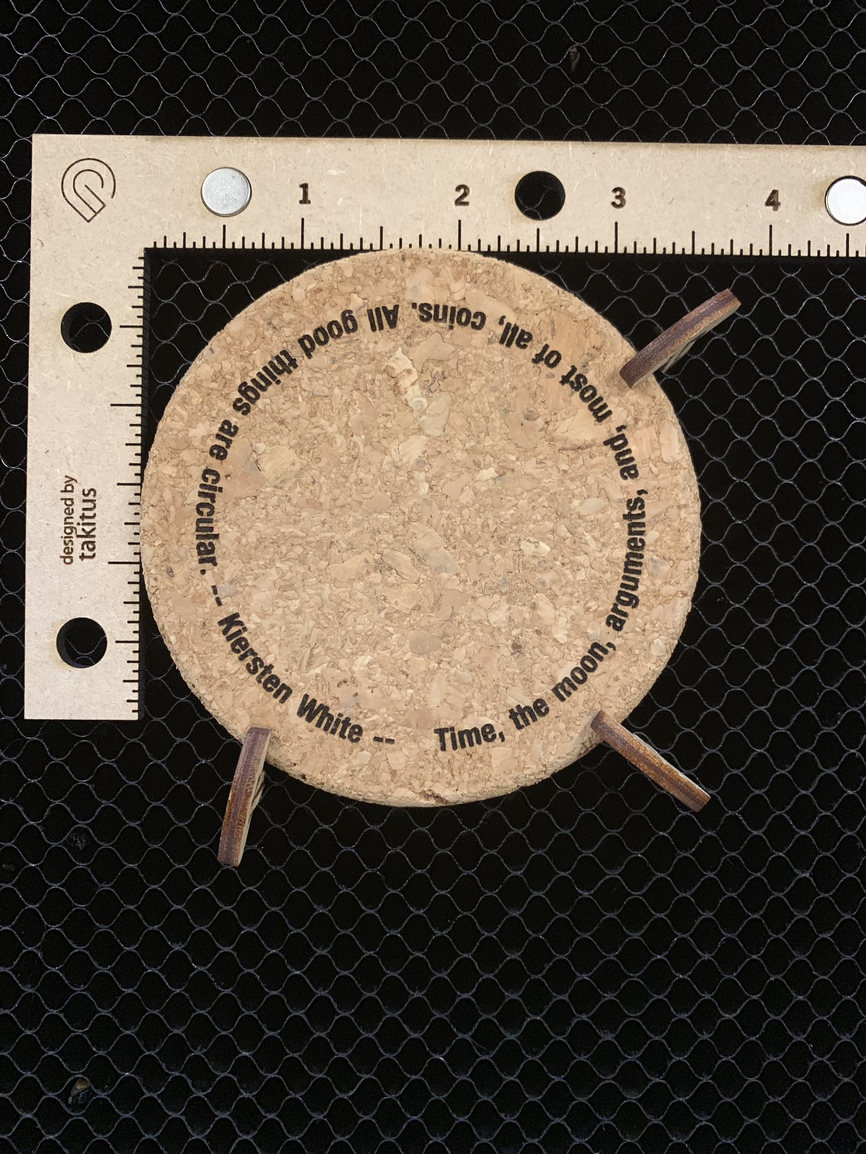
Tried it with a 3.5 inch cork coaster and it came out fantastic!
24 Likes
24 Likes
So you need Snapmark to make this work? I don’t have Snapmark so I’m guessing this is used with that program.
They are just rolling Snapmarks out slowly. Trying to understand if it’s ready for prime time.
1 Like