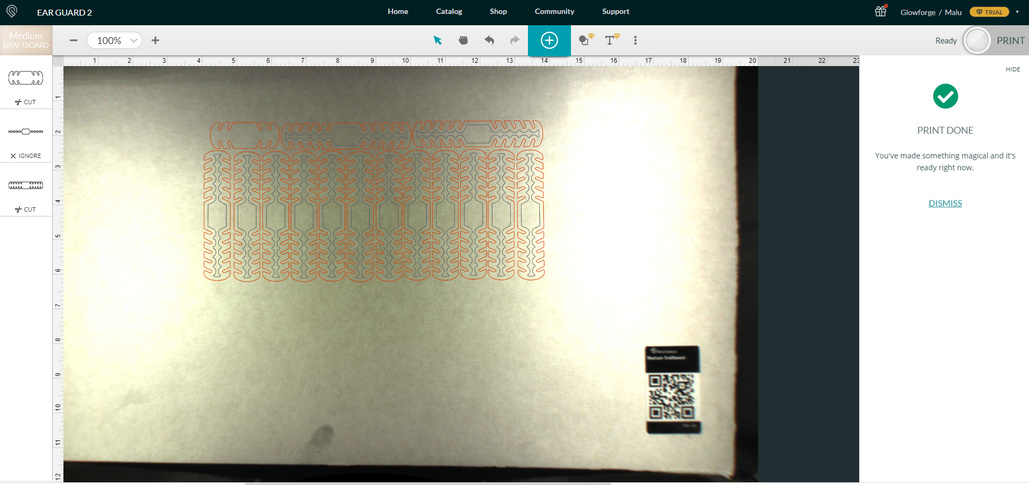
I was wondering, is the camera supposed to only see part of the printer bed? I have tried the camera alignment tool, and it is still not capturing the entire space when I use 18x20 sheets for my Basic model. I have also been setting the focus every time. It doesn’t hinder the laser from working properly. I just can’t utilize the full space of the material because I can’t see where to place it. Please see photos attached.
Prior to the camera alignment calibration, my prints were really wonky. I am happy to say that the alignment helped. Along with having to print in the complete darkness instead of having lights on. It worked, at least, on a 5" x 10" proofgrade acrylic print. I am waiting for supplies for my 18" x 20" acrylic.
Any insight would be great. Thank you! I am a newbie and feel very lost!
The printable area is ~11x19.5, and is shown completely in your pictures.
You can physically fit 18" tall pieces into the machine, but you can only print on the lower 11" or so. That’s why Proofgrade material is 12x20, sized to fit onto the bed.
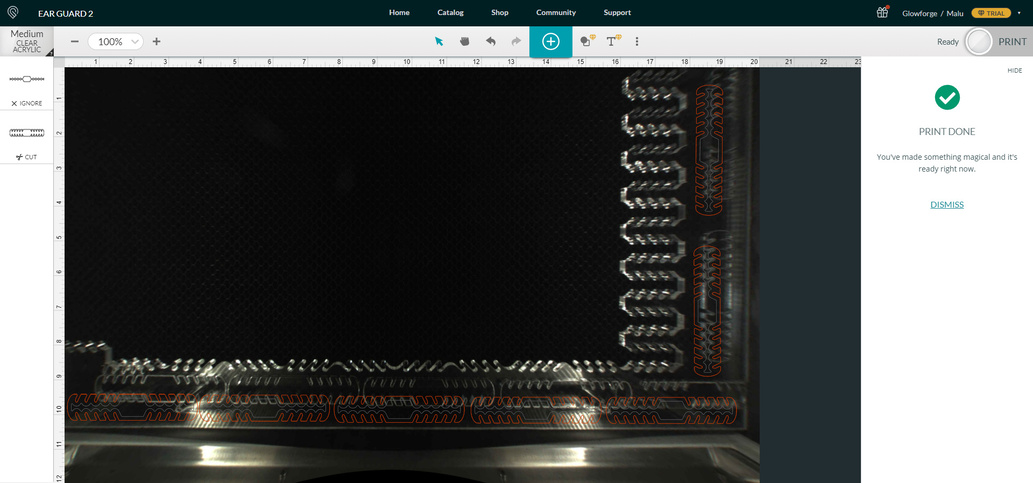
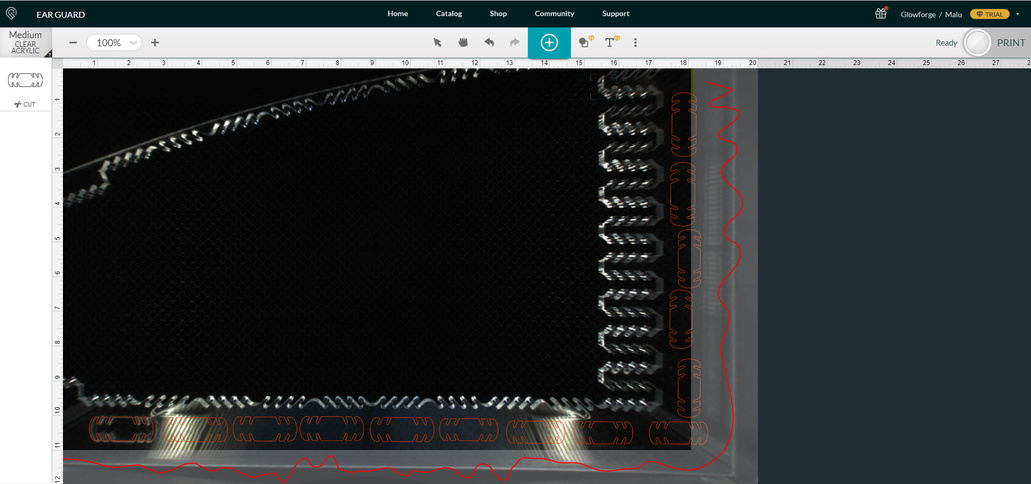
Thank you. That is helpful. I was wondering if you could look at some screenshots I took and tell me if the alignment or precision (whatever it’s called) is normal? I haven’t touched the print, and the actual laser seems to not align with where it was placed in the software, if that makes sense. I was also wondering how to tell exactly where the “printable area” is within the software? I thought the non-printable area was the part I scribbled red in the third photo, but then I could print in it. So, I wasn’t sure what the purpose was of the frame within the software. But, in the other photos, the print versus the software can be quite off.
I’m glad the information @eflyguy provided about the viewable area helped! Thanks Eflyguy!
You’re correct that the gray area in the app should indicate where a print is unable to run. In order to look into what you’ve shown in your screenshot, will you please let me know which web browser you’re using?
Look for the header that says “Your web browser’s unique URL”
Click the button that says “Copy URL to Clipboard”
Reply to this, and paste in the link provided
Regarding your unit’s alignment, will you please run a test print on Medium Proofgrade Draftboard? We’ll extract the logs to take a closer look. Here are the steps for the test:
Turn off your Glowforge.
Check for small pieces of debris or dust.
Check the lower door to make sure it closes all the way. It may require some force to open, but open it, wipe any dust off the edges, and close it all the way.
Remove the tray and clean any dust or debris from the surface underneath. Pay careful attention to remove all debris from the four dimples where the tray rests.
Check the lid to make sure it closes all the way. Small particles of material, such as dust or debris, can prevent it from closing completely.
Check the surface your Glowforge is on to make sure it’s flat. Ensure it is not twisted slightly and that there is no debris propping up one side of the machine.
Turn your Glowforge back on.
We included an extra piece of Proofgrade Draftboard with your materials shipment for troubleshooting. Place the Proofgrade Draftboard in the center of the bed and print the Gift of Good Measure using the default settings.
When the print finishes, leave the lid closed and wait until the fans stop and the picture updates. Without moving your artwork or your material, take a screenshot of the Workspace to show us the difference between the artwork placement and the actual print placement. Make sure to include the rulers in your screenshot and show as much of the bed as possible.
Mac: Press Shift-Command-4 and click and drag a box around your image. You’ll find the screenshot file saved on your desktop.
Windows: Click on the Start Menu and type “snipping tool”. Open the Snipping Tool > New then click and drag a box around your image. Click the Save icon and name and save your file.
After the test completes, please send us the screenshot along with the date and time you ran the test and we’ll investigate.
I hope everything worked out. It’s been a little while since I’ve seen any replies on this thread so I’m going to close it. If you still need help with this, we’re happy to pick up where we left off and continue troubleshooting - please either start a new thread or email support@glowforge.com and let us know if that’s the case.