I assume you do it using curves?
Nah. I’ve left crumbs here and there about it. Maybe next month. I have a really big few weeks coming up with a ton to get done. 
3 Likes
 Remember your priorities here…forum first, preparing your life for the big event second.
7 Likes
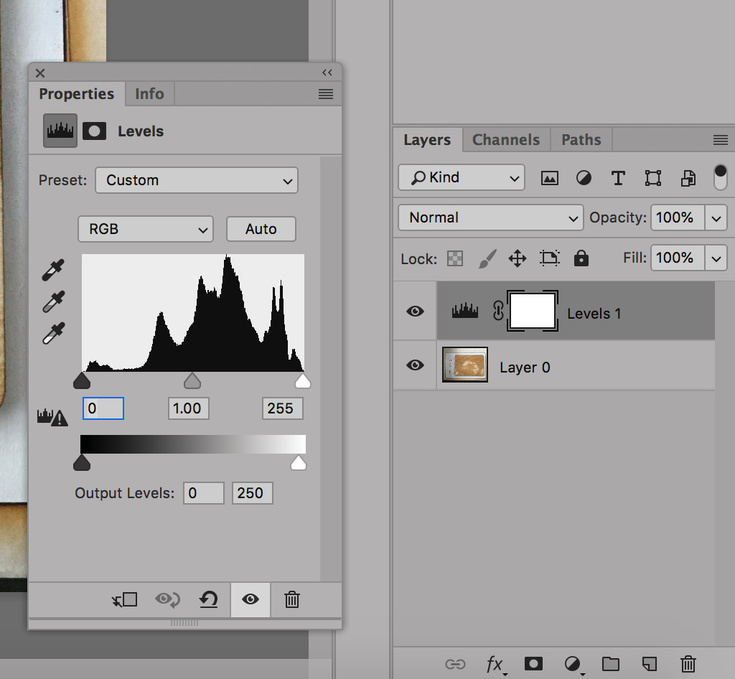
I use levels.
Specifically output levels:
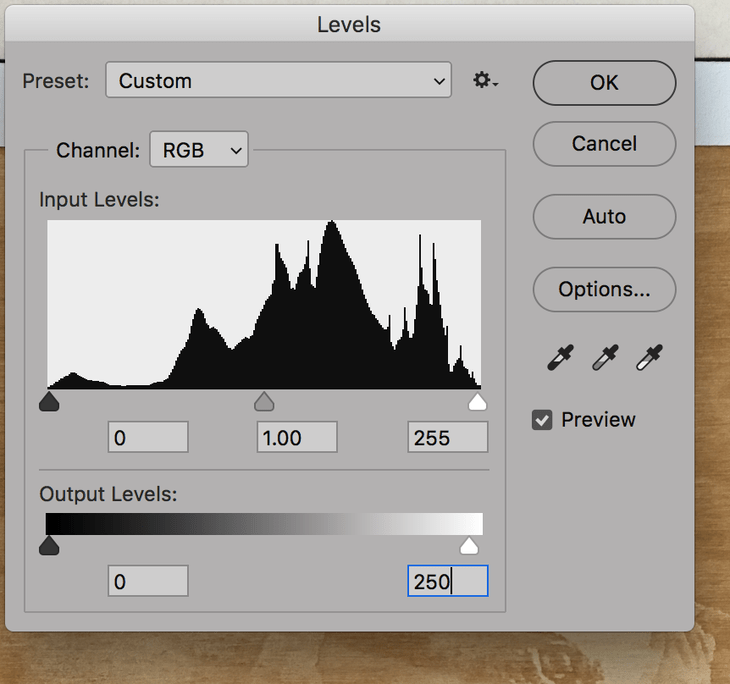
In Photoshop, if you open the levels (Image > Adjustments > Levels), you’ll get the above dialog box. If you change the output level in the lower-right box, it will set the max white level (or you can change the black level to get rid of pure black).
6 Likes
I don’t think anyone mentioned… Your first test of the ‘inverted’ image… that IS actually good technique, but for certain materials, darker materials specifically, that turn lighter when etched. Like some black acrylics or various tiles. OR if you’re going to etch and paint. (Your example, on black acrylic that etches to white, you would WANT the nose to NOT etch, so you’d need the inverted image.)
So… yea… keeping track of all this info, is INDEED, and rather sharp PITA.
I don’t even attempt to keep it all in my head. I keep it here, in the forums. 
3 Likes
Then I would contest that your image does not have pure white (255, 255, 255) in it.
If you want to test it, here is a sample file that I just made (and engraved) that shows the laser doesn’t touch 255, 255, 255.
254_test.svg.zip (1.6 KB)
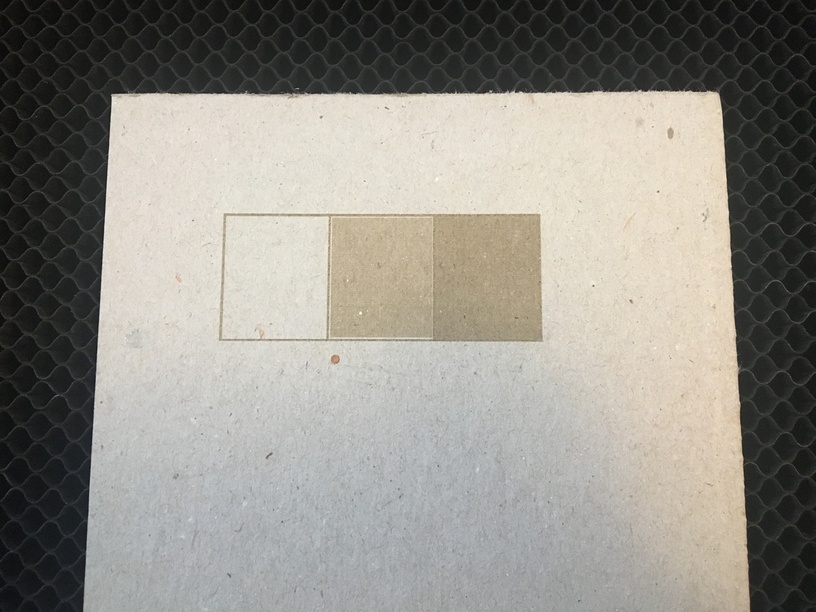
This is 3 rectangles with a black border. The left most rectangle is filled with 255, 255, 255. The middle rectangle is filled with 254, 254, 254. And the right rectangle is filled with 200, 200, 200.
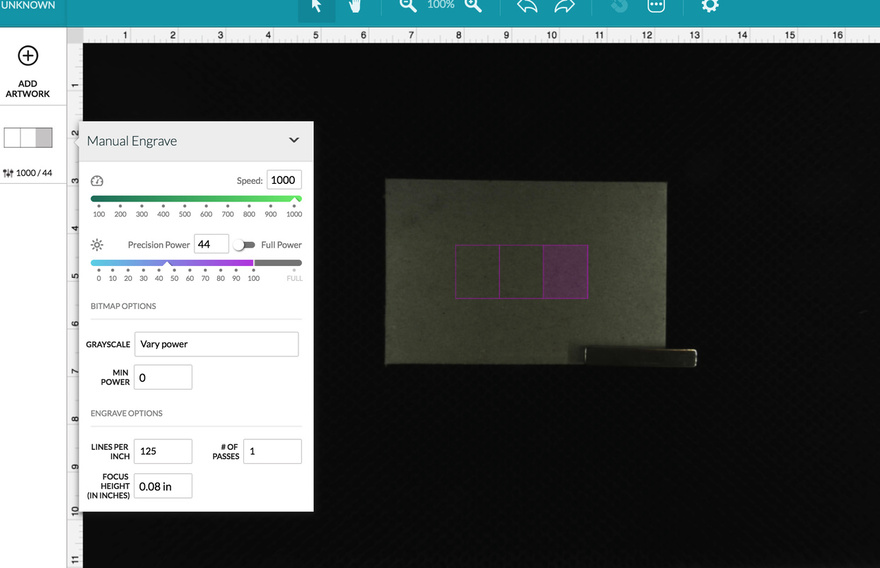
Here are the engrave settings:
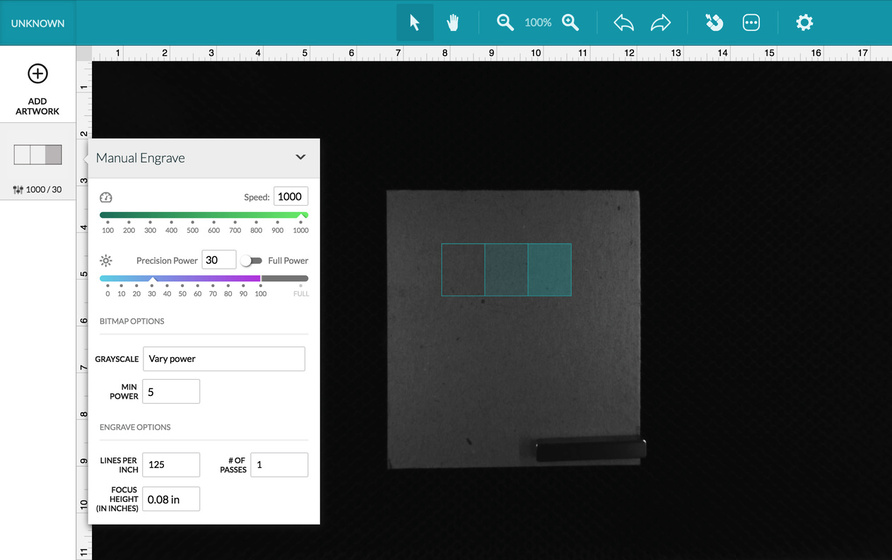
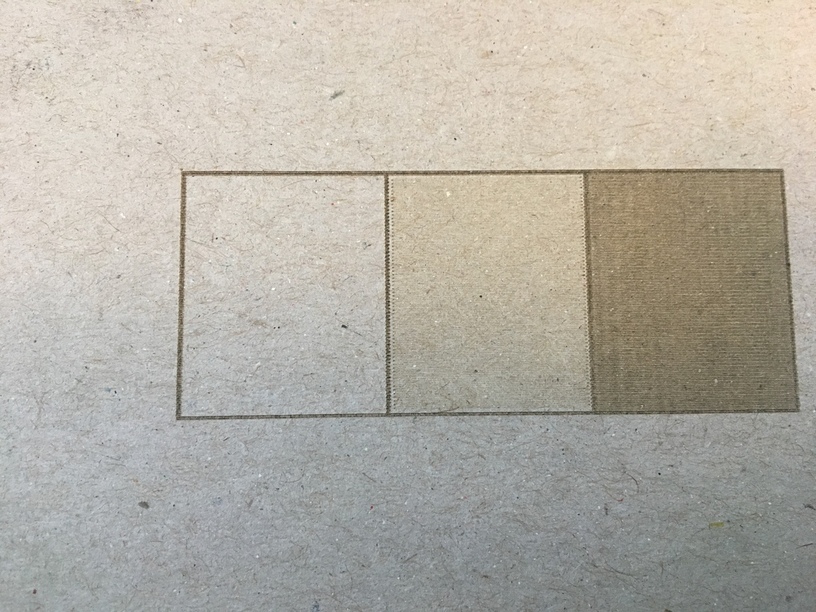
Here is the result:
3 Likes
Then 254,255,255 gets you what you need. and save the 255,255,255 for the part you want trimmed away otherwise every image would cut as square. as you see from my image the design is round, but the cutting does not go all the way to the corner, but if you set the minimum of 20 there would be a drop off at the edge of that pure white. it would never be that hard to make sure that “pure white” is not included where you do not want it.
You have me thoroughly confused here.
255, 255, 255 is white; 254, 255, 255 is not white.
Pure white is not engraved.
As you said,
That’s right. Because 255,255, 255 is not processed and engraved. It’s skipped.
If it’s 255, 255, 255 it’s not engraving. If it’s any other value, it’s engraving.
2 Likes
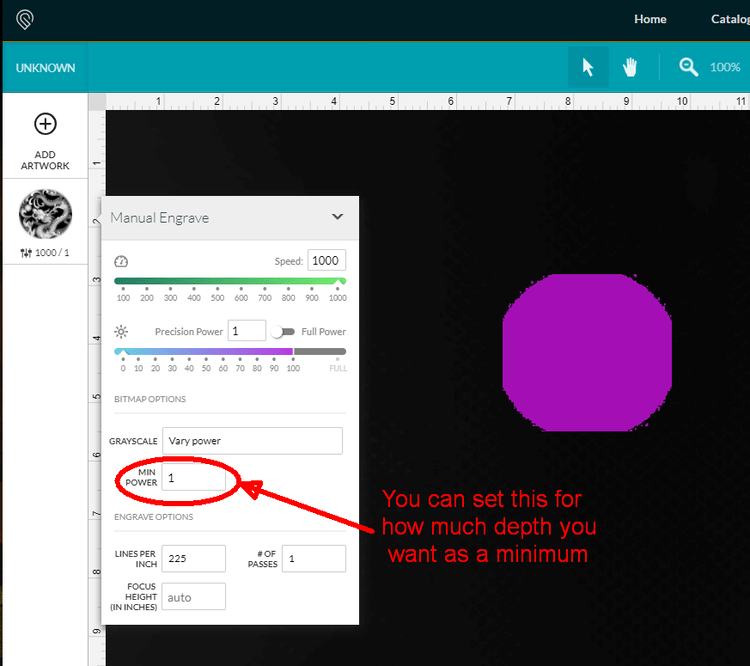
You were speaking of the issue affecting variable speed cutting that the areas of no engraving looked bad because the wood is not touched. I pointed out that by setting a minimum depth everything would be cut. If the 255 depth is reserved, as I had forgotten it was, so it could act as a mask, However, with a zero start a 254 shade would be indistinguishable, but by adding a minimum, even the 254 will have that much of a cut.
The 3d engrave is based off of 256 levels; 0 to 255. If you image is uploaded as RGB, it’s converted to grayscale (0-255) by the Glowforge servers in the background as it analyzes each pixel.
0 is white. 255 is black.
3D Engrave has a max power and minimum power.
Max power is the maximum power level for Black (0). Minimum power is the power the laser will fire at, at values of 254.
If you set the max power at 20 and the minimum power at 10; the laser will map the power accordingly. White(255) will be ignored. Black (0) will be engraved at a power of 20. The lightest non-white (254) will be engraved at a power of 10. And every value between 0 and 254 will be mapped to a power between 10 and 20.
5 Likes
I think I see what you are saying… that because there is a zero in the minimum power field that there must be some level beyond non-white that is not engraved if you set the min power to zero? Even with a zero in that field, anything non-pure-white is getting engraved.
Here’s a test showing exactly that.
The engrave is very, very light but it’s there. At “zero minimum power”.
I don’t know what to say otherwise… I try to go by results, not theory.
5 Likes
I get schooled every time I browse the forum. I love this place, these people, and this machine.
5 Likes
I might be mis-remembering, since there have been about two years worth of discussions that came before…but didn’t Dan tell us at one point that that Min Power slot was just there for some internal purposes necessary to setting up the low power engrave settings, that we didn’t need to mess with it, and that they were thinking of doing away with it at one point? (Then some of us talked him into just leaving it there for some reason?)
It’s all starting to run together.
I don’t remember that specifically. It definitely has a very useful place though in my opinion.
1 Like
I don’t recall that. But I do use varying min values depending on my project. If i’m engraving something that’s masked I make the min = 5 as that will burn through the masking. Otherwise the lowest shades of non-white will remove the paper but not the glue and I get sticky residue. I also use i t when engraving materials like white-cored matte board so I can get varying shades of white or shadow effects on matte board.
4 Likes
Maybe that was it…the need to burninate through the masking sounds about right. Okeedoke. 
What helped me a lot was doing a grayscale test for each material. I have a small grayscale graphic that I engrave on each material and keep a little collection with the settings written on them to know which is which. This allows me to know which settings I can get the full range of tonality out of. Definitely worth doing if you can spare the time.
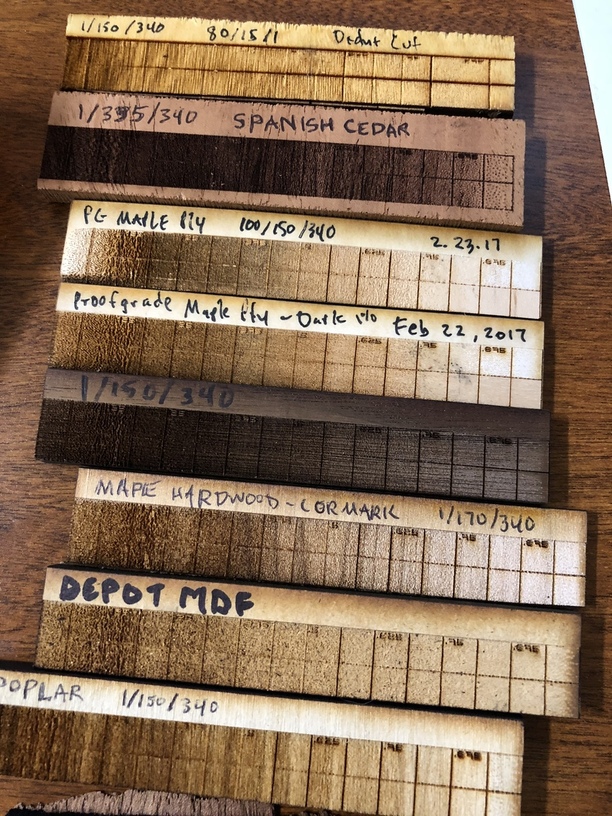
Once you get that dialed in doing full range images like this is pretty much converting it to b/w and hitting print.
17 Likes