Believe it or not, I used Crayola markers and then added a touch of glitter paint to the shoes. Super high-tech!  I have found that using markers let me control how dark I want the color and look like a stain compared to a paint.
1 Like
Thank you so much for this! I was trying to figure out how to make something to sit a photo I engraved on wood. This is PERFECT! Thanks a lot!
Hey everyone,
I hope this isn’t taken as an affront, but I toyed with the design a little bit because the fit was just a little too tight. I’m also working with a partner and we both decided that some back leg support was also needed. So taking all the comments in the thread to heart (specifically the scaling around the slots) this one seems to slide together just right. Enjoy.
 Yantra Stand2.ai (49.4 KB) Yantra Stand2.pdf (49.2 KB)
2 Likes
Thank you!
1 Like
This is amazing work…i was just thinking of doing something like this!
1 Like
Hey Steph,
Thank you got sharing this file. I am trying to figure out how to adjust the slots to fit 1/4" thick wood. Any suggestions on how I can do this? I am very new to glowforge so any help would be greatly appreciate it ![]()
2 Likes
The OP has not been on the forum in almost a year.
Measure the actual thickness of your material (1/4 is rarely 0.25"), then adjust the slots in your design software so the slots are a little under that dimension to account for kerf (usually around 0.001" or so, but test first).
3 Likes
You could try this recently posted variation by @trun which is parametric (you can customize it).
It lets you type in the material thickness — which automatically adjusts the slot — and download an SVG.
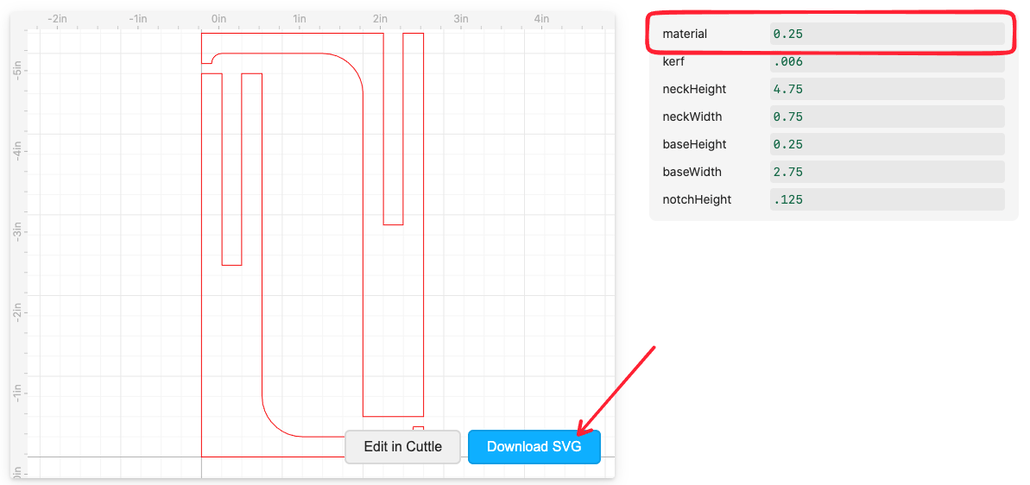
12 Likes
Thank you Toby, this is super helpful!
2 Likes
Thank you!
1 Like
Thank you!!
1 Like
Thank you for sharing this design, got’er done!
2 Likes
Thank you Steph, I just printed it out.
3 Likes
I love it when some of the great designs make a comeback because new users find them!
@deb_gaines717, we’d love to see a picture of what you did with yours ![]()
5 Likes
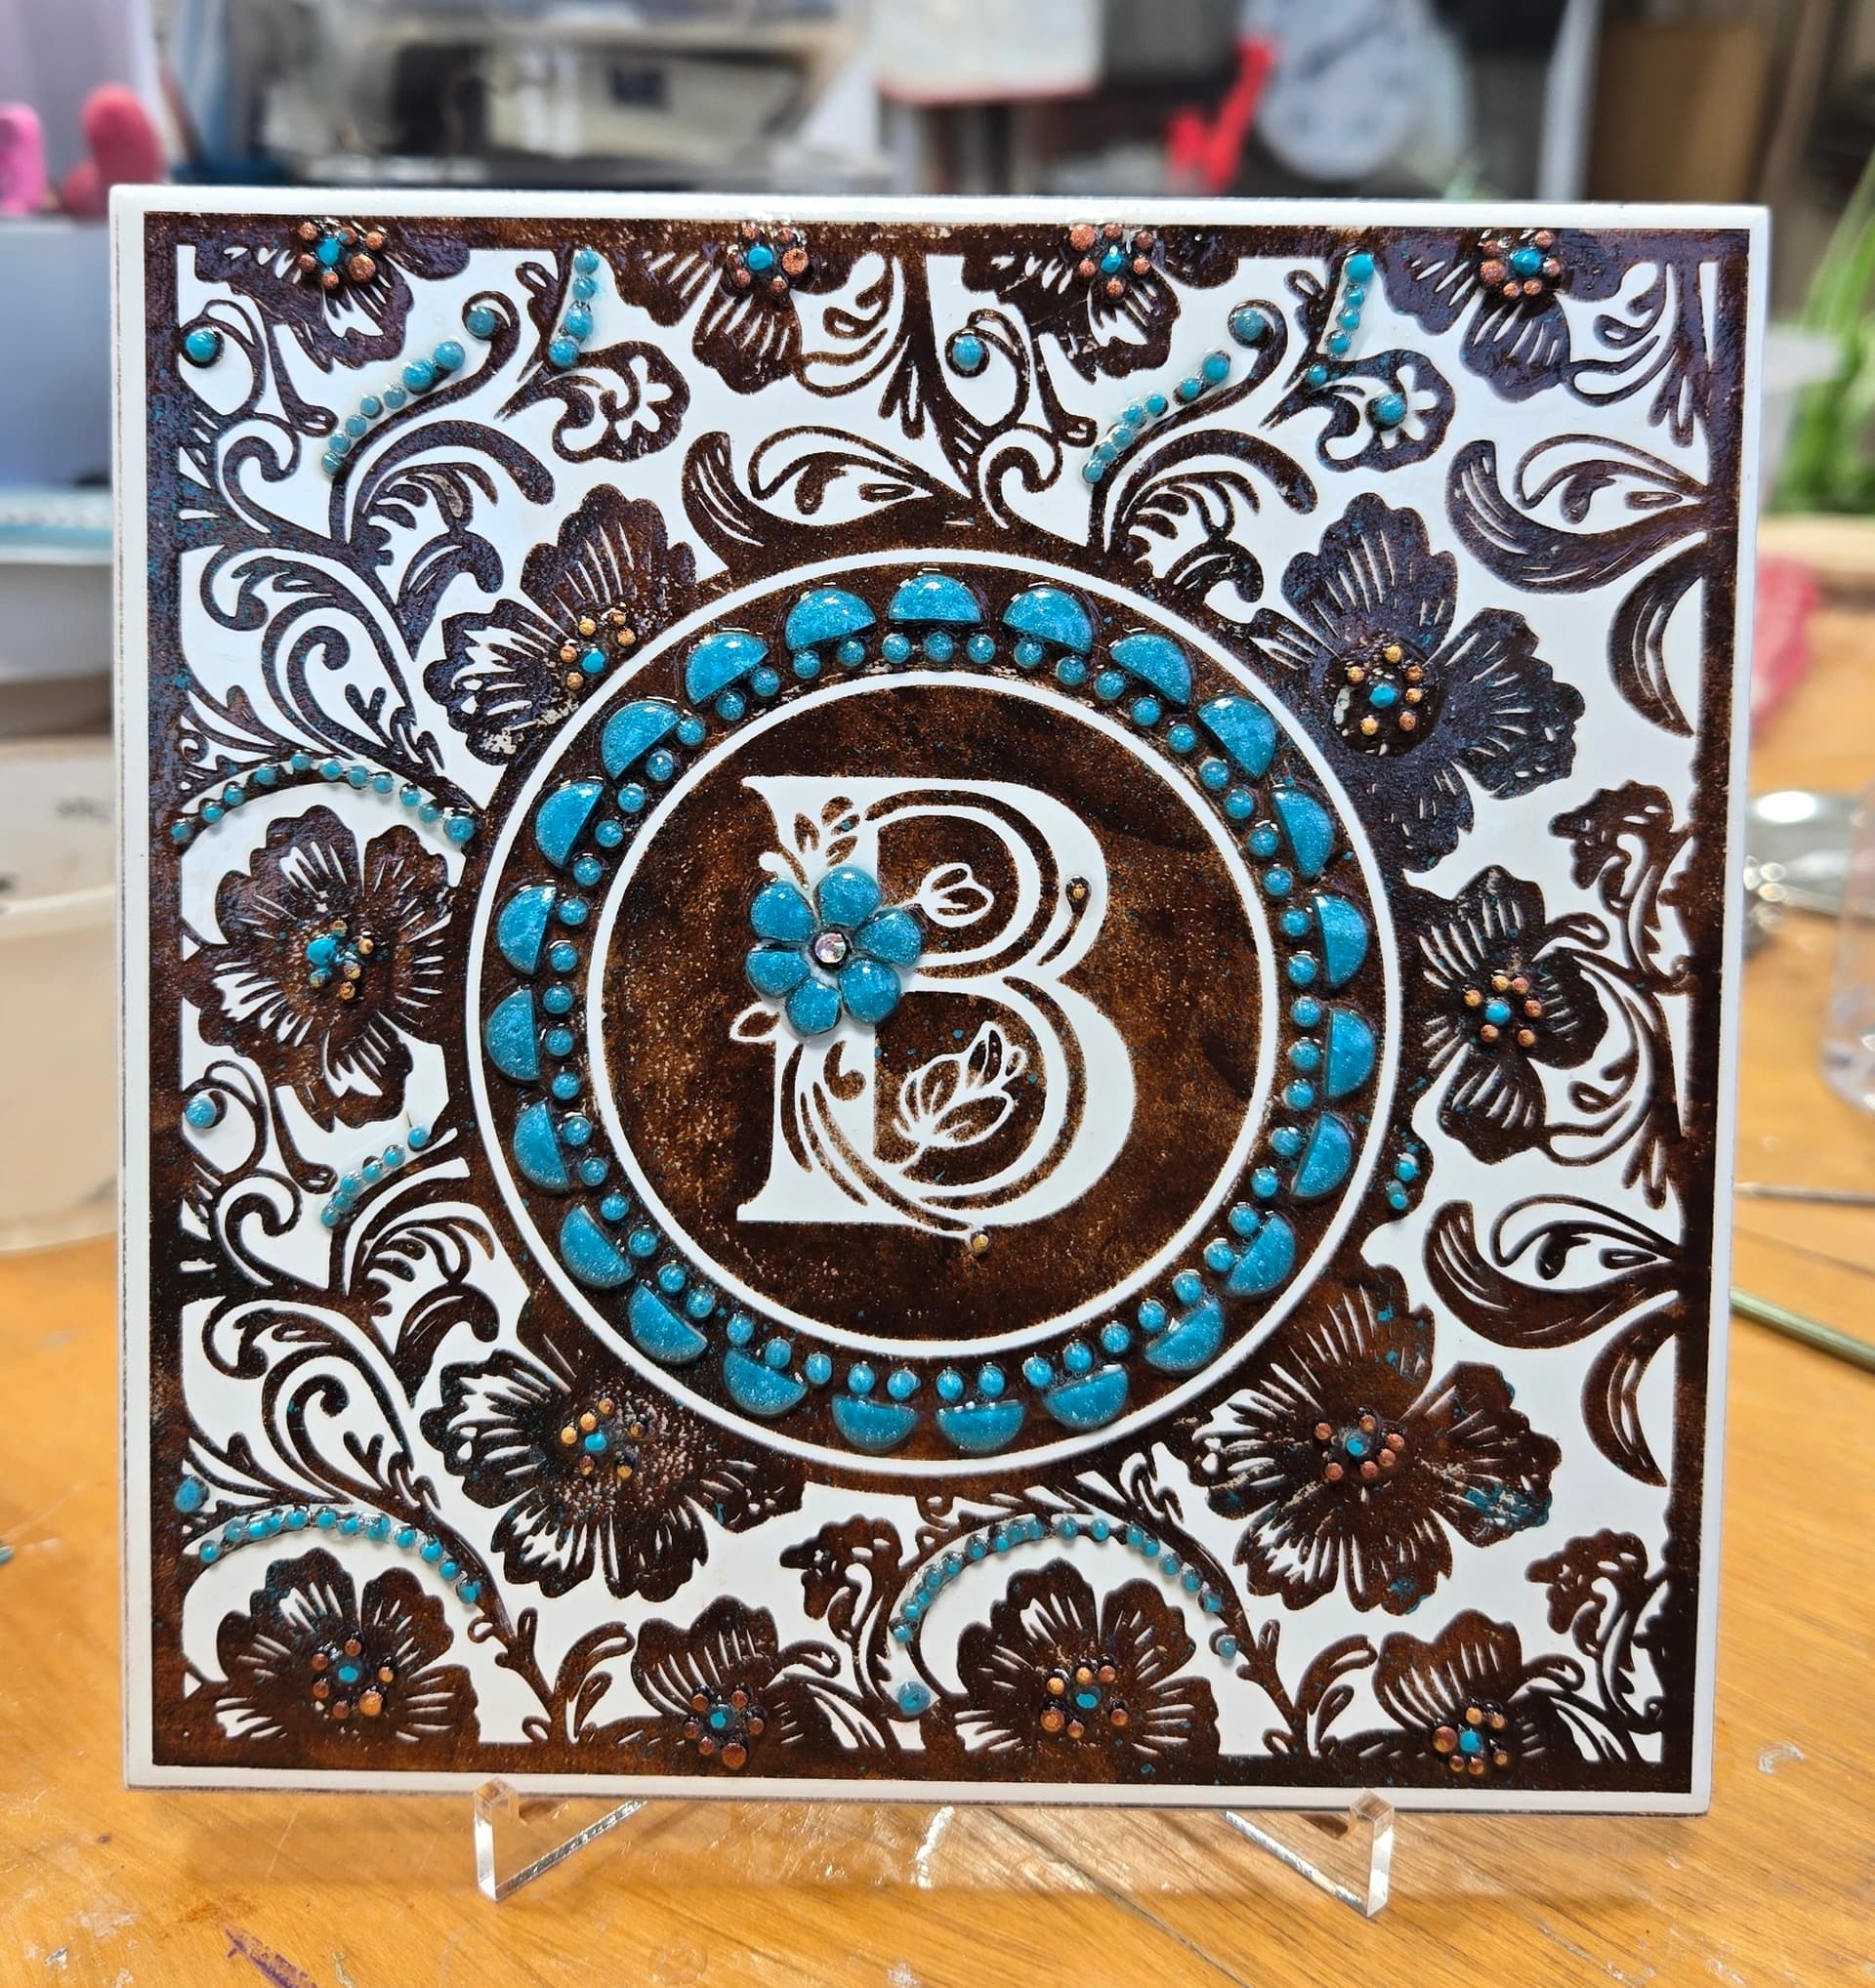
This isnt totally finished. I still need to add another coat of Brite Tone varnish on it. I etched the masked white tile with my Glowforge on settings 700 /Full/Dot/340 LPI twice. The masking with diagonal & horizontal lines allowed me to center the tile better with my design.
Then I sponge painted the brown acrylic in, let dry, & removed the masking. Any over paint on the smooth tile easily came off by rubbing with paper towel. Then, because this is for my granddaughter, i made the copper & turqoise colored shapes out of polymer clay & glued them on after baking.
I’ve learned so much from this group, I do appreciate it.
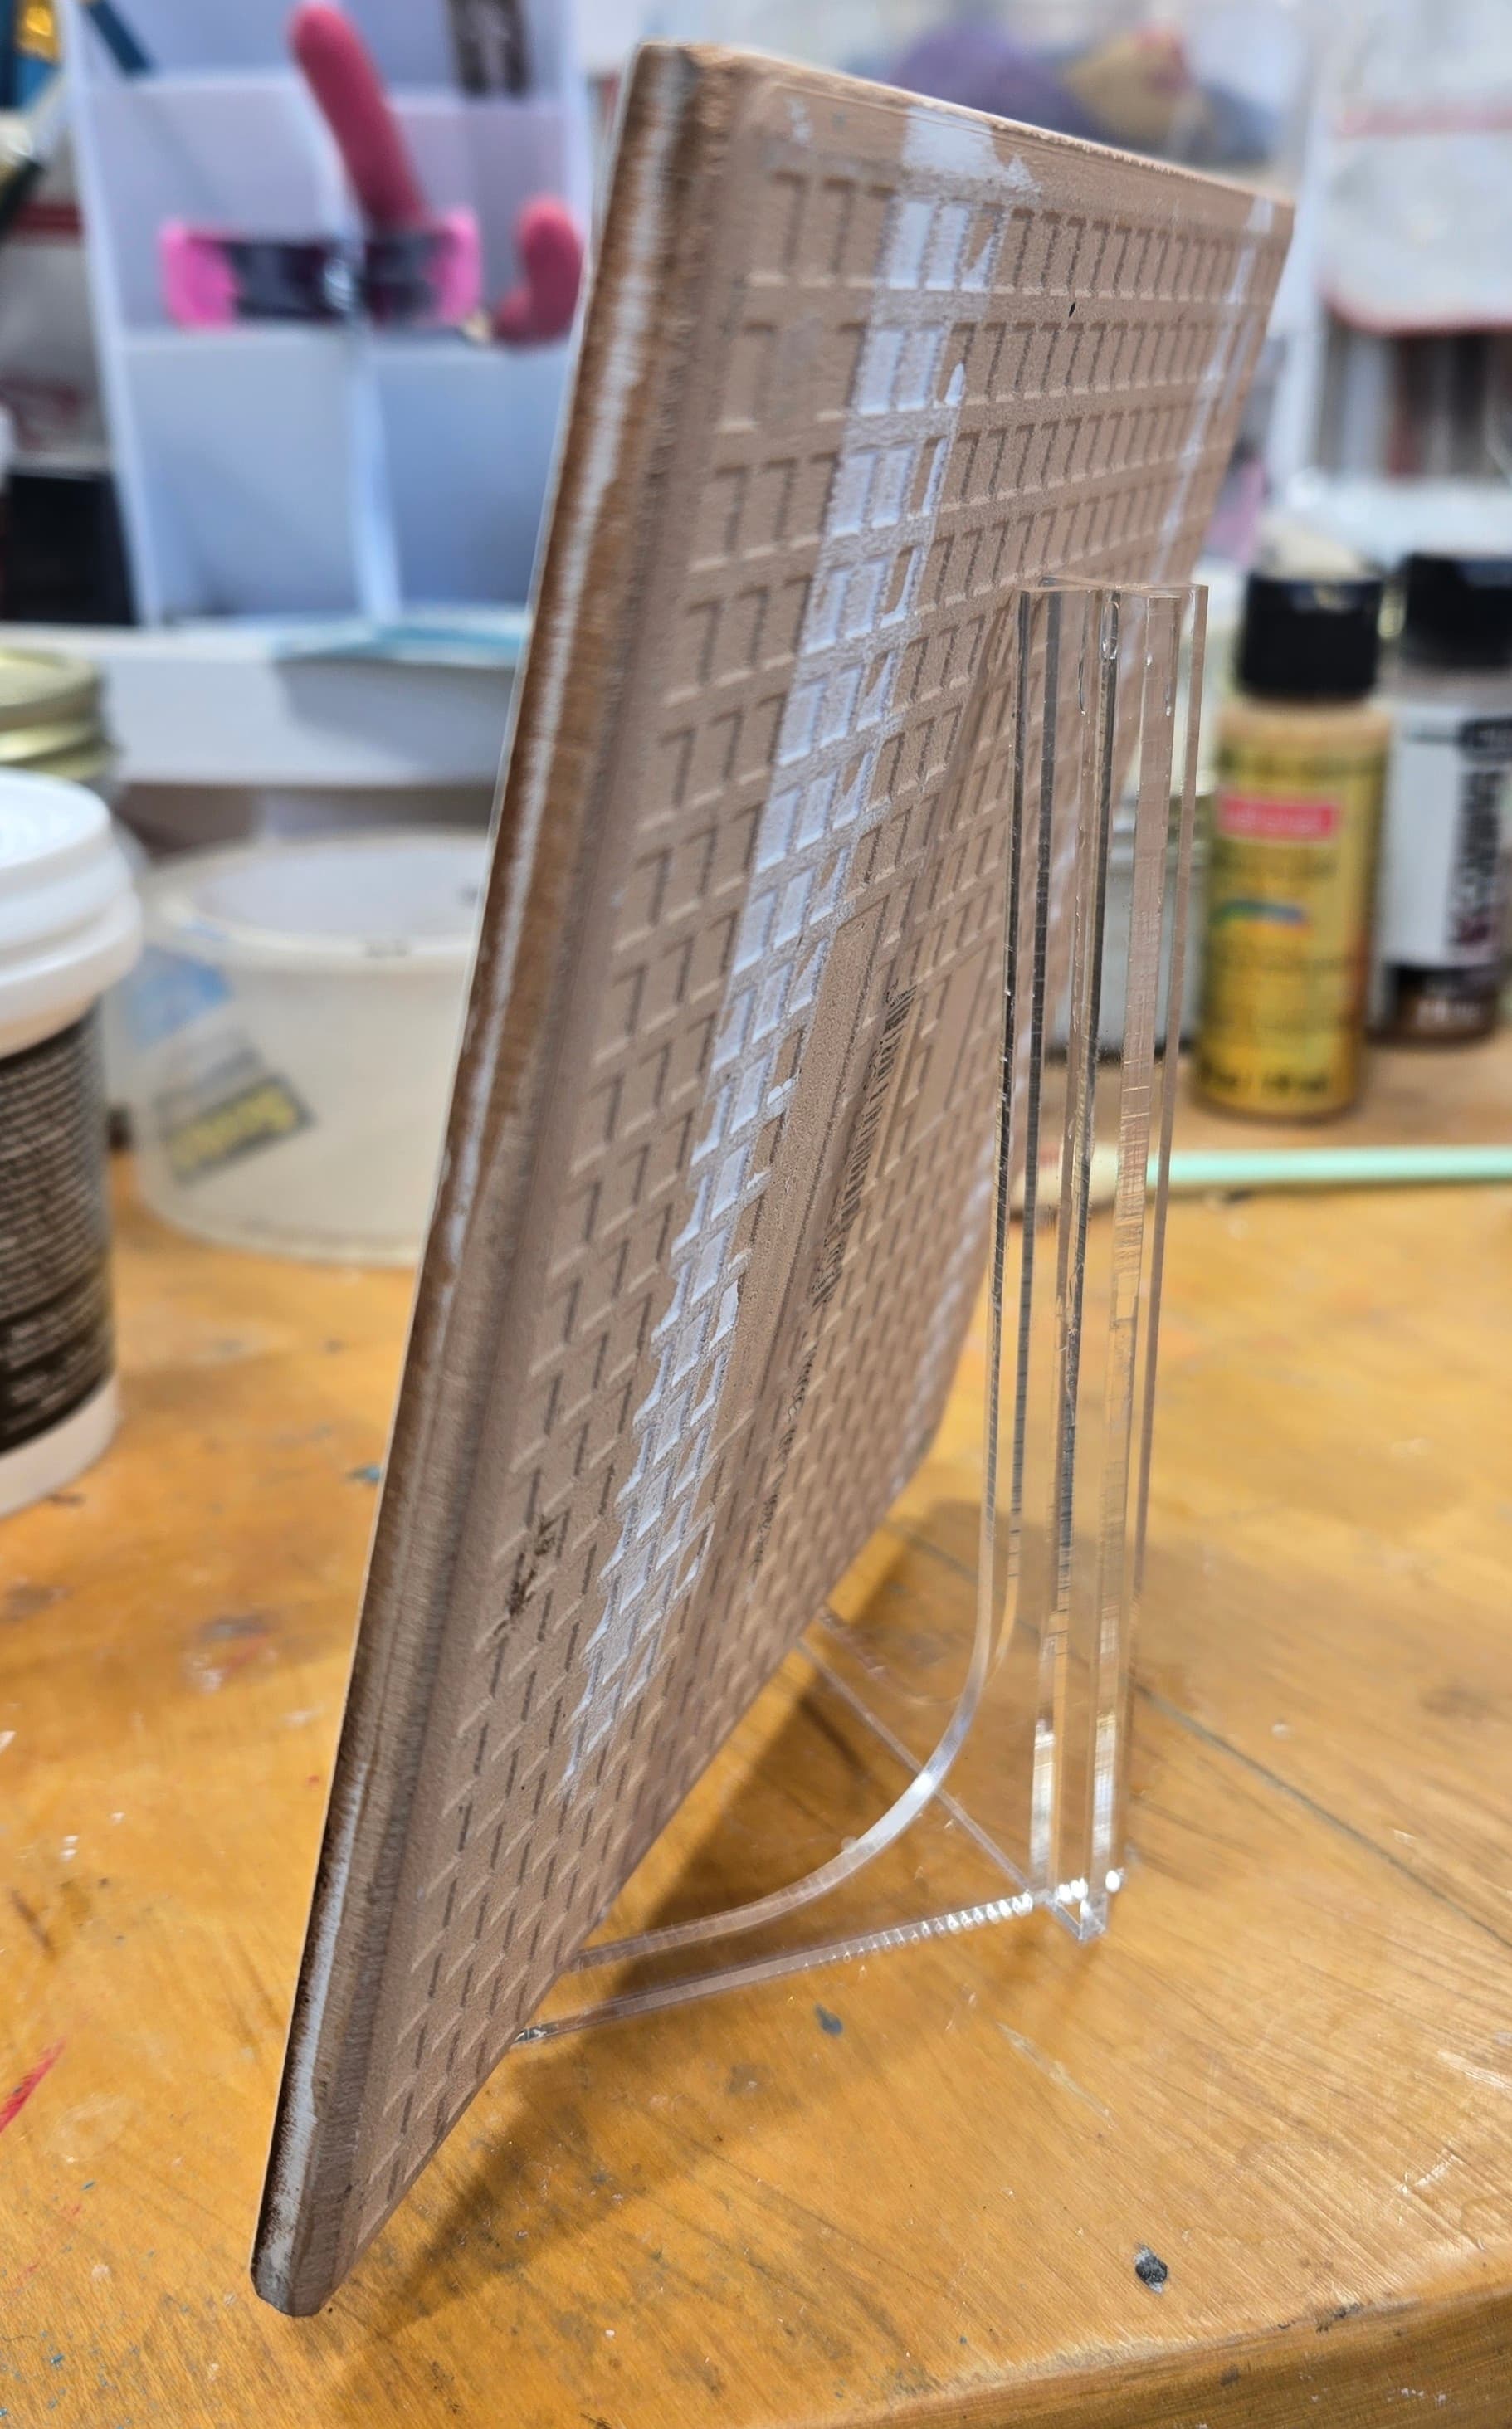
Oh & the stand was quick & easy! Thanks Steph for posting
10 Likes
Gorgeous. I love the clay enhancements. They really make it pop. Quite distinctive.
6 Likes
Thank you, I appreciate that.
4 Likes
That’s lovely! I like that the stand is both supportive, and completely invisible ![]()
5 Likes