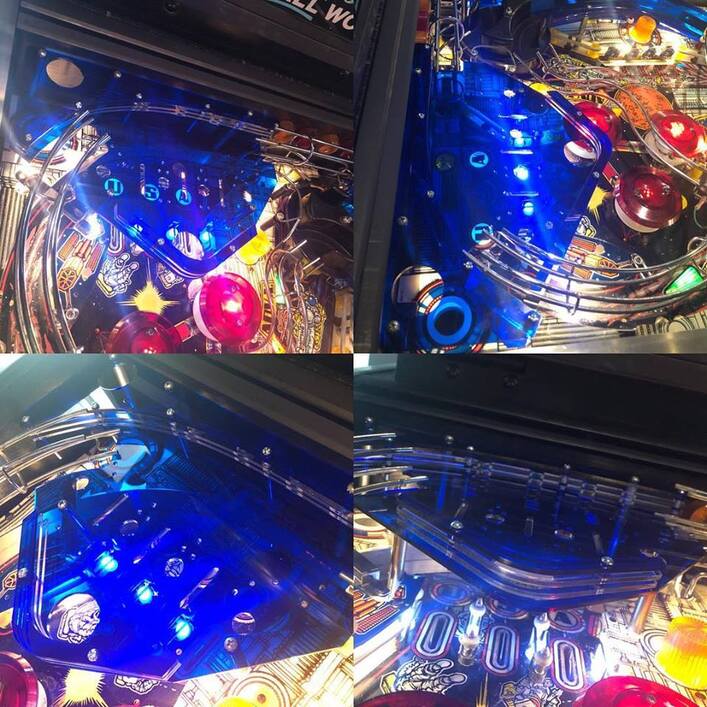
I own a few Pinball machines, and one of them (Williams, Space Station) has a molded plastic upper play field piece that cannot be found anywhere on the market. Lots of people own the machine, but have damaged or improvised pieces up there, because no replacements are available.
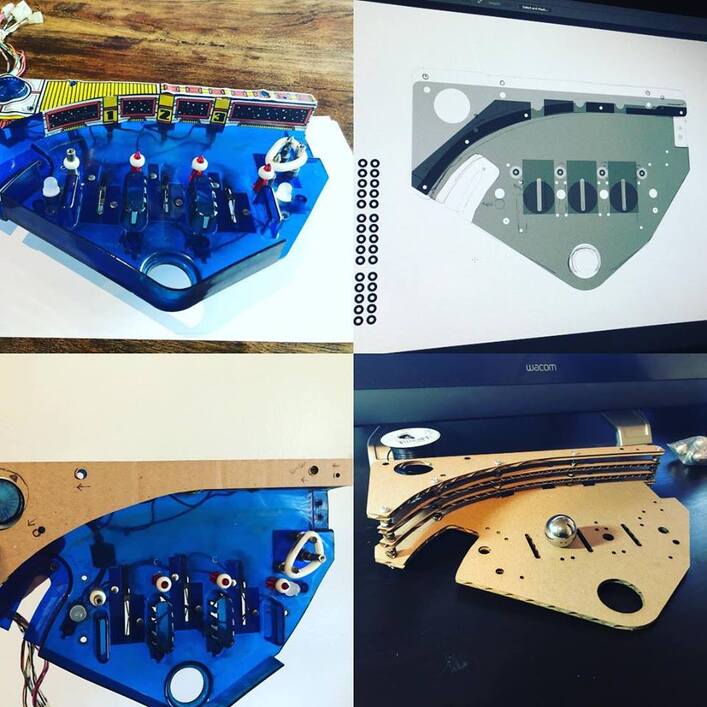
So, I figured I’d try and fix that. This is my prototype cut I made last weekend. I have already tried applying it to the machine and have made notes on adjustments to make, and hardware I need to buy and apply to it. I’ll be updating here as further progress is made!
I used paper and just ‘traced’ where the support locations were, and the general shapes. Then scanned the paper and worked off of that. I made my first pass with cardboard and found where I needed adjustments, and then this acrylic one was pretty spot-on.
I have ordered some more plastic that should be tougher than the acrylic, so i can cut out my updated design.
The fact that you found it so easy and seem to take what you did for granted just shows how skilled you are. Believe me for mere mortals this is no mean feat! Outstanding job! Can’t wait to see the sturdy plastic version.
Speed 250, Power 100, Passes x2 is the best I have found so far. However PETG just melts if the cuts are spaced too closely. Most pinball parts will probably be fine, but my Mason jar shaker top will need to be redesigned to have larger holes spaced more widely.
If you change the colors on the holes you can control some if the cut paths. Making a half dozen colors spread out over the pattern should allow the plastic to cool before the hole next to it gets cut.
I tried something in the same ballpark by doing a cut, then manually restarting and doing second and third cuts. That gave the piece a lot of time to cool. It didn’t help perceptibly. I bet that there is a cut spacing threshold where delayed cuts would pay off, but my guess is that this specific design just has cuts spaced too closely for this material and this laser. Nonetheless I will probably try exactly your suggestion sooner or later since it’s so easy to change colors.
The root problem seems to be that if you don’t use enough power, you just make a melted spot instead of a cut… and if you use enough power to vaporize the material, you also soften the material around the cut.
hmmm… I just received some PETG sheets. I’ll let you know how it goes. The acrylic cut beautifully. But I know people say its not great for holding up to pinball abuse. Though this could be an exception. The upper play field on this particular game does not get hit very hard by anything. I might be able to just go acrylic with some rubber washers on the supports if the PETG doesn’t work out for me.
Your design doesn’t have a lot of closely spaced cuts, which is good… but I bet you are using thicker PETG than I did, which may make the screw/post holes harder to cut cleanly. Those would work fine in my .060" PETG but I can imagine them melting more in a thicker sheet. From what little I know, I would not be surprised if you need to use a drill for the smallest holes. Good luck! Looking forward to seeing more.