The design below is from my post here:
Here’s the SVG for this design:

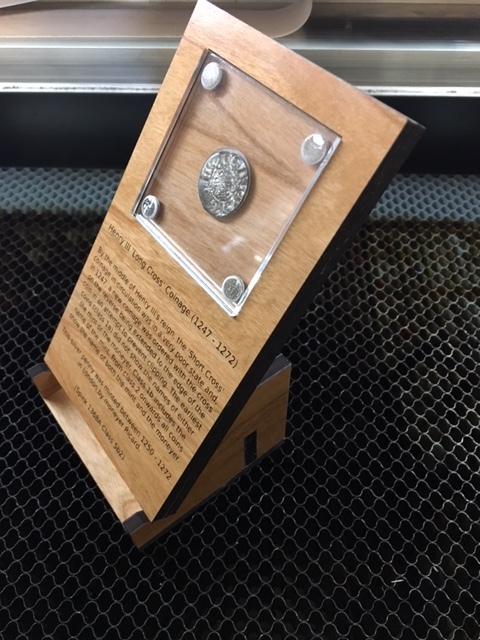
The wood pieces for the plaque are all outlined in red (I used PG Thick Cherry Plywood). The pieces outlined in green are acrylic (I used PG Medium Clear Acrylic). All of the red and green lines are cuts while the blue circles are engraves. I left the larger middle circle in the design even though you will probably want to either get rid of it or properly size it for the coin you want to display in the plaque. For a stamp I would assume you don’t really need an engrave.
I left the details regarding the coin I was going to display in this drawing just as a reference, so you’ll want to delete this unless you just happen to have a Henry VI silver halfpenny you want to display.
The smaller blue circles are engraves to hold the magnets. You will need to resize these depending on the diameter of the magnets you are using.
The stand is made up of the four pieces in black (I used PG Thick Cherry Plywood for this too). These are all cuts. The slot cut into the 2 side pieces for the crossbar is about .17" wide and is sized for PG Thick plywood (.188" thick). Because of the kerf, the fit is a little loose for thick plywood so you may want to reduce the width of the slot for a tighter fit. I left mine this way to allow some room for glue.
The slot meant to hold the plaque is sized for .375" material (in my case, it was 2 pieces of PG thick plywood glued back-to-back). Resize this if necessary for your plaque.
Here are the steps to put it all together:
-
Place the wood you want to use in the GF and cut out the 2 pieces in red. If you’re using the same material for both the plaque and the stand, you can cut out the black pieces in this step as well.
-
Glue the 2 pieces of the plaque together.
-
Replace the wood used in step 1 with the acrylic you want to use. Engrave and cut the two pieces outlined in green.
-
Before you start gluing magnets onto the acrylic, make sure you get the polarity of each magnet correct so that the magnets in the top layer of acrylic will attract the magnets in the bottom layer. It’s best to have all “north” poles on one piece of acrylic and all “south” poles on the other. That way the top piece of acrylic will snap into place no matter how it is turned.
-
Glue the magnets into the 8 circles engraved on the acrylic. I used CA glue (superglue) for the adhesive.
-
Clean the bottom piece of acrylic before gluing it onto the plaque. You don’t want your fingerprint eternally memorialized right now (that can be given its own plaque later on if you like).
-
Glue the acrylic into the ‘window’ of the plaque with the engraved areas on top. I again used CA glue for this. I put a couple of very small drops behind each of the engraved areas of the acrylic in order to hide the glue points. If you get too much glue here it will spread out and the glue will be visible through the acrylic (ask me how I know).
-
After giving the CA glue a few minutes to cure, place the top layer of acrylic onto the bottom piece of acrylic to make sure everything snaps into place.
-
If you haven’t already cut out the stand, replace the acrylic with the wood you want to use for the stand and cut out the black pieces.
-
Slide the crossbar into the slot on each of the side pieces (using glue if needed). Once this complete, glue this assembly to the rectangular base.
That should be it. Let me know if you have any questions or see any errors with the steps above.