That took around an hour if I recall…
2 Likes
Not bad. Is it about 4-5" in diameter? (Guessing based on Inventables hard wood blanks.)
2 Likes
5”
3 Likes
I believe you’re describing 123D Catch from Autodesk which was sadly killed off a couple years ago.
Adobe’s Capture app has never had any photogrammetry components, though it does have PBR materials creation for some reason.
1 Like
Hi Henryhbk, would you be open to telling me how you made this? I’ve been trying my hand at 3D and having a hard time getting it to laser the different levels in the wood. Thanks, Joy
1 Like
So that sounds like you were trying to just create a 3D laser file yourself. That’s not how this works. So the basic Trick is you need a file properly made so the automagical 3D algorithm will do this. So the algorithm uses grayscale to decide how hard to burn. So as a simple example put white text on a black background and the black is full-burn while the white is no-burn so that would be a simple embossed text. You could be more “3D’ish” if you then put a feather outline on the text (say a gradient glow) and then the laser would vary the power into a nice fillet around the text. But you’re presumably wanting something fancier, but the above is critical to understand what it’s doing before getting fancy.
So now you have your 3D model ready, and it’s time to convert it to a 3D model. In this project I link to a tutorial on how to generate it. (It took a bunch of fiddling, so be patient, and the Mac version of blender didn’t quite match the screens in the tutorial, but eventually I got everything to work). But basically I used blender to render a 3D depth map file (as a PNG) of my 3D model.
4 Likes
I see. Yes, I was trying to figure it all out. I was very lost…lol! Thank you for sending that to me. I will be sure to watch it and hopefully learn from it. I hope you have a wonderful Christmas. Joy
2 Likes
Actually technically I was’t quite accurate. You can make a 3D laser file yourself, but you will need some sort of 3D CAD program (Fusion 360, OnShape, etc) that can produce a 3D model (such as STL) then you can go through the whole blender routine (along with a lot of trial an error). You can demonstrate how this all works yourself by simply making a gradient fill in Photoshop (or whatever graphics program you use) from white->black. Do a radial gradient like this (feel free to fill in a shape if you want:
The white part will remain un-carved while the black will be maximally carved. You should end up with a cone/sphere (depending on your gradient’s algorithm)
6 Likes
I truly appreciate you breaking it down to me. Do you know that you are the one and only person who was willing to help me? I can’t thank you enough for your help. I hope you are having Merry Christmas.
3 Likes
Incredible depth and detail.
3 Likes
absolutely AMAZING …Very Nice
2 Likes
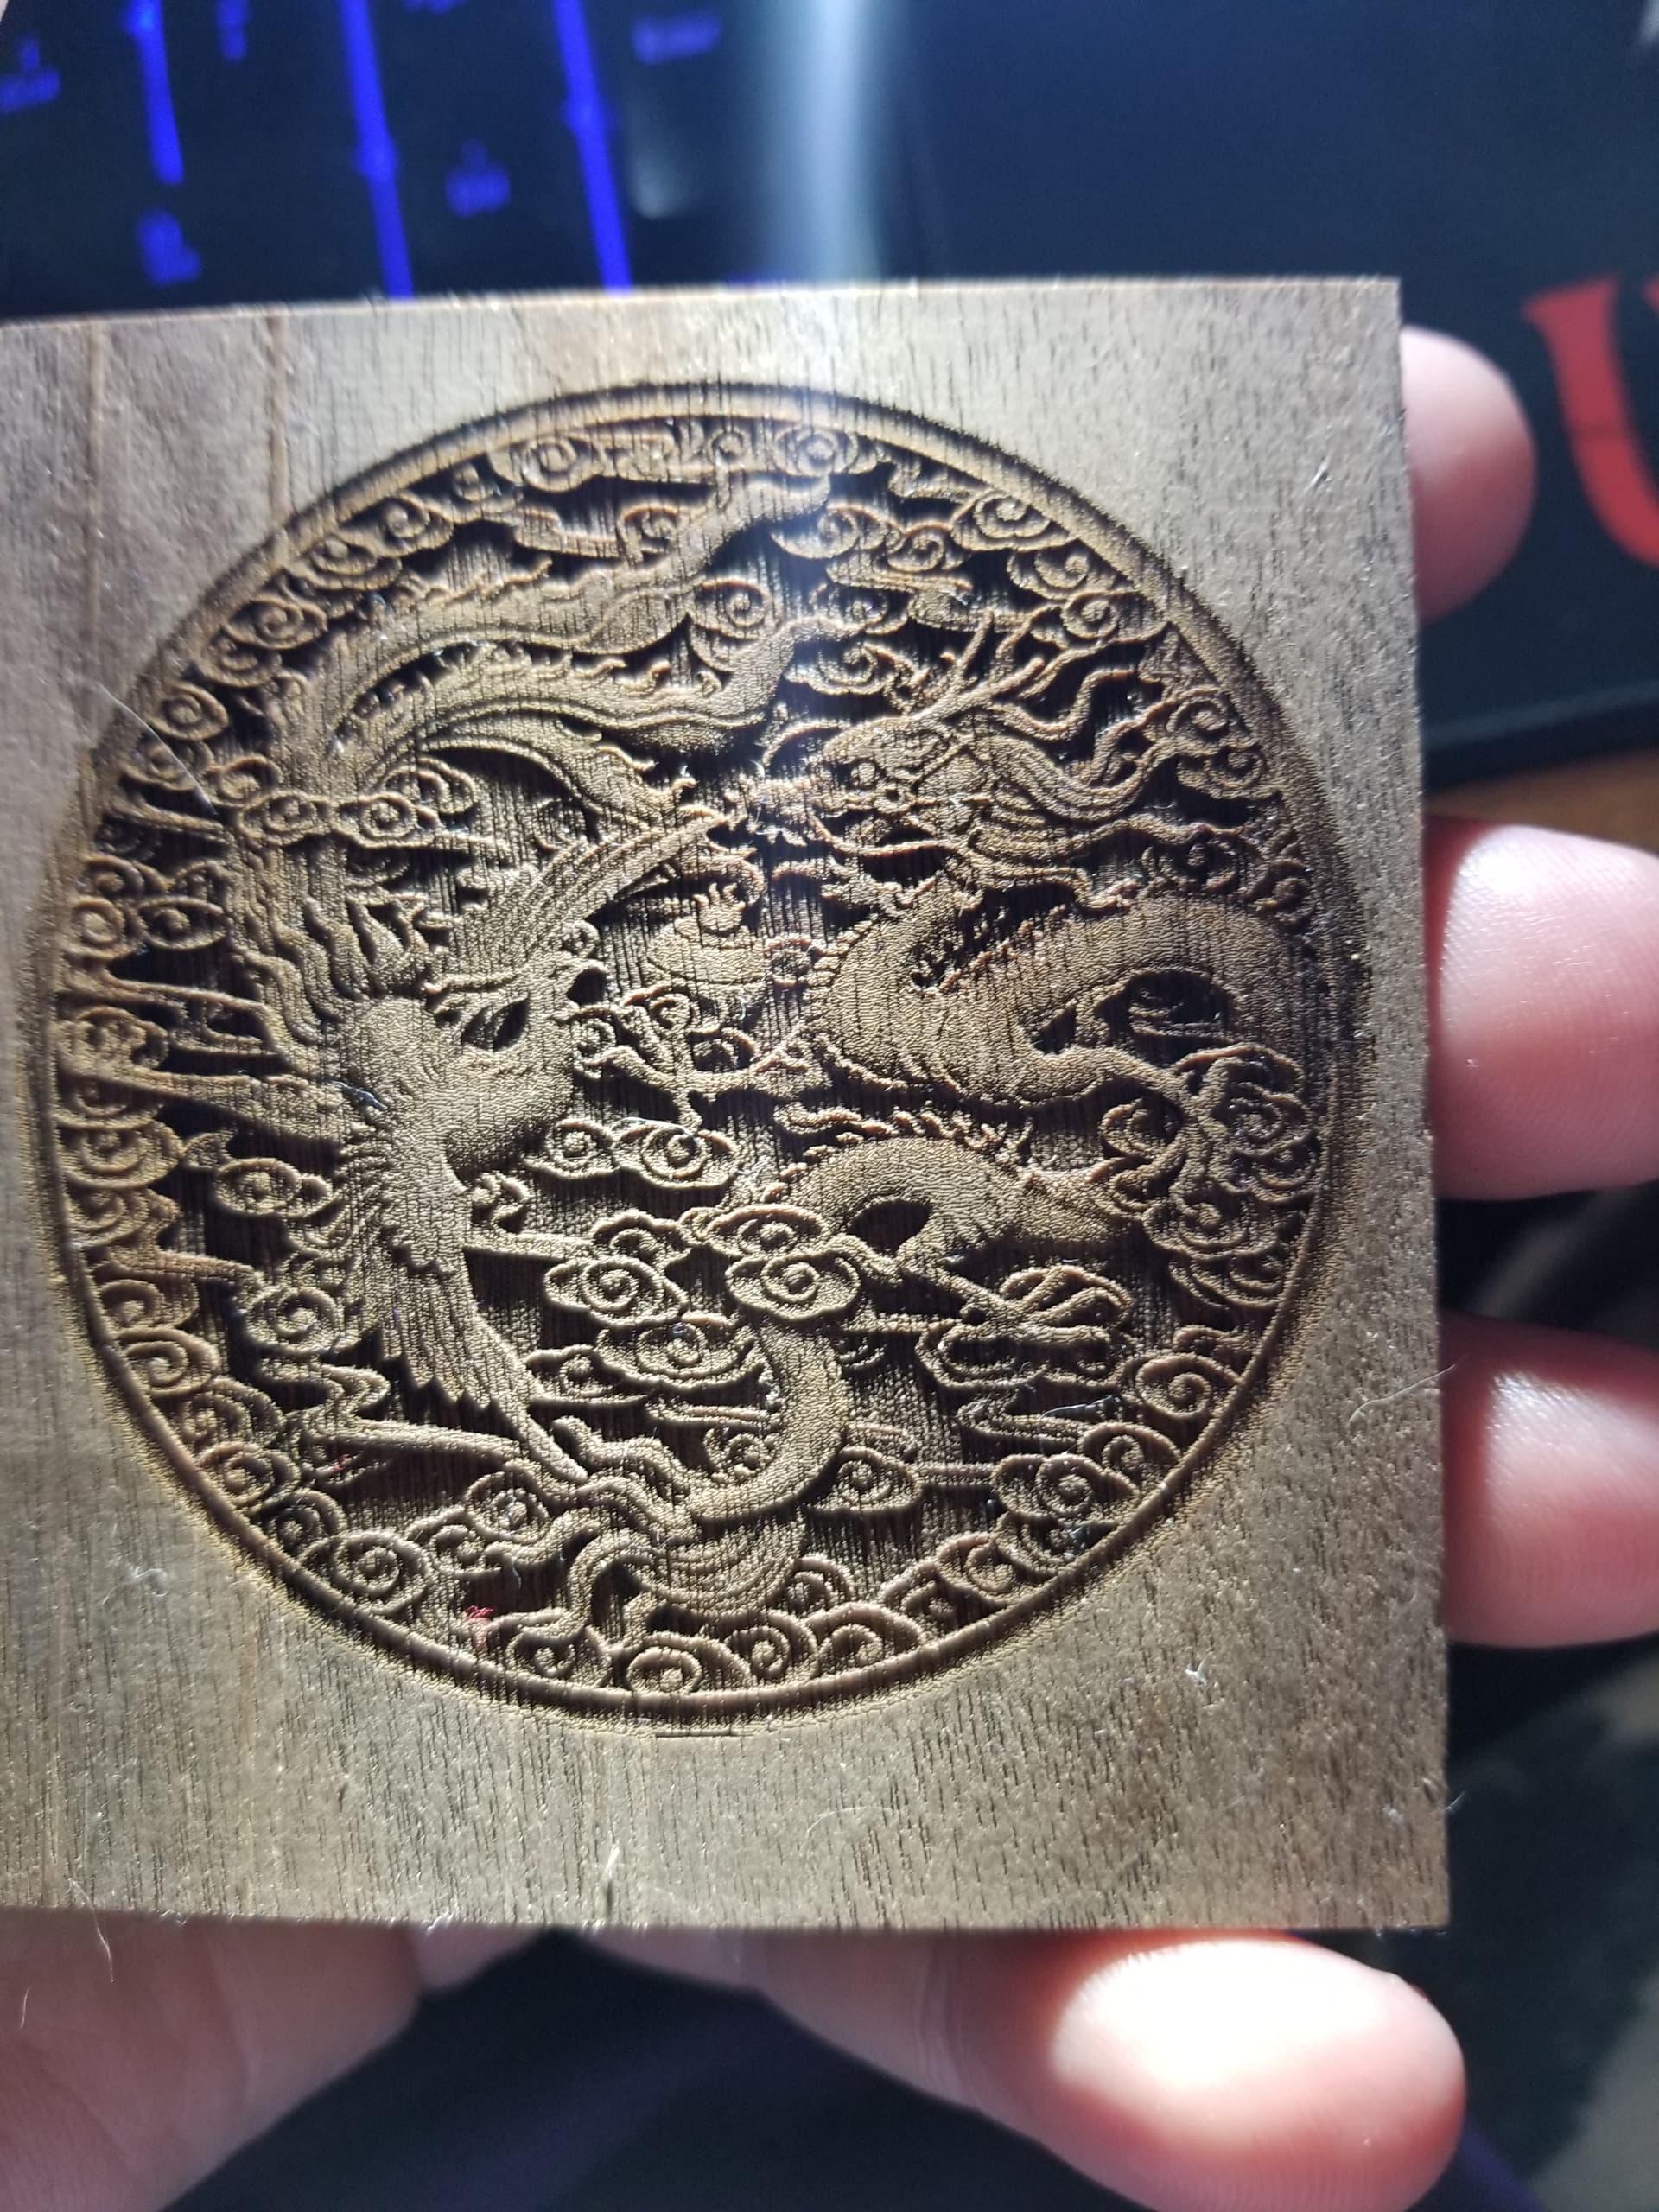
Single pass Xtool F1
4Min 55Seconds
Walnut it’s about 3.5 inches across. It’s still drying. Used just water and a dish brush.
9 Likes
Thanks for sharing this. You have been missed!!
3 Likes
A little stain and urethane and that would be incredible looking I bet making the grain pop like crazy. But looks great as is.
5 Likes
That would be a Dragon and Phoenix design I think. I don’t know the legend behind it but I have seen the theme many times. That particular one is about the nicest version I have seen. I have recently done a lot of 4" circles at the standard SD settings and regardless of the design they are in a range of 40 minutes on a pro and I think 270 LPI. That certainly looks to be a higher LPI. Do you get a similar scaling to LPI in that machine?
2 Likes
This was at 450 lpi, my mind was blown at the speed. But the cutting ability totally sucks. Cant wait until I get my Glowforge back up and running, between the 2 of them I’ll be able to make just about anything.
450 LPI is about midway on the scale for the F1
4 Likes