Hello…
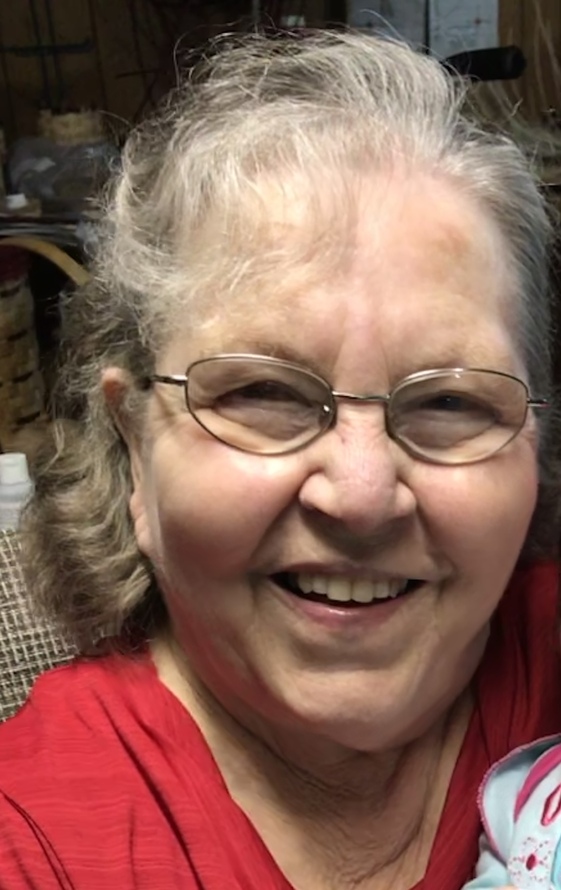
can someone please help. I’ve only had my glowforge for a very short time and had not had a lot of time to get into it… well my nana passed recently (on 5th) and I would like to make a picture of her on some wood for the funeral. But to be honest I’m afraid I’m going to mess it up!  and I honestly have no idea what I’m doing. Is this even a possibility in the short time I have? Needing it by Friday…
thank you in advance.
Ash
2 Likes
Normally, I’d tell you to practice a bunch and work up to this, because photo prep and engraving can be a little tricky… But, given the circumstances, here’s what I’d recommend:
First, upload your picture to this thread and see if anyone has time to prep it for you.
Second, let us know what material you’re working with. Proofgrade maple ply? a cutting board? Something else?
Given the nature of your project and the hard time constraints, I have a feeling that people will help you get this done.
7 Likes
Post the most clear and high contrast photo you have and what size you want it to be and someone here can help.
5 Likes
Absolutely, Also you have proofgrade wood that came with your glowforge? Right?
We will use that wood so its the most perfect as possible
I am sorry for your loss!
Jonathan
4 Likes
Thank you both. Okay I’ll have to go print the picture might take me a few mins. Need to find my picture paper. But then you want me to actually post the picture on here right? Lol sorry. I’m so new and a basket case right now because of the situation
1 Like
And yes I do have the proof grade material still. That’s perfect I will definitely use that
Thank you so much I appreciate this. I’m so sorry to bug everyone!
Okay I have the medium maple plywood I’m thinking. As for size… umm I have no clue. Its a
12 x 20.5 piece… so maybe like a 4x8? Or you think that’s to big? I’m going to put it up at the viewing and then let my mom keep it.
1 Like
“too big” will depend on how high-res your photo is. Can you upload it here?
The general idea is that if your image is higher res, you can engrave it larger and it’ll still look good. I generally try for at least 300 DPI for something that might be held in the hand, but you can get away with a little less, like 220. So, if you want it 4x8 ish, your image will need to be at least ~ 800x1600px, ideally 1200x2400px. That’s about 2.8 megapixels, which is well within range of most cameras these days.
2 Likes
Yes. if you have an original negative or cell phone photo that would have the best clarity. Once in your computer, you can just drag it out of File Explorer and drop it into the typing area.
2 Likes
So sorry it took me so long! The funeral home called and let me see her for one last time. Originally we weren’t allowed because she passed from covid.
2 Likes
You should be able to get a very nice quality engrave out of that image at 4x8" size, it works out to almost exactly 300 dpi.
2 Likes
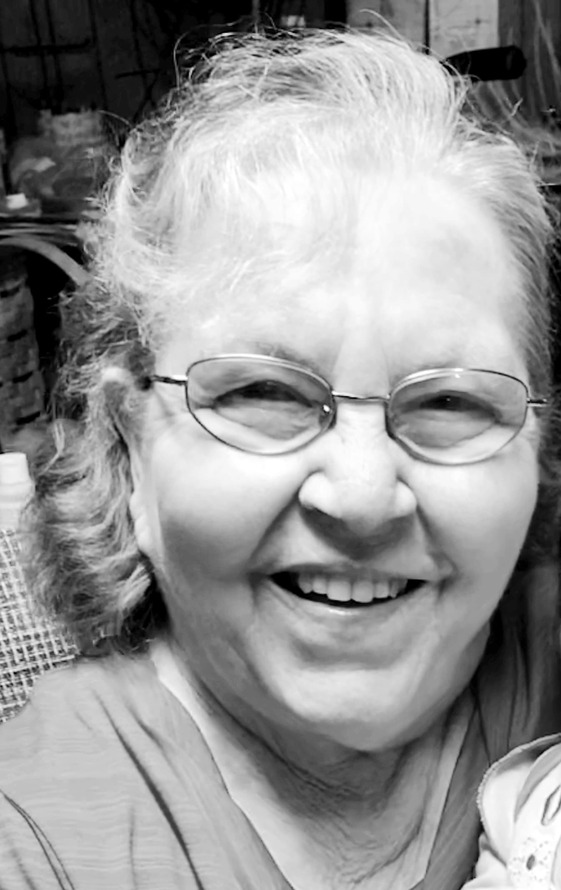
Here is what I got. the photo was very tall and not centered so I did what I could to even it out. It is 10" tall and has a red rectangle around it to cut it out. I would use the standard Photo engrave for the photo and the standard cut for that kind of wood. I would use the Maple plywood as the dot matrix does not dig deep if you back off the darkest part in the settings. I turned the busy background to almost black so will cut as very dark.
You can scale the image down in the GFUI to about 3" and do that first as it is faster, and then If you like how it comes out go for the 10"that will take several hours. I hope this helps in the sad times.
Nana-1.zip (870.4 KB)
6 Likes
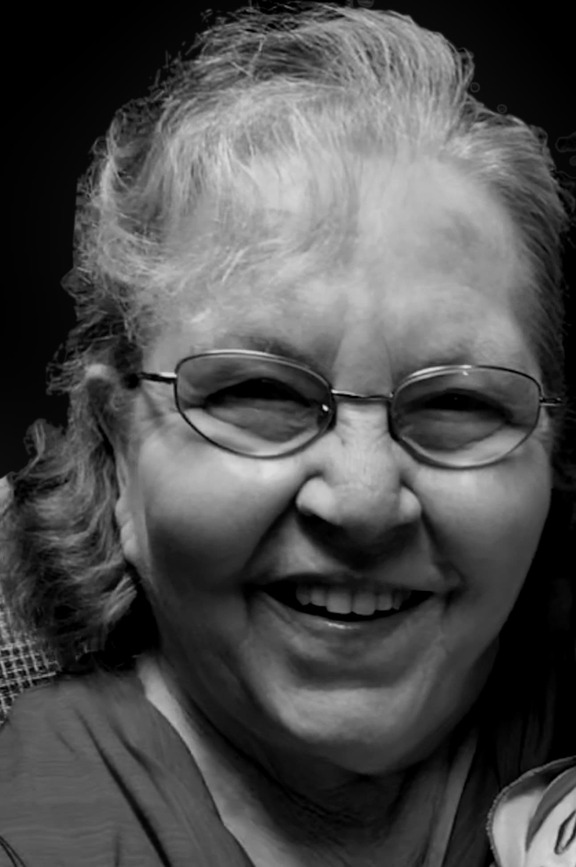
@rbtdanforth beat me to it, and his may be better… but this is what I would probably take to the forge if I were doing it. I’ve found that however light I THINK I need it… it tends to need to be lighter so I go with a bit lighter look.
19 Likes
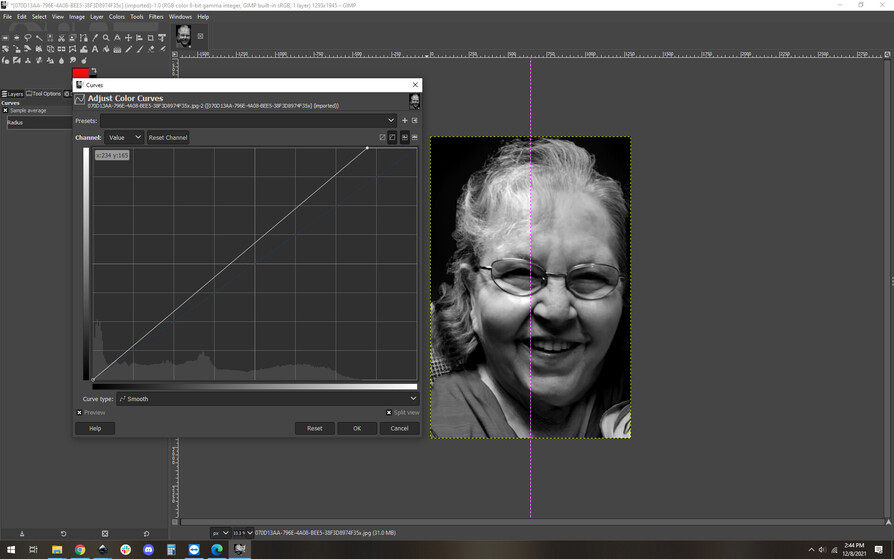
That’s a nice bit to get the background cleaned up, though the whole image is still fairly dark. Using curves shows you that you’re not using the top end of the dynamic range:
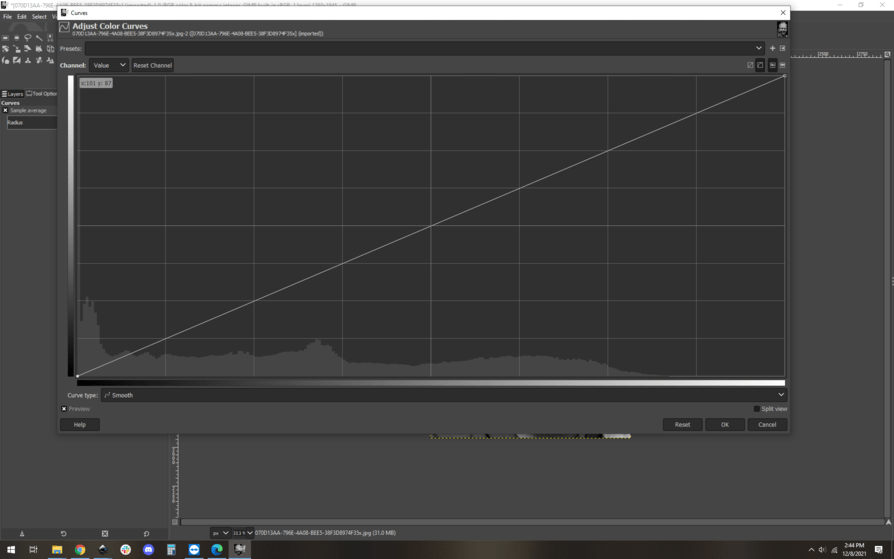
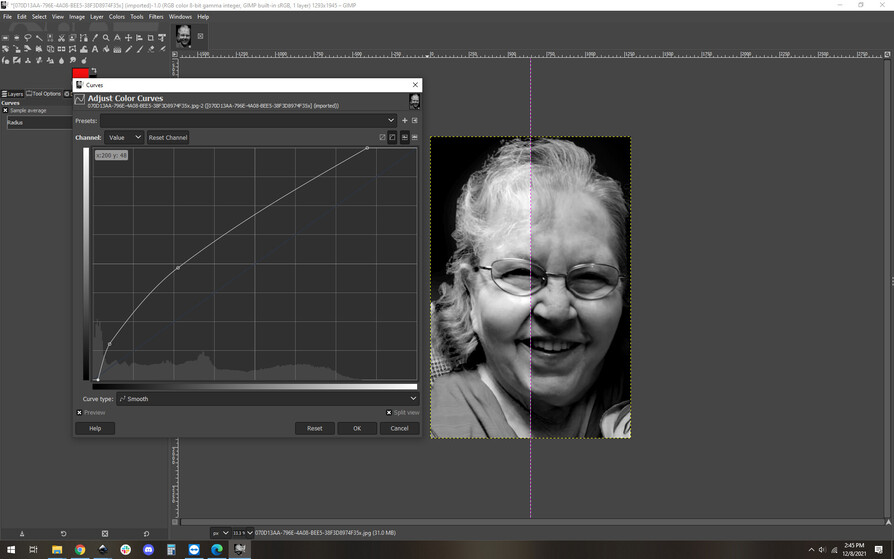
The curve goes flat at about 75% of the range. Adjusting the curve to set the white point around there looks like this:
already getting some better detail, but it’s still very dark on the low end, so I pull that curve up a bit to get more detail in the low end:
and the final result is here:
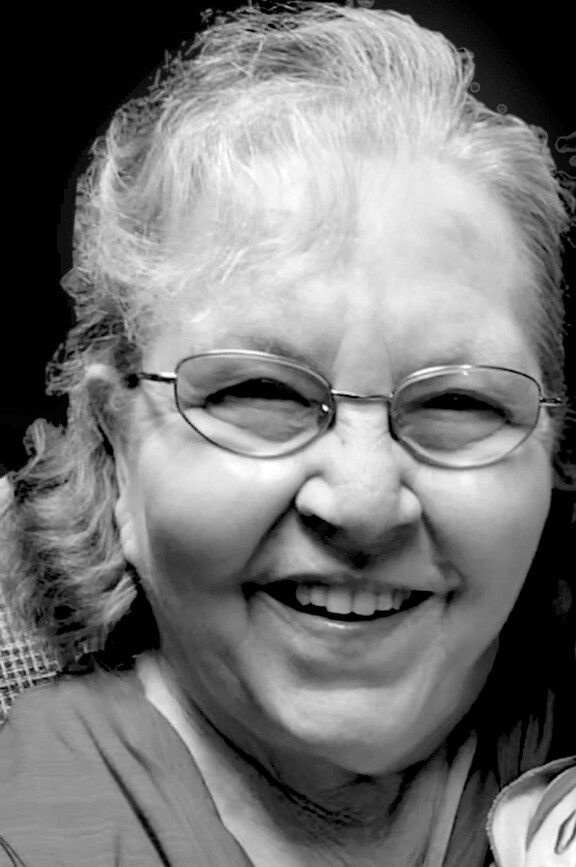
It feels washed out and overly contrasty to our eyes, but the laser will do much better with it.
Next step would be to add a frame if you like, you can put words on it as needed.
9 Likes
I look for the maximum useful range. If you can’t make out the hair coming down over her forehead, the it changes the photo a lot.
Also I never use variable depth for photos as there is only a very narrow rang at the top that scorches brown instead of going to black. Except that some places are not touched and others are totally cut down I find that dot works best and you can adjust away from it getting bad that way and every dot is the same color, just more crowded in dark areas than light like a newspaper photo and the higher the LPI the smaller and less intrusive the dots.
3 Likes
Lots of ways to approach this. I use vary power for everything, I think photos properly processed for vary power look better than with dots when engraving.
Personal preference, but in general I find that I get better results when using the entire dynamic range, regardless of the other settings or modes.
That being said, in this case, since the OP was talking about using proofgrade plywood, I’d go for dots in this situation. Plywood doesn’t handle varying power after a certain point, you burn through the veneer and it looks weird. I’d still use the higher dynamic range image to do it, but I’d use dots.
3 Likes
Especially with dots if you get few to no dots much detail is lost, usually where you need it most to see detail, I did not look at the curve but it did not surprise me. Unless it is all very light so as to not go deep, a normal photo has some weird effects caused by shadows where in small enough dots they work fine.
3 Likes
i prefer photo engraving on unfinished wood. any very light areas will get a little weird when you engrave into but not through the finish. or when you get through the finish, but not as deep or dark as you would on unfinished wood.
5 Likes