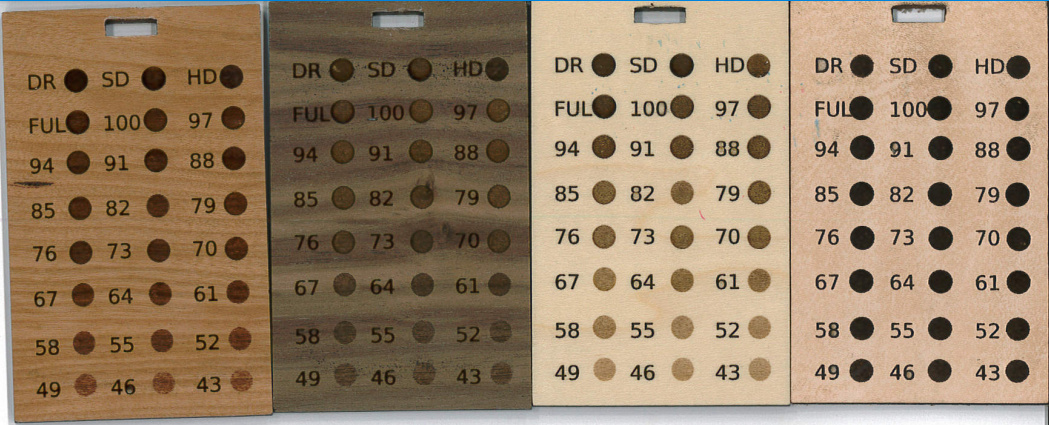
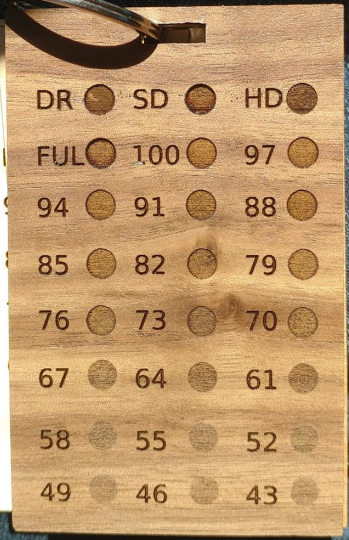
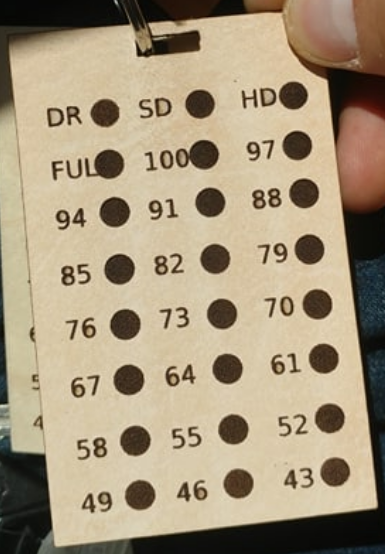
Made these to test variations in color in photo engraves. I like about three colors in the engrave: “White”, “Black”, and “Somewhere-in-the-middle-of-white-and-black”. I like that these give me a visual of what it will look like before I’ve started making something. The numbers are for power setting. I kept the speed full for everything.
I’m going to have to make another for Leather that starts at about ‘50’ and goes to about ‘0’ because pretty much all of the settings shown here are different depths of “black” lol.
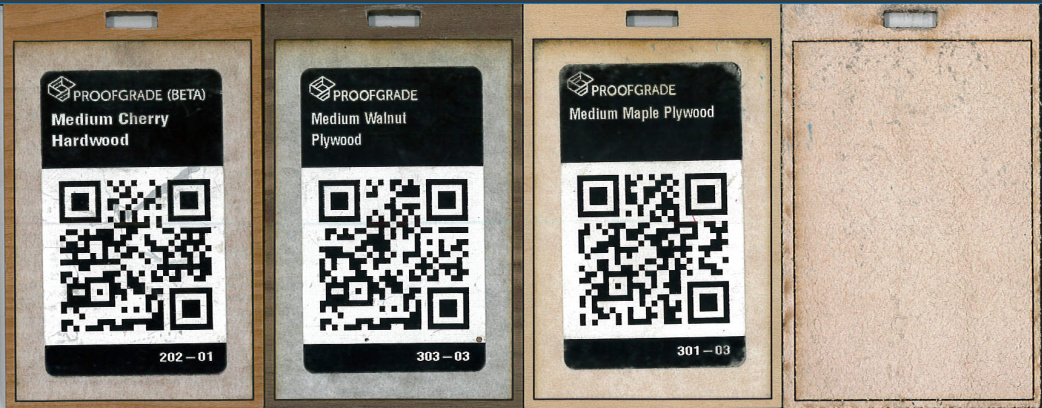
Edit: Noticed that there are new Materials in the shop: Red Oak? Poplar? Basswood? Yessssssss.
have to say I love not only the fact that you have to test pieces but the spare id’s for the proof grade, I should do this! with my luck I cut the label in half the first cut on every sheet it’d be nice not only to know the settings but to have a id to stick in with the material to save me two seconds to find the material in the list.
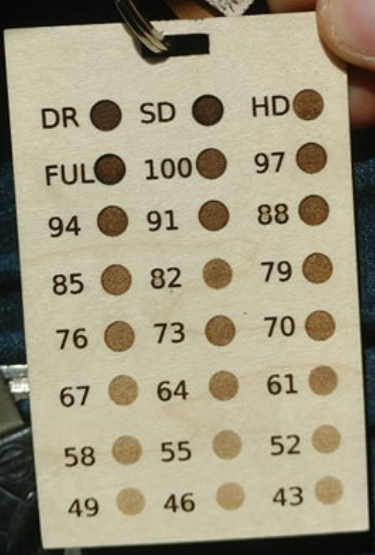
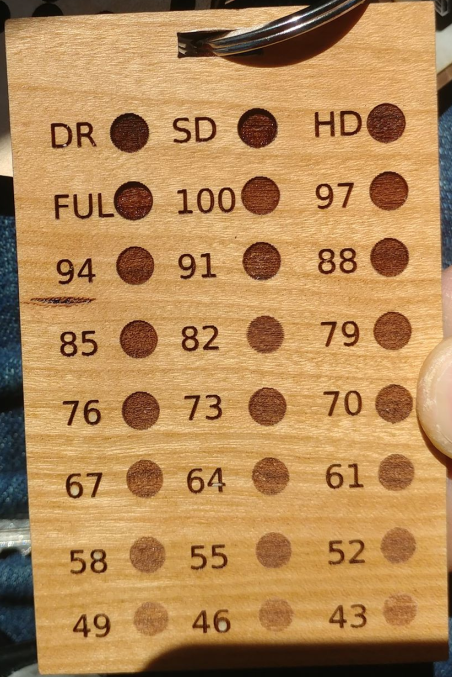
wasn’t too bad actually. i set it up once (once i had figured out the ideal file lol) and then just kept changing the pieces. the proofgrade settings changed per the material and the manual overrides stayed the same. They look (and feel) 100 times better in person though. They are hanging on my keychain for inspiration (and because I miss my laser when I’m at work…)
What do you mean? The power levels and speeds can (and have) changed. But they haven’t changed them for a year now when they made the switch from the initial % & ipm measurements.
Now 0-100 on the Power are the same for the Basic (40W) and Pro (45W) but Full is more power on the Pro than the Basic (that’s why if you post a setting for Full power it’s nice to let folks know if it’s a Basic or Pro model). This allows all settings below Full power to be shared between models.
The speed settings are just numbers and they’re not linear (e.g. 500 is not twice as fast as 250) but there’s a spreadsheet they have out there if you’re really interested in how fast it’s going.
All that being said, if you create one of these for your machine & materials it will be consistent over time.
Thanks. I had written down settings before that were updated. So I wasn’t sure if it would happen again. I did not realize it had been so long. Good to know.
they really needed to do the power change so Basic & Pro users could share settings. I don’t know that the different machines are capable of different speeds (although GF suggested that was the case) so not exactly sure why they did the speeds at the same time. It might have been to provide more granularity in the settings vs. needing to use decimal places or to make the support of mm & in measurements easier for people - you won’t have to translate between ipm and mm per minute like you’d have to with their initial setup.