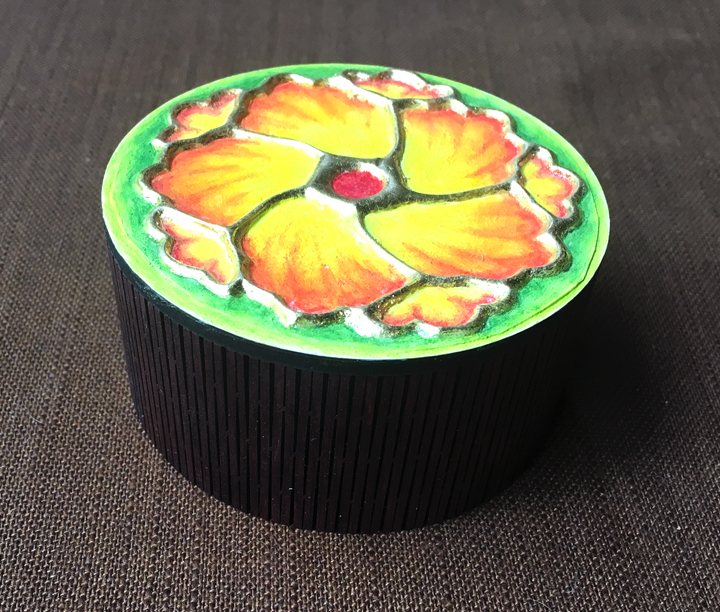
Here’s a different way to incorporate metal into your project.
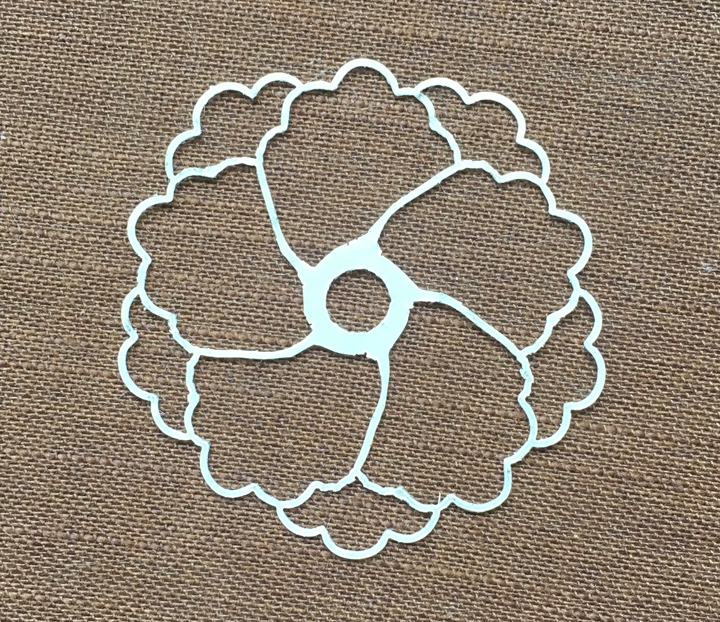
First, I created a stencil in 10mil Mylar, of the shape I wanted the metal in, and cut it on the laser.
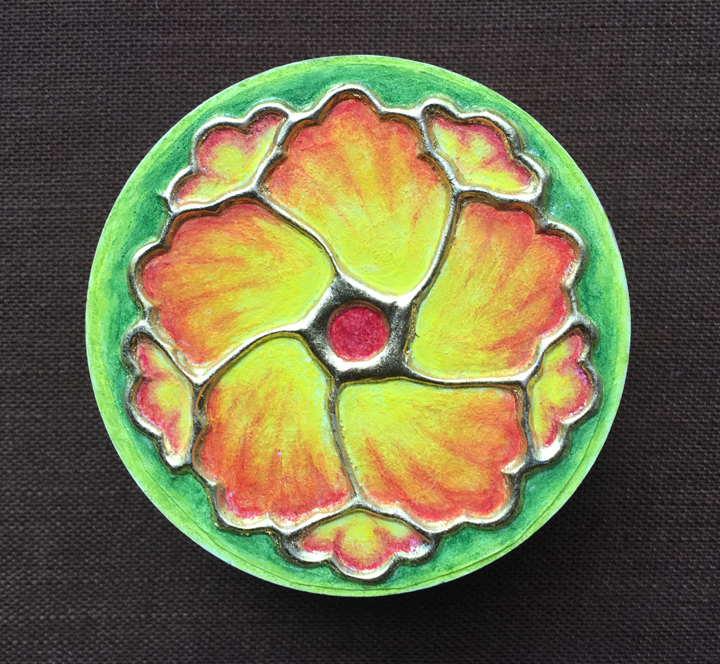
Then, I placed some thin (38 ga) soft tooling aluminum over the stencil on a soft surface, and rubbed over the top with a paper stump, to impress the shape in the metal. Moved the operation to a hard surface, and using paper stumps, a Teflon scribe, and embossing tools, I embossed all the lines against the stencil so that the metal would be raised in those areas. Then flattened the in-between portions with a paper stump. I wanted the metal to be gold in color so I gold-leafed it all. Then I painted gesso into all the non-raised areas, colored with Prismacolor pencils, and finished with workable fixatif spray.
The box was made in the same way as some of my other living hinge round boxes. I used Baltic birch, and colored it dark brown with alcohol ink.
This is really amazing! I loved reading your play by play technique, though I didn’t ‘get’ half of the terminology or materials. Another avenue of learning for me. Beautiful work!
This is a fantastic idea!
You may already know this, but the technique you are using is almost like repoussé.
The difference is that with repoussé you put the metal on a soft material (usually a bowl of pitch) and then tool into it with little punches.
I really like the idea of cutting the “stencil” and then forming the metal over it, thanks for the detailed writeup!
Here’s a tip for people playing with mylar: If you have two sheets that you want to weld together in a seam, lay the two pieces on top of each other and place a sheet of parchment (oven) paper on top. Then run a soldering or wood burning iron across where you want the seam. Works great.
Also, I would not be surprised if you could use parchment paper to soften the full on laser blast in order to weld the sheets together instead of cutting through them.
FYI. If you get your mylar from me, that may not work. I get mine with a special coating that prevents welding when cut in layers on the laser since we cut up to 5 layers at a time.