That is gorgeous! Love to see the ways the GF can be utilized. Great job! Thanks for sharing the process!
3 Likes
It looks amazing! Great job!
1 Like
You can get sheets (2ft by 3ft) of 22ga (.025") aluminum in the sheet metal/ductwork aisle of Home Depot. That might work too.
1 Like
Really cool technique! The sign looks amazing.
2 Likes
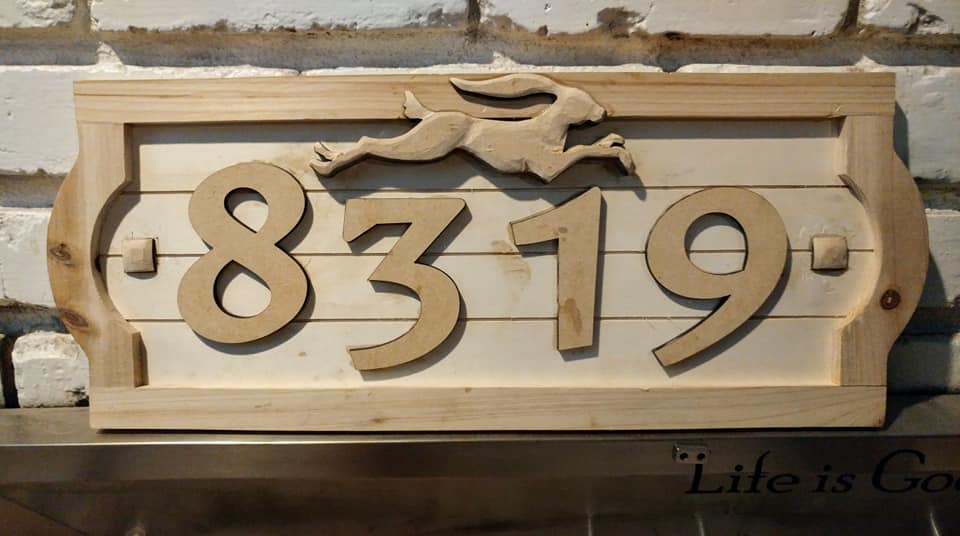
I’m slightly obsessed with signs and yours is amazing. Using the crisp prescision of the laser to act as the base for a hand beaten overlay is inspired. Must get me some copper sheet and have a go!
5 Likes
Simply outstanding! The care you went through to tool the copper really shows in the final product. Now I want a house number like this!
You can indeed use tooling aluminum for this. I did something similar on a much smaller scale with 38 gauge aluminum and it worked great.
6 Likes
Nice! I was thinking it would be an etch. Well, as my house is almost 100 and it needs some new numbers, I guess I have a new project.
1 Like
You can buy soft Aluminum flashing from most hardware stores. Much thicker than foil and I think able to chase down as he did, though perhaps not as tight as the much more malleable copper but experimenting could help. Also to make a negative and a positive and drive a car over it ![]()
5 Likes
So good. LOVE.
2 Likes
@ekla Hope you don’t mind me asking, did you use any adhesive on the copper or does it just stay in place with the hammering?
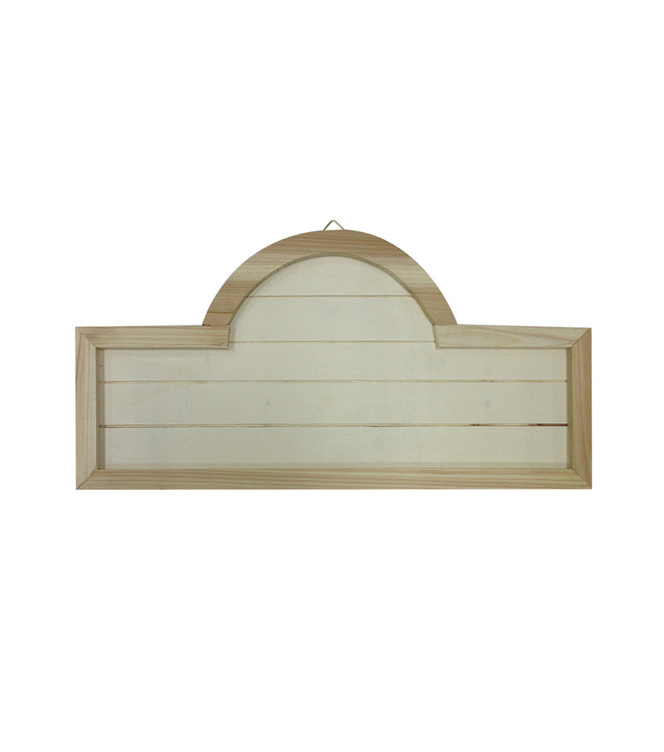
I found this cheap pre-made plaque today and thought it’d work well for this and you’ve inspired me to give it a try.
4 Likes
I don’t mind at all!
No adhesive needed for the copper, I cut the sheet about an inch extra large all around, and folded the edges to the backside, snipped corners, then taped those down blue tape (also keeps those razor sharp edges from slicing you as you work). I did glue my wood base parts together to keep them from shifting around.
Please post pics of your version  !
!
If you find you want to try the doming punches (handy for getting into the details) I got this set, with their usual HF 20% off coupon it was only $37.
https://www.harborfreight.com/25-piece-doming-block-and-punch-set-93539.html
9 Likes
Oh cool, I’m going to give this a shot for sure. I’ve never worked with metal like this so it’ll be an interesting learning experience. Thanks for the tips!
3 Likes
As if I needed yet ANOTHER friggin’ rabbit hole! Jeez!
Stunning piece. I aspire!
3 Likes

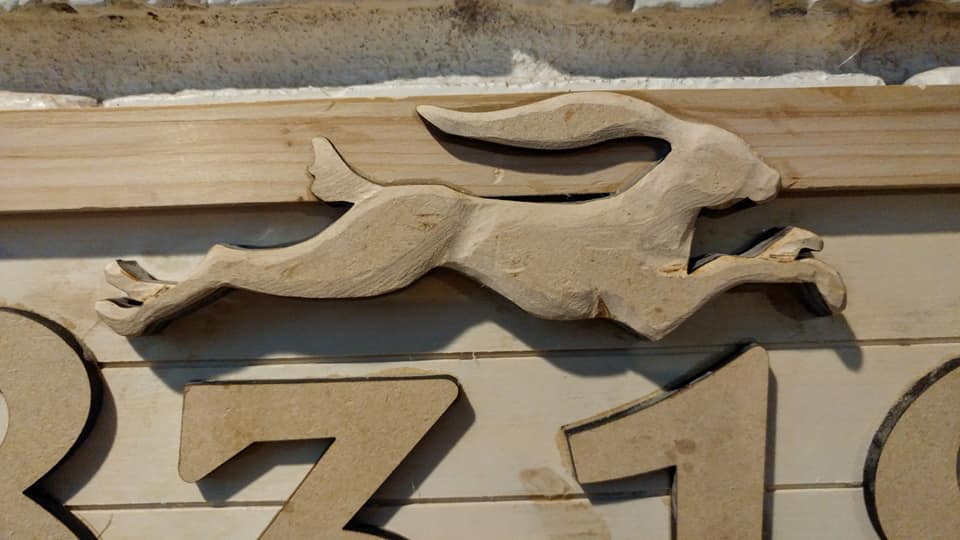
Beautiful! I especially  the bunny!
May I suggest going slow in the corner areas? (I poked several unintentional holes when I got impatient)
3 Likes
Please, suggest away! The rabbit is my logo and I think it worked well here, but I think I’m going to struggle with the depth of it. Oh well, ya never know until you try.  I’ll keep you posted! Thanks for all the help.
2 Likes
EDITED: Never mind, think I got her going now…
Oh @ekla! I have a question already  …Did you cover the whole thing at once and then hammer and stretch the metal into place. Or did you start at one end and lay the metal into place as you went? (Hope that makes sense.) I think it’s going to work better placing the solid sheet over the top and hammering it into place, but want to check. I have one shot and if I screw it up I’ll need more metal. Oh, and for those doing this for the first time, big curves on the frame are tough , just saying.
5 Likes
All at once  . Yeah those curves probably require a bit of clipping to wrap around to the back.
1 Like
I am anxiously awaiting photos of the finished product.
3 Likes
Wow, such a cool technique and great look! Thank you for sharing this.
3 Likes