So first of all I have to say that I am not an autoharp player. I only started using one so I wouldn’t have to sit on the sidelines at the old-time fiddler gatherings we go to. I know nothing about chords (my usual instrument is a wind synthesizer), so I learned how to read my husband’s fingers on the guitar and press the right button at the right time.
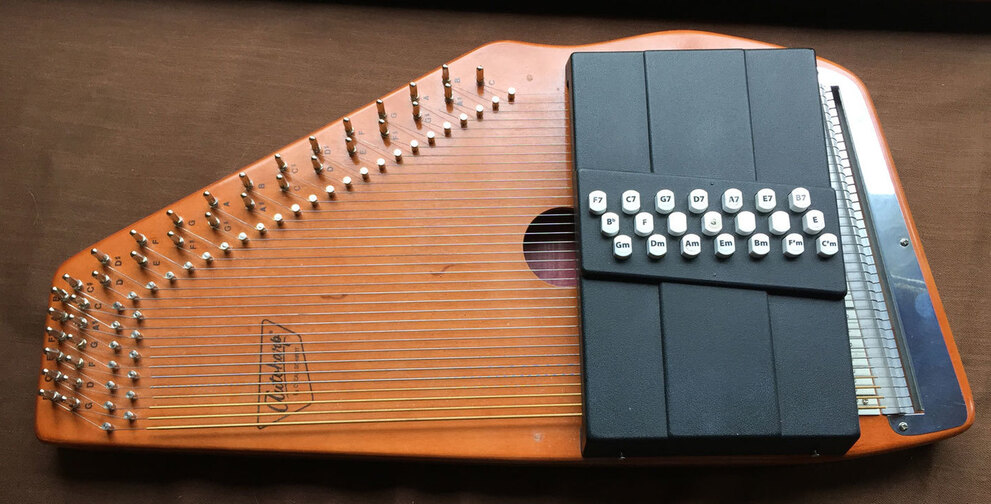
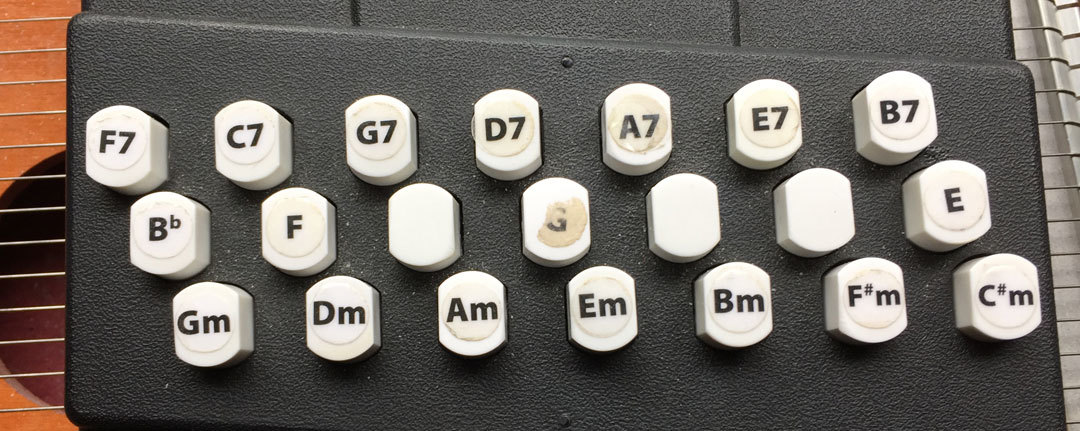
So we bought a decent looking used instrument a few years ago and my husband completely redid the felts with a chord layout that is most compatible with the kind of music we play (this is not the normal autoharp layout). At the time I made stickers for the blank buttons on my 2D laser printer to match the chord layout. It served me pretty well for about 5 years but gradually the stickers started to slip off:
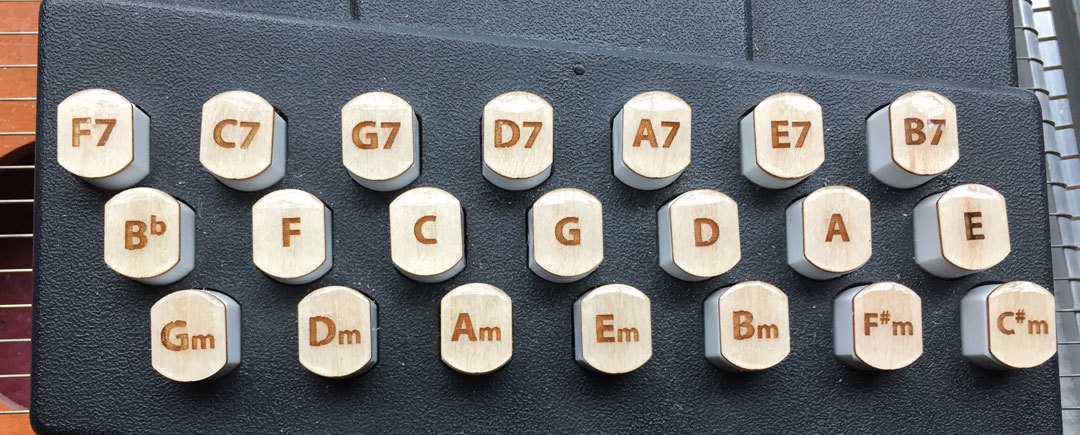
I’ve been holding off on fixing it (for about 1 1/2 years) thinking this would be a great job for the Glowforge! At first I was going to engrave the plastic buttons and infill with black something or other. But I don’t know what the buttons are made of, might be PVC, and I don’t have a spare to burn up in a test. On to Plan B: I decided to make button covers using Proofgrade maple veneer, engraving each button with the chord.
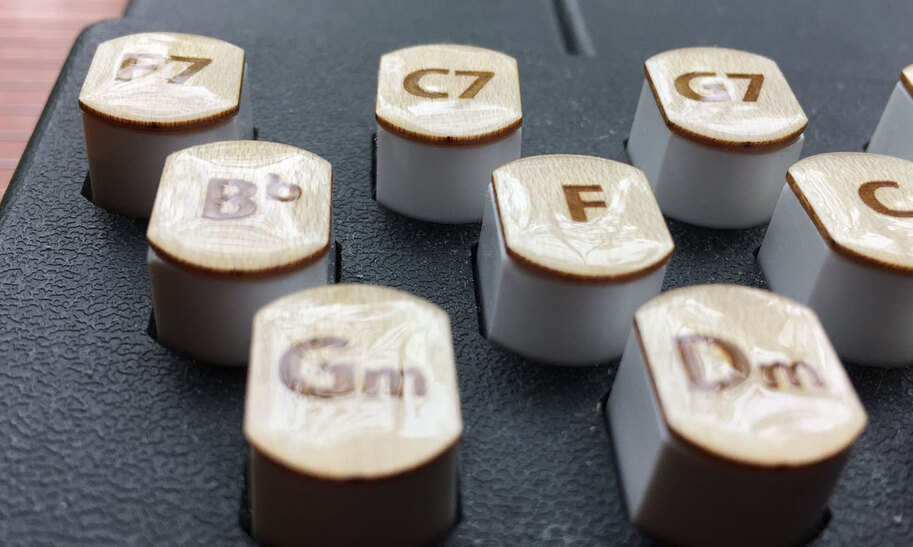
I spent a bit of time with trial and error, since I don’t think veneer is really meant to be engraved, it’s just too shallow. But I eventually got a result I liked, so I cut and engraved the 21 buttons. I did this a couple weeks ago; since then I’ve spent a lot of time experimenting with different finishes to give me something likely to stand up to hours of button presses. The winner turned out to be 3 coats of Krylon workable fixatif followed by two coats of Magic-Glos UV curing resin. The first coat has to go only around the perimeter of the button with a very fine applicator, otherwise all of the resin pulls up to the center of the button leaving the edges dry. Final result is not perfect but I think it’ll work:
Looks great and more importantly, has a function. The veneer will be much easier to engrave once they give us back the low power engrave settings.
Yeah, the wife decided a long time ago that she didn’t really appreciate the draw of hundreds of bearded old fiddlers playing outdoors until 3am for days at a stretch. She tried the mountain dulcimer to fit in but didn’t have enough interest. I’m counting the days until this seasons first gathering.
By the wear on the keys it looks like you play mostly in the Key of G and D.
This is so cool! I have a gorgeous autoharp and did some playing years ago. I can identify with the letters wearing off the buttons! My grandson has used my autoharp more than me in the last few years, but it’s nice that another generation finds it fun and interesting.
hm… neither is rice, but that hasn’t stopped Glowfolk
The buttons look great. Thanks for all the detail esp wrt the materials (I hadn’t considered resin on veneer, but I’m adding that to my list of things to try.)
yeah, when I did it last week it kinda sort worked, but not as well as I had hoped. But in that case the engrave was noisy enough to start with so it wasn’t as noticeable…