Presenting the Focus Height Ruler (duplicitous edition)

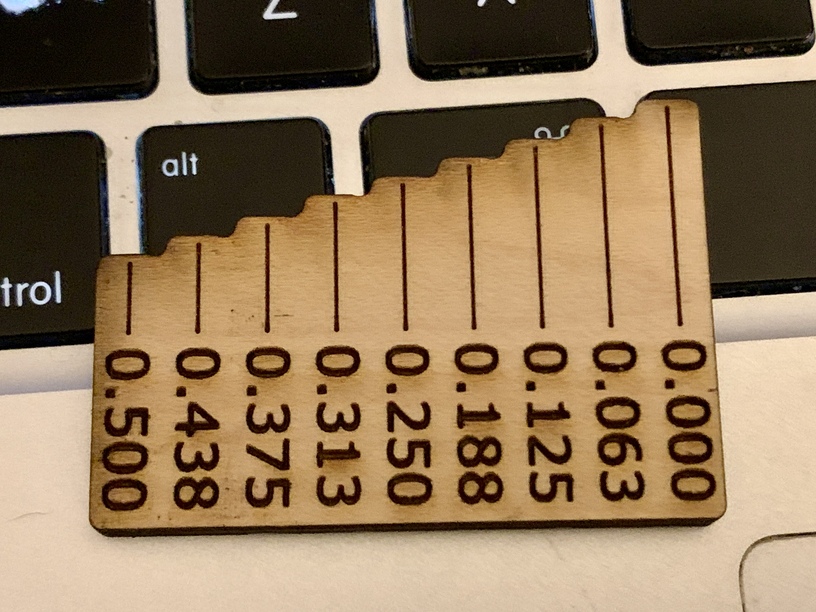
I present the ambidextrous version of the focus height ruler, to accomodate those disadvantaged users of the 3.24078e-20 parsec measurement system.

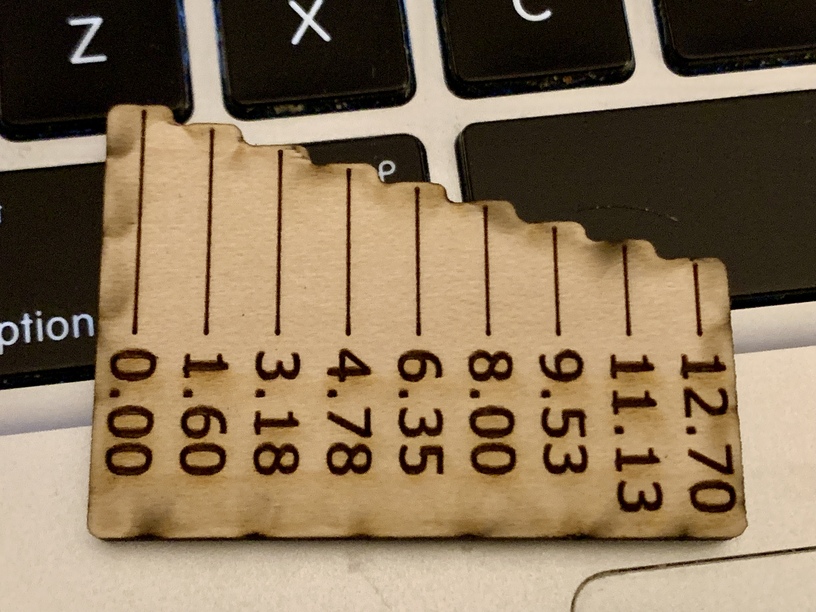
(The superior strictly colonial edition was shared here)

File is at the bottom of this post, and also here.

Printing is a two-part process.

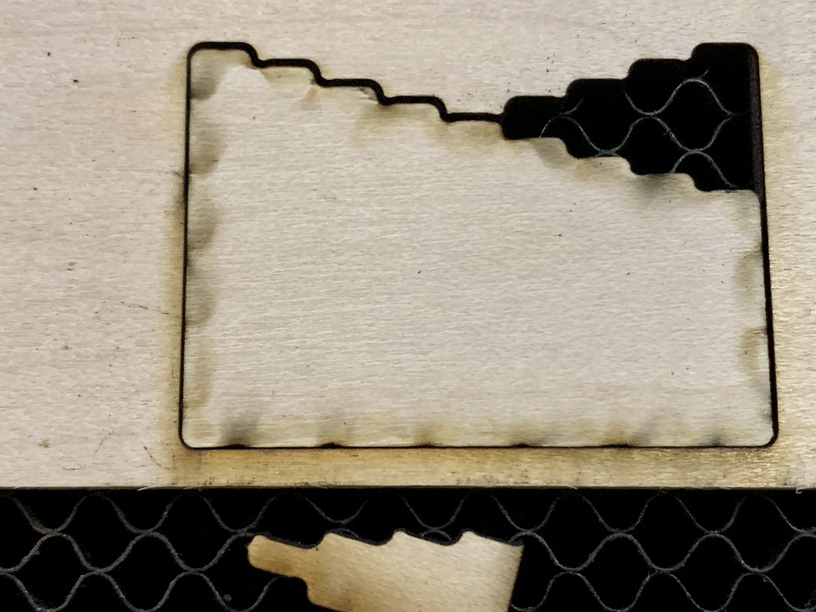
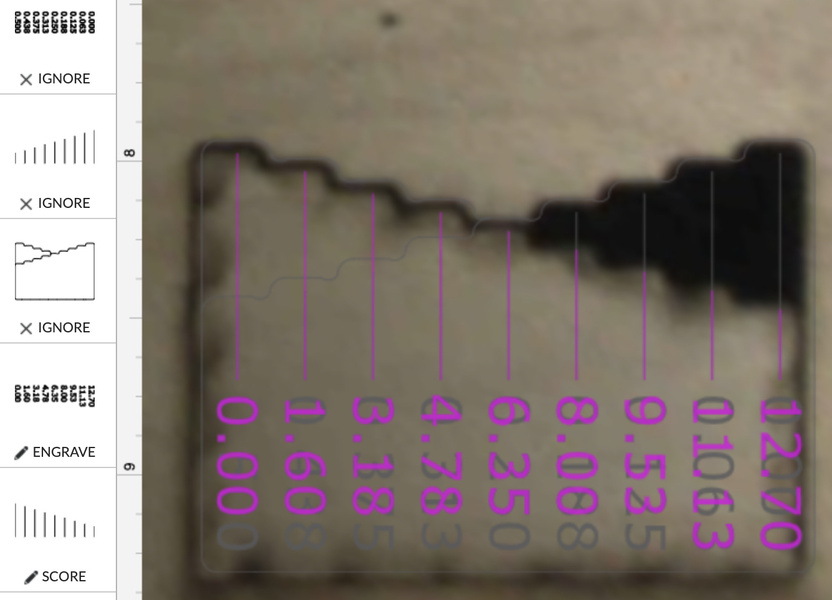
Act 1 - with your material SECURELY fastened to the crumb tray (this is important!), set the first three print steps to engrave, score and cut respectively, and the remaining two steps to ignore, as so:

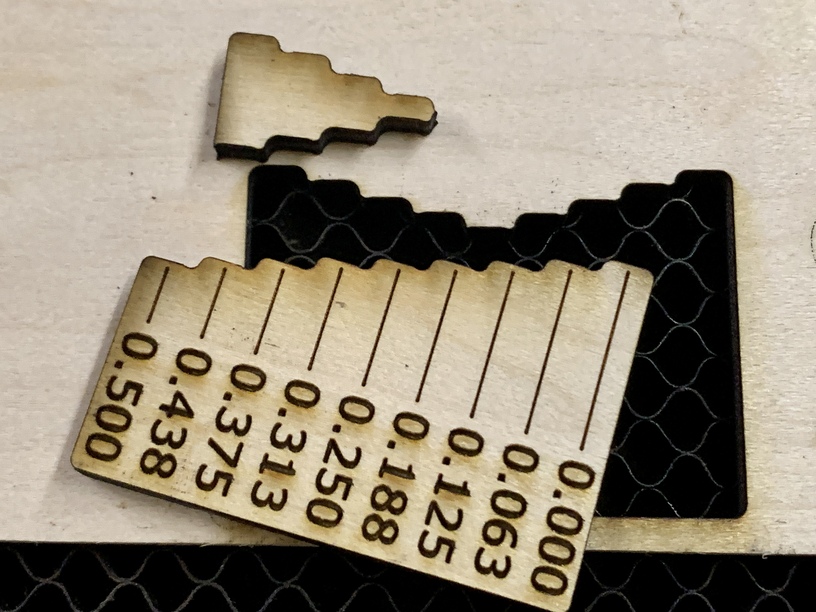
Act 2 - remove the cut parts being careful not to disturb the material, as this will be the jig for aligning the second print. Flip the big bit over, and place into the cut area. Don’t mind the gap.

Set the first three steps to ignore, and the last two to engrave and score respectively, as such:

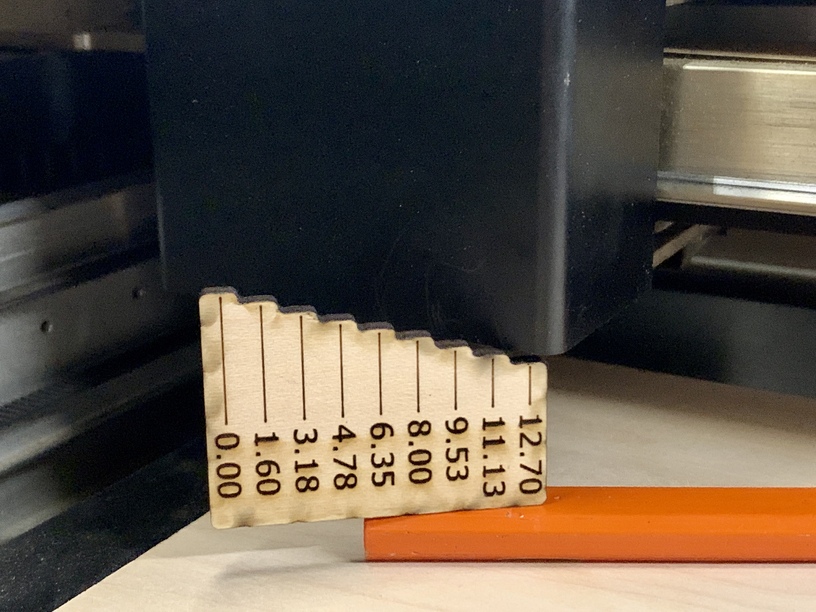
Remove with reckless abandon, and enjoy! Detailed use instructions for both with and without the crumb tray are over in the thread for the superior edition, but here’s a quick preview showing the power of the dark side:

(If you’re confused over which side is which, I might suggest sticking to Proofgrade materials…)

(Yeah, I didn’t mask the scrap I used. Sue me. It’s a functional tool, not a decoration!)

File is here → focus height ruler v.2.svg.zip (11.9 KB)

58 Likes

Nice work!

2 Likes

Very cool! I like the way you cut out that bit so you could flip the piece. So clever.

2 Likes

Thank you

2 Likes

o this is just what I needed. after making some adjustments to my machine so I can get whiskey bottles in it. been taking a lot of time to get things set up right

3 Likes

I"m in awe of everything people do on here. This is great!
Thanks!

2 Likes

Well done! Thank you for sharing!

1 Like

Hi! A little new to Glowforge - I just use the Auto Focus option. It seems to be working well. Should I not be relying on that?

It depends what you are working with. Irregular objects sometimes don’t lend themselves to using autofocus.

exactly how or what are you doing to get this done? this sounds interesting :thinking: . what size bottle and do you have any pix or steps?
thanks in advance! :slight_smile:

1 Like

Well to start with I cut a hole in the bottom
Of our GF so we can get what ever size bottle
In it we want. At this time I am just etching one inch at a time then I have to rotate the bottle I am working on building a rotary system that will us the Y axes drive to rotate the bottle.

2 Likes

WOW, thats amazing! definitely not for the faint of heart :smiley:
great job! :+1:

Bravo

I think you tool is awesome, for some reason the file is not working for me will you email it to me please.

I’m having same issue. When I take it into CorelDraw it is all messed up.

FYI, there’s no reason to bring it into a design program - right click, save as .svg, and upload directly to the GFUI.

I thought the same thing, then scolded myself for never having thought of it before. Brilliant!

Wow! So simple, yet so very INTELLIGENT!!!