I’ve made a few name puzzles as gifts, starting with very simple painted letters, then eventually adding a little flair inspired by this awesome post https://community.glowforge.com/t/my-first-project-after-testing-the-gf-a-few-days-personalized-name-puzzle/45303
My son’s friend turned 3 recently so my wife and I decided to go all out. She’s really into Disney princesses, especially all things Frozen.
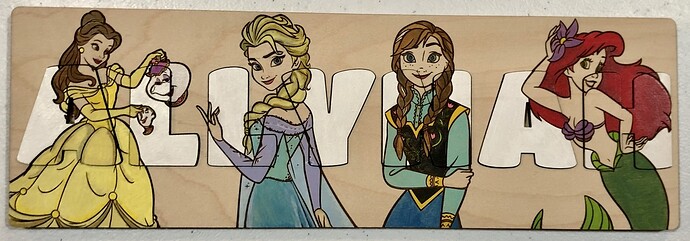
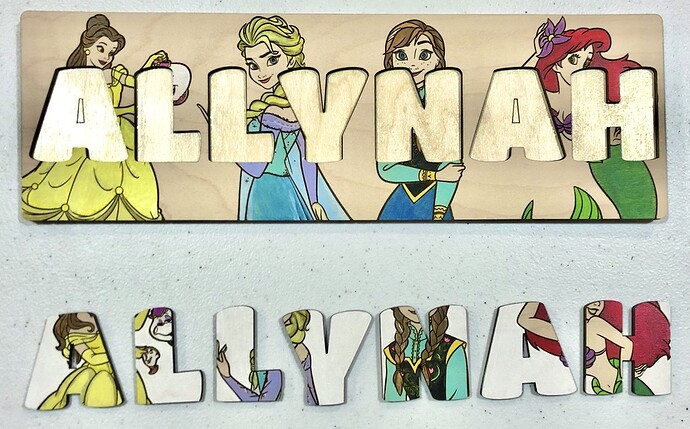
Finished product:
I did the design, cutting, layering and finishing. My wife did an amazing job with the painting. It’s the first Glowforge project we’ve worked on together since it arrived 3 years ago. She got really into it and is excited to do more now.
Luckily Disney has lots of online coloring games that make finding a workable SVG quite easy. After a little bit of work in illustrator they were ready to include in the design.
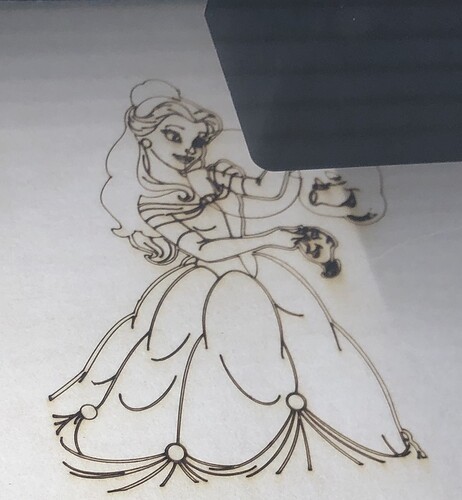
Originally I had thought scoring the characters would look nice, but I’m guessing I had an open path or two because the for some reason when I did this I ended up with a perfect circle scored over Belle’s shoulder. I couldn’t find the circle in the design in Illustrator, it didn’t show up in the Glowforge UI, and it wasn’t there when I switched to engraving either so I’m guessing it’s an artifact created by the server software when processing the paths to create the tool head movement. In any case I was wrong, engraving looks way better.
The characters are engraved into, and the letters are cut from a single piece of PG maple plywood, but because PG comes finished, which wouldn’t allow for painting, I had to peel off the tape, sand it lightly then add a new layer of tape. All this so that we could weed parts of the tape off individually for painting. If I had some unfinished boards on hand it would have been much simpler without the additionaly sanding.
The bottom is a layer of adhesive backed cork. I had to use a fresh x-acto blade to trim each edge because it’d start tearing through the cork pretty quickly, but sanding the trimmed edges smooth was relatively painless.
I cut the same sized lettering out of PG maple vaneer and inlayed them over the exposed glue side of the cork (which also serves the purpose of raising the letters slightly).
Then my wife painstakingly painted everything by hand with acrylic paints, including the tiny details, mixing colors and creating gradients in ways that absolutely eclipse my skill level.
Finally everything got a few coats of spray acrylic with some very light sanding in between.
Excluding the scoring mistake which cost about an hour, all in all I think we spent about:
3 hours designing
1 hour cutting/engraving in the GF
3 hours painting
1 hours finishing + drying time
We’d definitely do such fine detail again, but probably only for our kids next time ![]()


