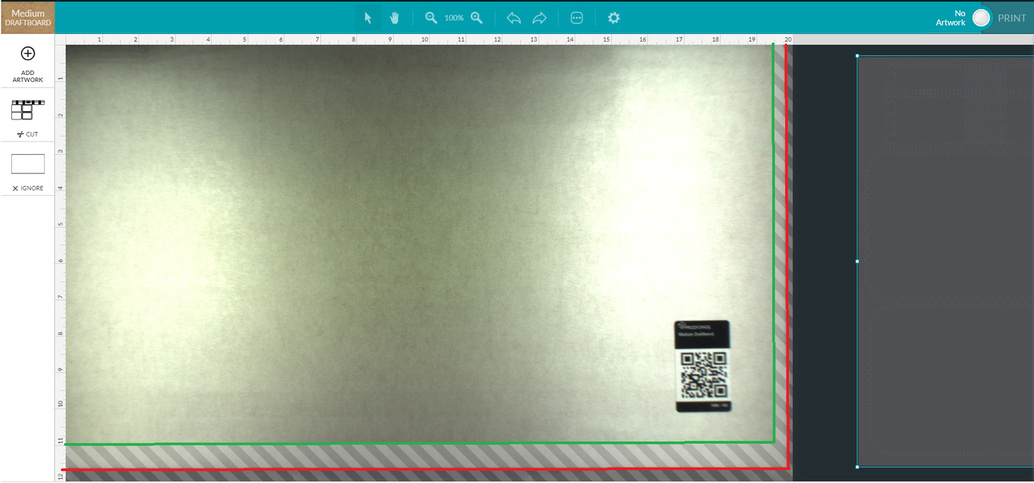
Which this actually doesn’t answer anything as we (the users) are still having this problem. There is so much space that we can use still, but it’s being blocked because the registered Proofgrade material is showing smaller than what the camera is actually seeing; resulting in nearly 20 sq inches of unused space (this area may vary from person to person of course).
Attached is my image of the issue at hand with the green lines showing the Proofgrade registered “picture” and the red lines showing what the camera actually sees. Mind you this board fits perfectly into the tray so the answer to placing the material in the center of the bed doesn’t help either as there is no other place it can go except center.
I’m not sure what part wasn’t answered. The “printable area” is what it is for the time being. Its reduced to avoid collisions while decelerating the head.
It’s one consistent size for cuts and reduces for engraves (slower engraves have more area, faster engraves have less area). It’s not the full bed width. The camera image displayed is being cropped from the raw image. It’s something they are also said to be working on increasing.
Sorry; seems my image didn’t upload and had to reupload it.
I do understand that the area is reduced for the time being, but the way the Glowforge handles it needs to be updated as well as it’s still giving the phantom area of “well this area can be used, but not at this time” making a bit of precious area unusable if that makes sense? While the material is at a good cheap price; we always want to make use of every bit of area we can even down to the last millimeter.
As a thrifty type I have found that if I use a one inch spacer on the right side of the material being engraved then I can cut/engrave right up to the extreme right side of the material.
Also, having the Pro model allows for insertion of the standard Proofgrade material sideways and cutting/engraving closer to the top of the material.
Hmm I will keep that in mind; thank you! Sadly we were not as fortunate to get a Pro model. While we would love for the extra power and length; we just couldn’t afford it.
I have a Pro now, but when I had a Pre Release unit, which was a Basic, what I used to do was place the 20x12” material in the bed and cut a vertical line about 4” from the left for as long as I had printable area, then turn the material 180 degrees around and repeat the cut for any remaining uncut bit. There might still be a little bit uncut but you can crack that off by hand. That way I had a 4” piece and a 16” piece with all of it cuttable. I tend to make really small things so that worked well for me.
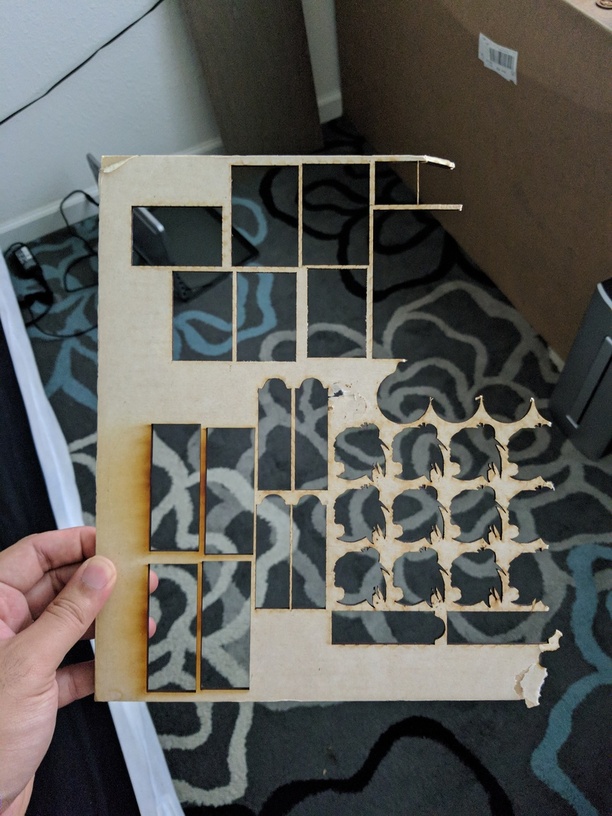
I’ve played with the idea of what cynd11 has mentioned, but most of my projects are small enough that I’m able to break my PG up into smaller pieces like this after enough things have been printed out:
In the early months of the main units being sent out there were issues where the gimbal head would kind of bump against the side, for some this was only during calibration, and others it had occurred during prints. For me, I’m mostly alright with the usable area being slightly smaller than advertised, because what I mentioned is being avoided, and for now, it’s still technically in a “beta” stage meaning things are still coming and being prepared for improvement.
Hopefully you are able to workaround this issue and continue to do great work with what you have, and who knows, maybe soon they’ll update it to be able to use the entire bed
Do they same thing using the depth in the back. Slide your piece in so you can get to the bottom - about an inch in from the front of the tray. Then to use the top material, flip it over and slide the cutout end toward the back under the gantry.
 's idea of cutting a little section off, but I always forget to do it when
  strikes.