Hello friends!
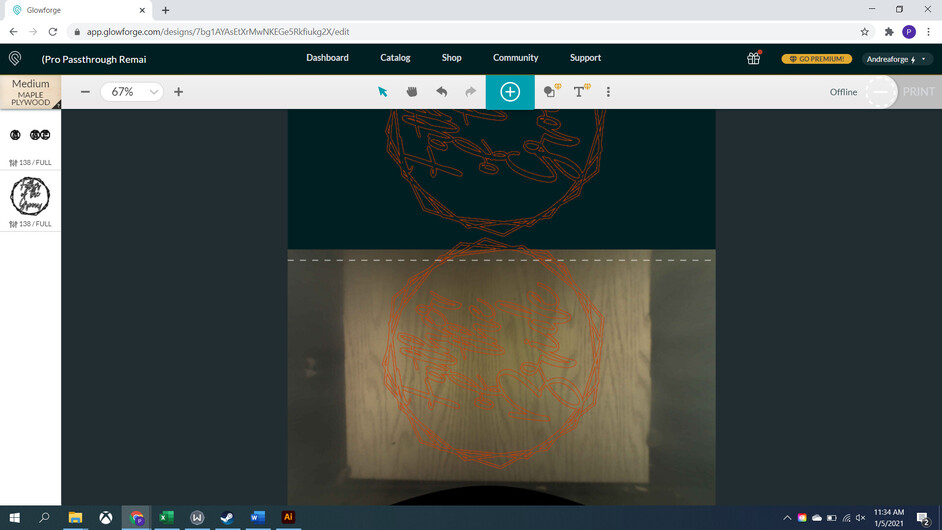
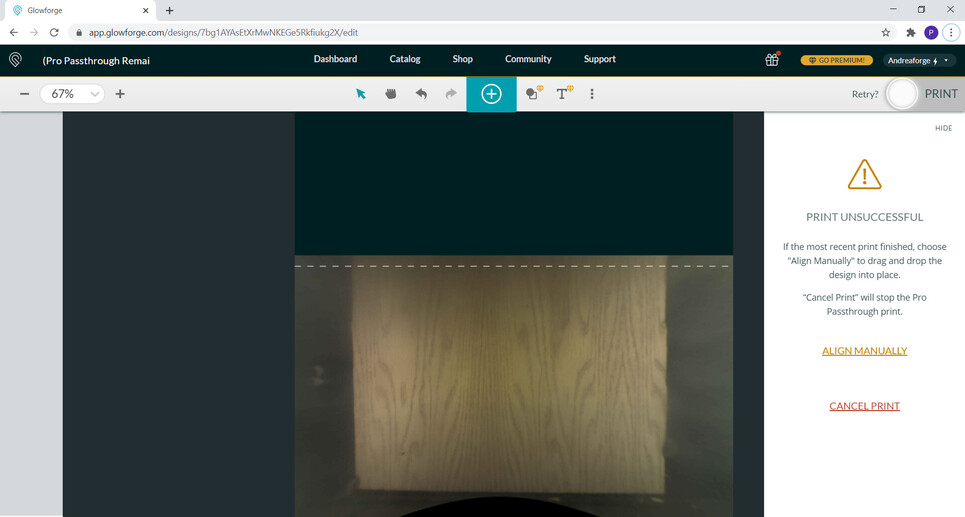
My GF is awesome, and I wanted to take the next step in our relationship and use the Passthrough Slot. However…it doesn’t seem to want to work. I can’t get it to even try. I set it up, and I get this error every time, then it wipes out the print. Aligning Manually seems to delete the section in the GF at the time. It never prints.
According to the instructions, you should not have any section of art over 8" or the camera will lose track of it. It seems to me that you have too much of your design in the first section, but without seeing the side guidelines I can’t be sure.
You might want to mask the material. It has to set the height and identify the design in order to match it, and that has a pretty strong grain showing.
(Don’t know for sure that’s what’s causing it, but that would be the first thing I tried.)
I tried both of these options, as well as (a) using a new smooth un-grained piece of plywood, and (b) a boring old square box as an image. It just keeps failing. I’ve tried moving the sheet all over, in, out, back, front. Nothing, always a failed print
I’ve extracted the log files from your Glowforge to review your most recent prints, and compared it with the details you’ve provided. It looks like your Glowforge is having trouble communicating with the printer head. There are two key connections I’d like you to check for me.
Could you please do the following?
Turn off your Glowforge.
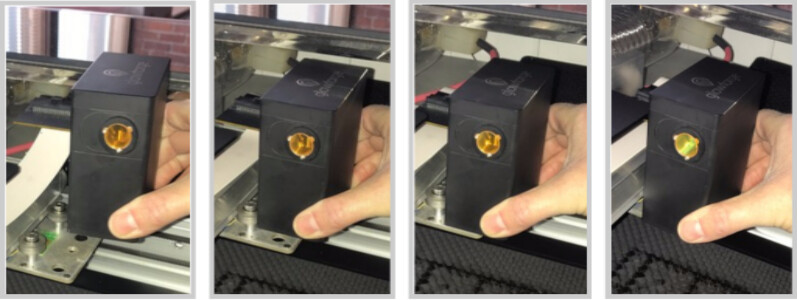
Holding only the finished black surfaces, grasp the printer head as shown. Pull gently up and back to disengage the magnets and remove the head.
There is a small tab in the center of the wire ribbon. Push down fully on the tab to release it, and gently pull the wire ribbon plug from the printer head.
Pick up the printer head and wire ribbon. Make sure the tab on the wire ribbon is facing up. Slide the ribbon back into the head until it clicks.
As shown, lower the printer head over the metal plate so that it rests next to the two round posts. Then push it gently away from you – you’ll feel a “click” as magnets pull the printer head until it sits snugly atop the metal plate.
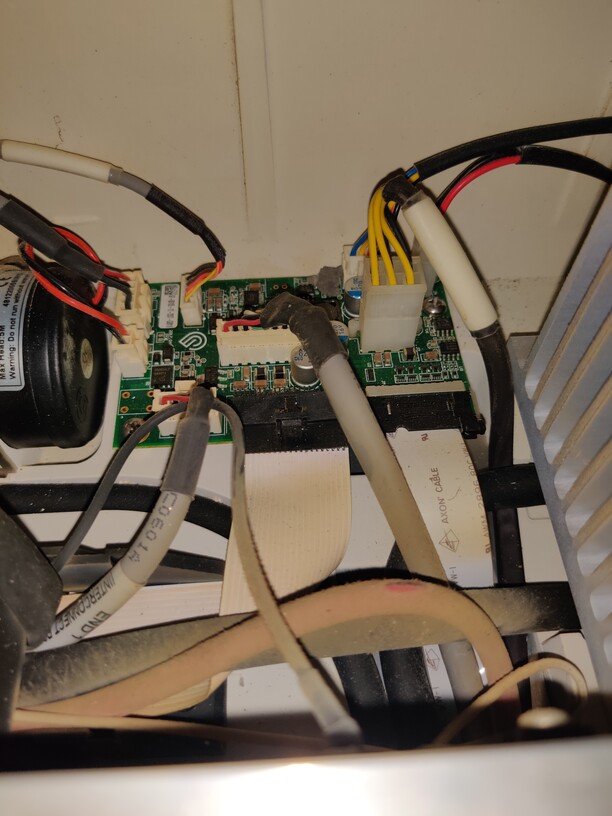
Take a photo of the circuit board. If the cable I’ve indicated above with the red arrow appears to be loose, please reconnect it and try printing again. This cable should ‘click’ back into place.
Hello,
I checked both of those connections, and they seem good (see attached). I also tried to set up a print for a “one page” passthrough, just to see if going outside of the frame was the problem. That print did not work, but when I did the exact same thing with the passthrough slot off, it worked.
Thank you for taking the time to work through those instructions, and for posting these photos.
Unfortunately, it looks like your unit is experiencing an issue that we can’t resolve remotely. I want you to have a reliable unit, so I’m recommending we replace this one. I’ll be in touch via email to sort out the details. I’m so sorry about the bad news. I’ll now close this thread.