If you read back up this thread, there are a few lists of tips that Jules and others have posted that have helped. I have not had great results ( my machine seems to be not great with this feature) but these tips seemed to improve my batting average. Here is what comes to mind but I suspect there are a few other gems worth finding in the prior 200+ posts on this.
position the work towards the left
control the lighting (I block out external light when the photos are being taken or pondered)
make sure your materials are flat and well supported
clean the optics on the bottom side of the head (those are what are used to see your parts)
make sure your transition at least 3 inches away from the front door.
Also be sure your material is light colored. Either actually light colored material (Light colored woods, bright acrylics) or masked with light colored masking material.
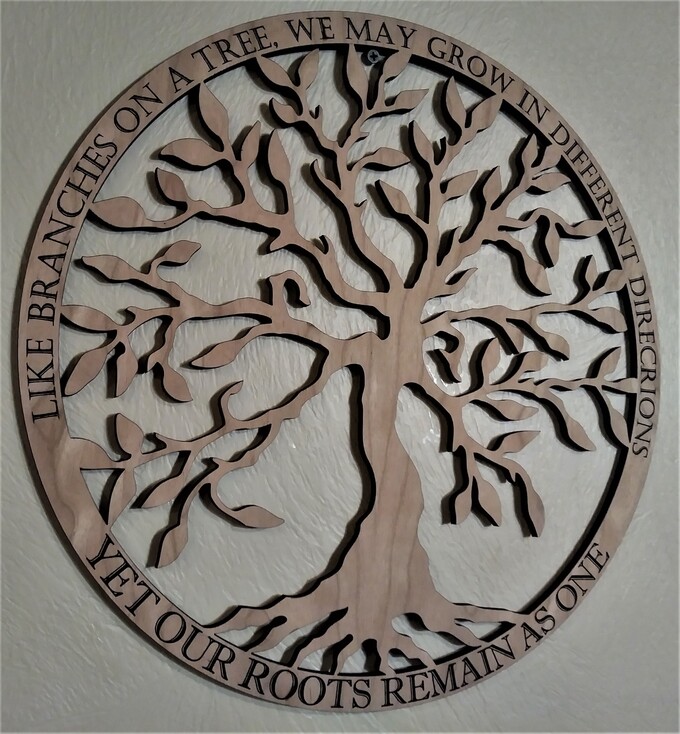
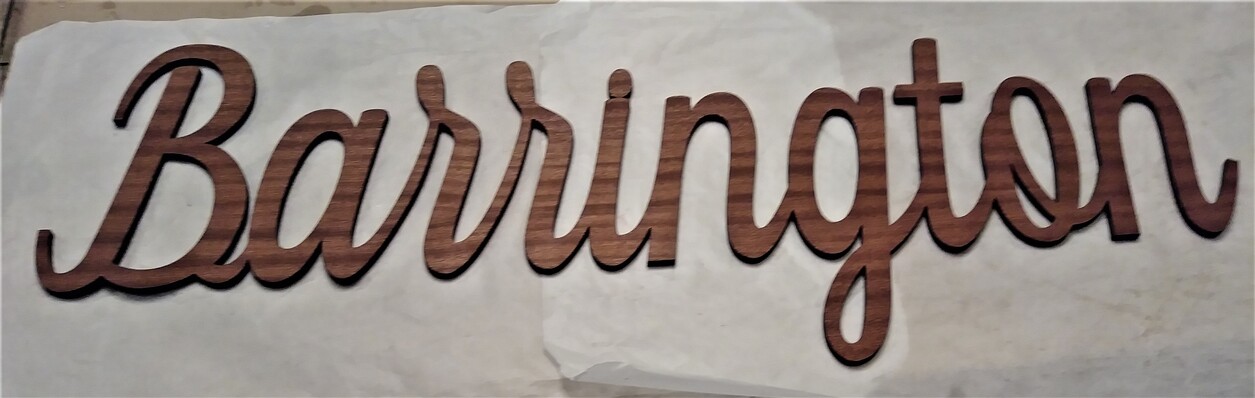
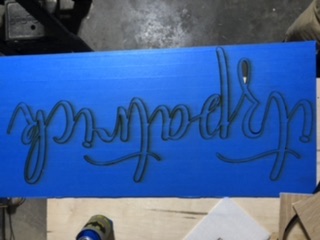
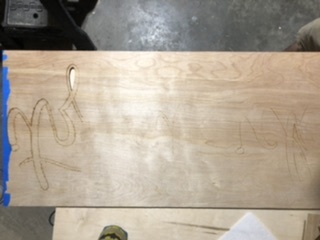
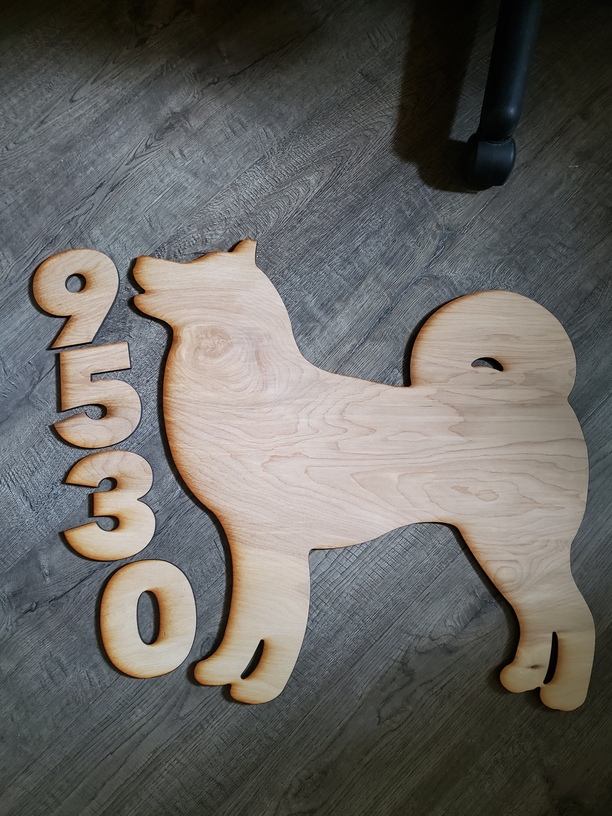
I am impressed with the new passthrough beta. Snapmarks was a struggle and this made it easy peasy to cut and engrave larger items. It does take patience to allow the GF to do what it needs. I have cut and engraved a 19 x 19 tree of life ( 1/4" Cherry), Came out perfect, except for my spelling error, Check out the great spelling of Directions. Oh Oh!! Do not move it, do not open the lid unless it says you can. I did a 36 inch family (1/4" Sapele) name last night, It did 5 separate alignments during the process and aligned everyone perfect. Took about 25 minutes total time. keeping your material as straight as possible is crucial. The material is used for the 36 inch family name was 40 long x 12 wide. To keep the material straight when it told me to move it, I use an new set of honeycomb bed pins. I adjust the material on the bed so that the edges of the bed pins are tight against the edges of the material. This way, when I pull the material out the front of the GF, it keeps everything straight. This process for me, works well. I have had a couple failures, but it was purely operator error and was a good lesson in patience. “BE PATIENT”, let it do it’s thing. It will go thru the alignment a couple times on each section. All in all much, much, much better than snapmarks. Can’t wait to do more larger items.
Although we would typically want to give it the maximum chance of success, and I also normally use pins to help guide the material, during testing I have intentionally moved the material so the steps were angled, and had perfect results as well.
The passthrough feels like a bit of miracle, and I’m grateful for the work the team has put into it. Wanted to share my bug experience, no response needed.
First project was super simple, about 30 inches long, the top of a canoe paddle. Needed to make two.
I set it up, did the first one, it worked perfectly.
Repeated the job, this time had the following bugs:
After the first cut and shift, it had trouble aligning. I had it try three times, with slight adjustments on my end between each one. Finally, I hit “Align Manually”. Instead of giving me a chance to align manually, it simply bailed. It turned off the setting for Passthrough Beta and put me back into the standard UI, lost track of where it was on the job and gave up.
I decided to try to save the cut by putting the wood back to step one and starting over.
Turned on pro passthrough, the GF camera refused to work. Showed a void instead of the bed or the wood.
Opened top, no luck.
Restarted GF. No luck. Same with the second time. Then I refreshed my browser and that did it.
Started the job again, but when it got to the second step, it skipped it and printed the third step instead, as if the job was only 20 inches or so.
I can finish the project with a saw, but thought you’d want to hear about the buggy behavior.
I got the pass through beta about month ago and a trend I am noticing is it has trouble if you want to run multiples of the same pass through file. The first full project runs perfectly but the second project locks out after the 1st cut. Almost like it knows it already ran the second cut once. I have found if I want to run multiples after I do the first I back out and open the file again it seems to reset the machine. then runs well. I also had some second or 3rd cuts that just didn’t look aligned- I tried re align several times even moved the wood again hoping to get a better picture, but since I had a spacer piece of wood on the left and knew that was all aligned and moved through evenly I finally just pushed the “I believe” button and it did line up well when cut. Overall I am super happy to have the pass through Beta and it is working about as I expected when I initially Bought my machine. I call it a win!
If I applied for the beta testing of the pass through software, how long should it take for me to hear back on the application? I am so excited to try it. My current software isn’t as user friendly on making my cuts useable for the pass through. Crossing my fingers I can use it soon!
They’ve never said, nor guaranteed that everyone who applies for the beta gets invited. There are hints that it depends on specifics of how each machine runs - how suitable it is for testing and whatever it is that they’re interested in measuring back at the mother ship. Some people get invited right away, others months later or still not yet. While you wait, play with your machine a lot and run the camera calibration process to have fun and give them lots of data on your machine.
I have been running into issues with my cuts not going all the way through using the Pass through software. The first cut segment works perfectly. Cuts all the way through with no issues. And the cuts after that do not cut all the way through. No settings are being changed. The wood is fully flat to the crumb tray using hold down pins. And the rest of the wood is supported on both ends to ensure bowing does not occur in the middle.
I notice a lot of charring on the masking which tells me it is not cutting all the way through and just bouncing back up. Again, this only happens after the first cut segment. I notice that the first cut segment goes faster than the rest. Like the rest of the segments slow down. Also, the speed at which I set for it to cut gets changed after I start the process. It does not stay with what I set it at (I.e. I set it to 160 before hitting print then it will change to 163). Any suggestions?
You’re not the first to report what sounds like a change in focus between steps. They can determine from logs whether something unexpected is being sent to the machine.
I had the same issue with mine and ended up having to replace the unit. I received a new unit though and with the exact same settings that it used to not cut with, it cuts perfectly now so you might have a bad unit?
When I got my second unit though, I had to be re approved for pass through (took a a little over a week and a bit annoying since I had a pro and bought it specifically for pass through and had been approved on a machine that ended up not working).
Now that I have pass through again, it will not make a single cut aligned. Its more than a bit upsetting that I have had a pro for about 6 weeks now and the one reason why I purchased it over the basic does not work. When I contacted support they said, “well its in beta so go to the forum for help”. You know a $6000 machine that was purchased for a reason, get the machine and then being told its not fully capable yet seems a bit like false advertising. I see all the people on here having theirs work and think I might have another broken machine on my hands.
I watched the tutorials and read the instructors, but I cant even get a straight line or a simple 18 inch circle to cut perfectly through on pass through if anyone can lend some advice or help.
So far I’ve had success with the passthrough. The mouth part looked on the screen to be misaligned, but I went ahead and cut it the way it is. It came out perfect. The hardest part for me that I had to learn was not to be quick to move the material as soon as I hear the machine stop.
On my computer it says “taking photos, will take a few minutes”, so I have left it there until the message clears and says to move the material forward. But after that it says that it is unable to align the cuts and have to manually align it or try to re-scan the item where it left off at.
Even with a straight line or a simple circle, it would never read the cut and align and I am feeling like I have an over priced basic model now, especially since support wont help.
I can’t remember if it gave me the same response as yours. But I feel like I had something close. I found out for mine I had moved it over 8" so there was less than 3" of exposed printed cut (if that makes sense) and it wasn’t letting me move forward. So after it tells me to move it. I use a measuring tape to measure 8" and then push it through to my mark of 8". Then from the top, I measure to make sure there is at least 3" of print is still in the machine. When it was less than 3" of print exposed is when it gave me a hard time. Hope this helps. I apologize if it’s not the same issue as yours.
No that makes sense, I’ll try again and just not move it as far forward and post my results here as well. An issue I have with that is that silicone or plastic liner that guards the pass through is completely falling apart and makes it hard to push though, just another quality complaint I have about my unit.