Problem cutting near edge with Proofgrade

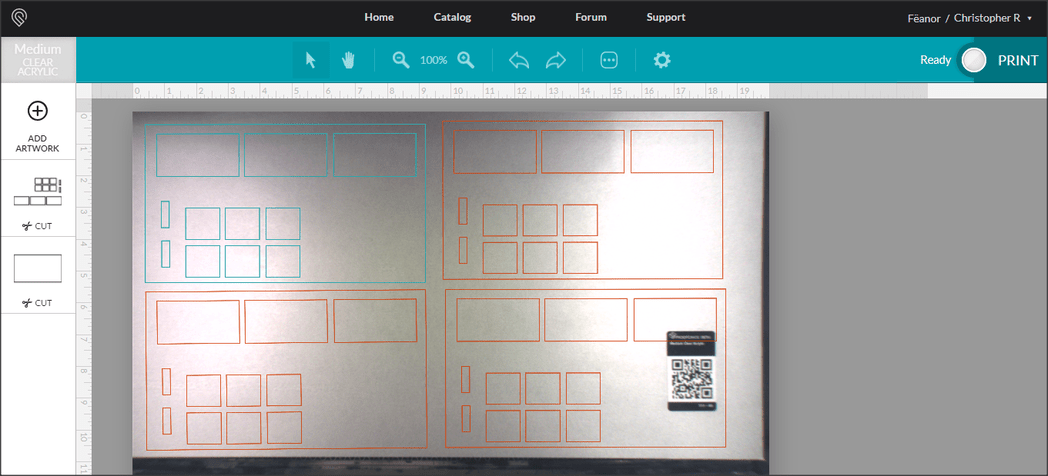
I have a very simple cut project for the medium acrylic Proofgrade samples we got. I tested the design out 3 times till I dialed in exactly what I wanted. I then did a single test with my proofgrade. I lined the cut up close to the edge, but still within the “Good to Print” zone detailed by the interface. I set the interior cuts to happen first, then an outer cut for the whole design. Everything seemed to go fine till the outer cut.

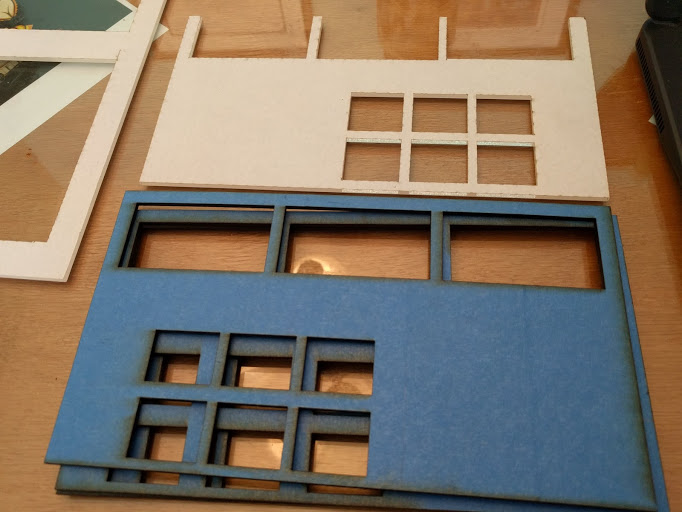
Blue painters tape where draft copies. White what Proofgrade Medium Acrylic.

There’s nothing worse than having your tests work and the money shot fail.

What seems to have happened is the interface approved a range that the laser head couldn’t reach. It then decided to do the best it could and cut off the top of the design.

I moved the same design down, now not trusting the UI and giving ample room for the next cut. it worked flawlessly.

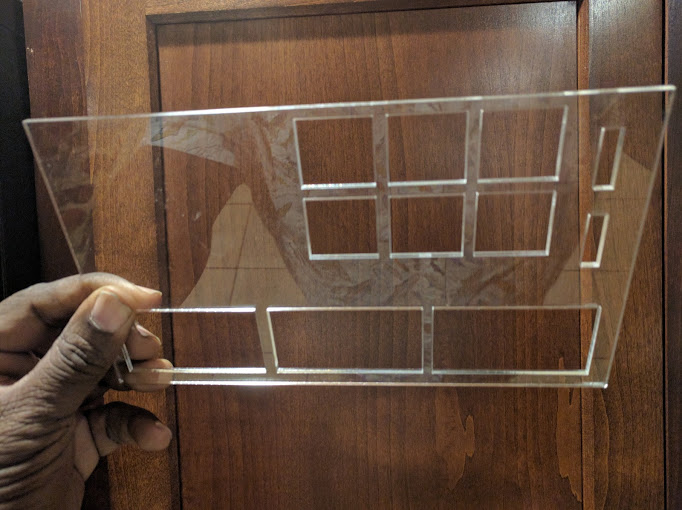
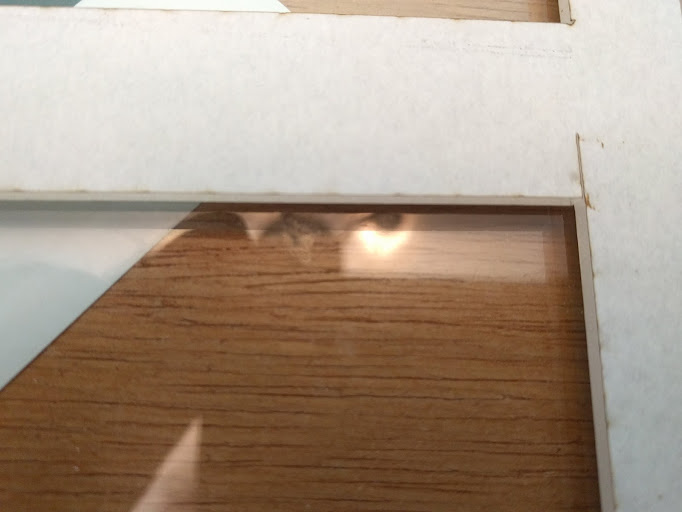
Upon closer inspection, I found the top had a rough, jagged cut and a burn in the corner.

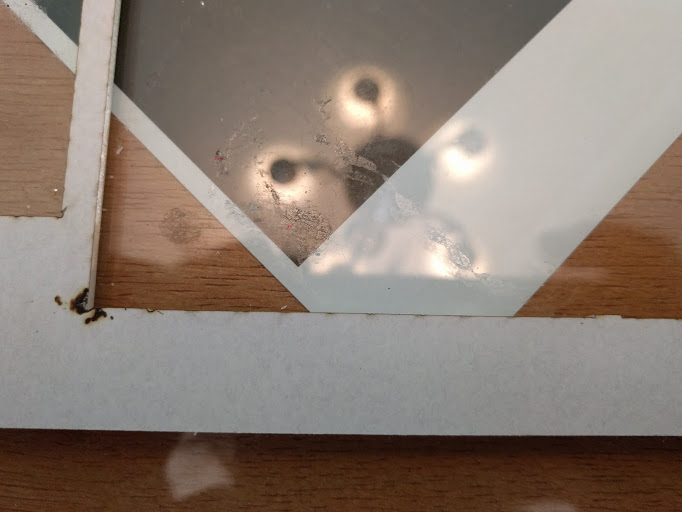
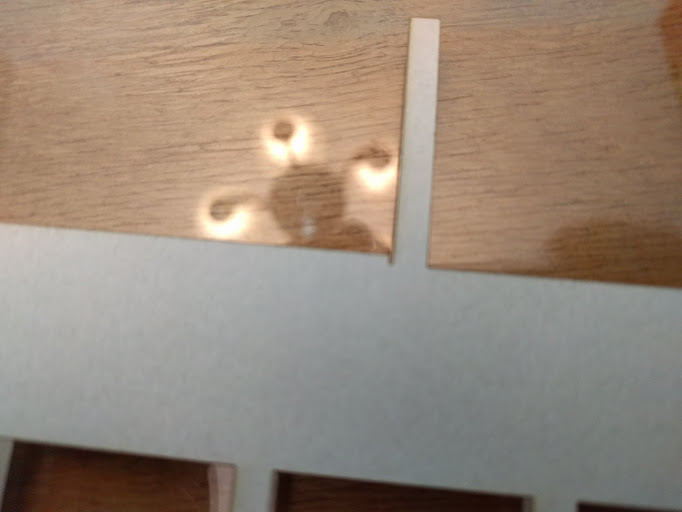
And there was an odd cut on the inside edge that should not have been there at all.

After doing a closer inspection of the inside cuts, I noticed one of the boxes near the top of the design shows the same inner flaw in miniature.

This leads me to several questions.

Is this a known bug? I did a search for similar posts, but it wasn’t exhaustive.

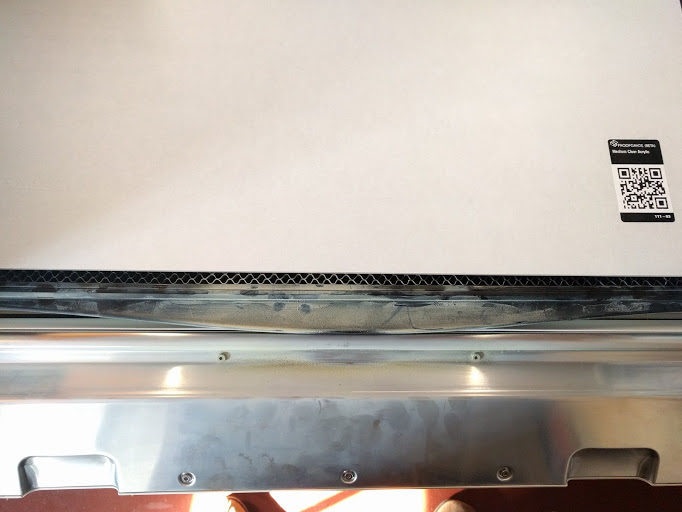
How should I line up proofgrade 12"x20" material to get the maximum material use? Toward the front of the grate? Toward the back? Or somewhere in the middle like I’ve done in this shot?

Is there something I should have done to avoid this? What are best practices?

If it is a bug, Any idea how long to fix? This is pretty bad waste of material using Proofgrade. I’m about to buy more, but would like to know I’m not tossing money away. I’d like to get as many templates as possible for each sheet.

Don’t know if this is a best practice, but because things are shifting as they test and roll out changes behind the scenes, and because I’m not crazy about losing material either…I tend to give myself at least a 1/8" to 1/4" safety margin when placing anything at the edges of the working area right now.

And there’s another reason I do it - flashback. If you’re burning too close to a material edge, the air feeding in can really make it flame up, and I don’t like finding overburned bits on my cuts either. Sometimes the paper backing is not adequate to keep from scorching the material underneath.

I wind up with a bunch of little leftover “stir sticks”, but I don’t often lose a whole sheet to a bad cut. (Bad designs, yes.)

No idea why the cut shifted on the Proofgrade though, that was some spectacularly bad luck, especially since you’d gone to the trouble to test the layout first. Engraving, possibly, but for cutting, I wouldn’t expect it. :neutral_face:

Anyway, I hope you have better luck with your next sheets, or that they find what caused the problem.

3 Likes

Thanks for the speedy reply Jules. As always, your aid is most welcome. Please note, when I say the “Top” of the material, I’m talking about a cut that started 4/5" in from material edge and ended up being 1/3" shorter than the other two cuts made with the same pattern. I assumed the in software guides would help here, but I guess there’s still a lot of beta to shake out as you say. I’ve got one more Proofgrade to try today. I’ll eyeball and extra 1/4 beyond what GF says is legal. Hopefully I can make multiples closer than what I did and squeeze 4 copies out of a sheet. Fingers crossed!


Spacing seem reasonable?

1 Like

Yeah, that looks good, you can probably even make them a little closer to each other actually, and give yourself a little more room at the edges.

(Can’t figure out why that first one cratered though, and it’s probably going to bother me. ) :smile:

1 Like

It worked perfectly! W00T! For now, I’ll just beware the edge. Thanks again Jules!

1 Like

I always find I tend to leave more room than needed in my design file between objects. If I can see a space in the GFUI, that’s enough. Those 4 boxes can definitely come in a lot tighter.

I find I can get really close to the bottom and the right edges so I tend to treat the lower right as my anchor point on fresh material. Then once I’ve swiss-cheesed the piece I’ll pull it down and in from the left so I get those margin areas to use too for small things :slight_smile:

1 Like

I’m thrilled that you have a solution, and I’d like to learn a little more about what happened. If you’re up for it, would you please:

  • Turn off your Glowforge (this is important to avoid damage to your unit)

  • Check for small pieces of debris or dust

    • Check the lower door to make sure it closes all the way. It may require some force to open, but open it, wipe any dust off the edges, and close it all the way.
    • Remove the tray and clean any dust or debris from the surface underneath. Pay careful attention to remove all debris from the four dimples where the tray rests.
    • Check the lid to make sure it closes all the way. Small particles of material, such as dust or debris, can prevent it from closing completely.
  • Open the lid and, using both hands, gently roll the laser arm to the center of the bed, and then back and forth about 3 inches in each direction.

  • Continuing to use both hands, gently move the laser arm to underneath the lid camera

  • Gently move the head under the lid camera

  • Turn your Glowforge back on

  • We included an extra piece of Proofgrade Draftboard with your materials shipment for troubleshooting. Place Proofgrade Draftboard in the bed and print the Gift of Good Measure in the front right corner.

  • Send us a photo of the resulting print.

Thank you!

1 Like

It’s been a little while since I’ve seen any replies on this thread so I’m going to close it. If you still need help with this please either start a new thread or email support@glowforge.com.