So I am trying to figure out what the engrave settings are for the different proof grade natural leather thicknesses. I have found that some presets settings work great non proof grade material but if I try to duplicate it, because of a slight difference in material thickness, I go down the rabbit hole of figuring speed/power/lpi/etc…
Not that I don’t love a challenge, but I would love a better framework as to where to start.
ANY help would be appreciated. 
1 Like
Engraving involves burning away a layer or multiple layers of material. Leather is leather and wood is wood, and there isn’t that much difference between Proofgrade and non Proofgrade material. What is different, is the thickness, surface preparation, and maybe masking.
Starting with Proofgrade settings for material similar to what you are using is a good place to start, then use a testing template such as this to dial in your settings: New material cut test method
In addition, reading this may help you understand the relationship of speed/power/lpi : Working With Manual Mode – Glowforge
Every piece of leather could require testing as the tanning process, color, use of dye and desired result could each be unique. There is no magic formula that is going to take the place of testing.
It is important that focus height is set properly. Are you using auto focus on material that is held perfectly flat against the honeycomb tray? Are you using calipers and inputting the focus height manually?
1 Like
Thanks for the info. 
Yes, I am using auto focus with it being held flat and I am using calipers for the height. I had already printed out Working with Manual Mode a while ago to familiarize myself with it and have made my notes.
I will definitely use the new material cut test template. I guess what I am looking for is the starting point, even for the test cut. If the setting is X speed, X power, X lpi for medium leather settings then I have a place to work up or down from when working with my other leather thicknesses.
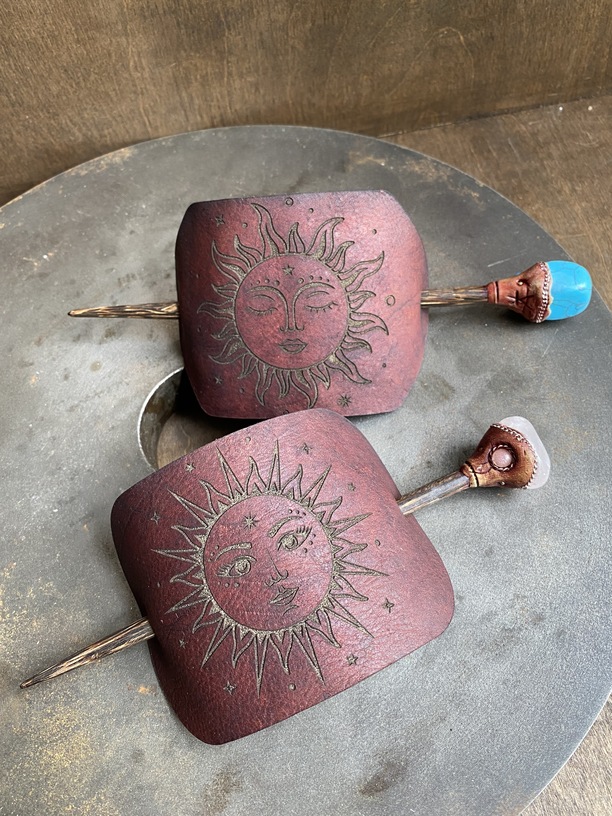
You will see from the image, the engraving on these pieces came out exactly how I wanted and I used the proof grade engraving settings. The next leather I chose was slightly thinner so the proof grade setting didn’t work at all. That is why I was hoping for those engraving settings to play around with.
5 Likes
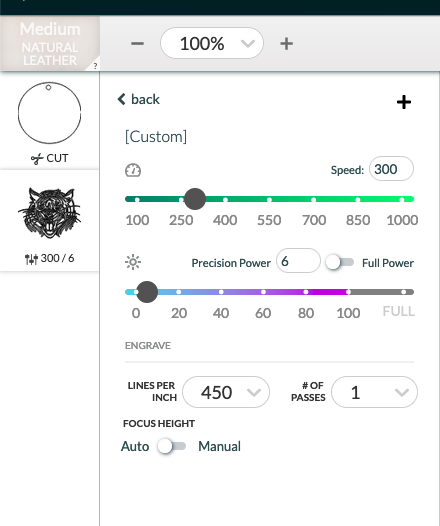
The Proofgrade settings are shown if you click them.
1 Like
Yep, you are right. 
I was trying to hard. ugh.
2 Likes
And now I see that depending on the graphic that changes too.
Thanks for your help!
1 Like
With leather, even PG, there is variation. I go with the PG settings and if it doesn’t come up easily I set a 2nd cut bumping the speed up by double. Sometimes it’ll cut all the way through the first time except for tiny strings. In that case, having an Xacto knife nearby can slice through those easily.