Just got my Glowforge (It smells beautiful) super excited to run this little guy I’ve waited 3 years for and off to my first print I go.
I tried to cut something and it failed miserably the first time.
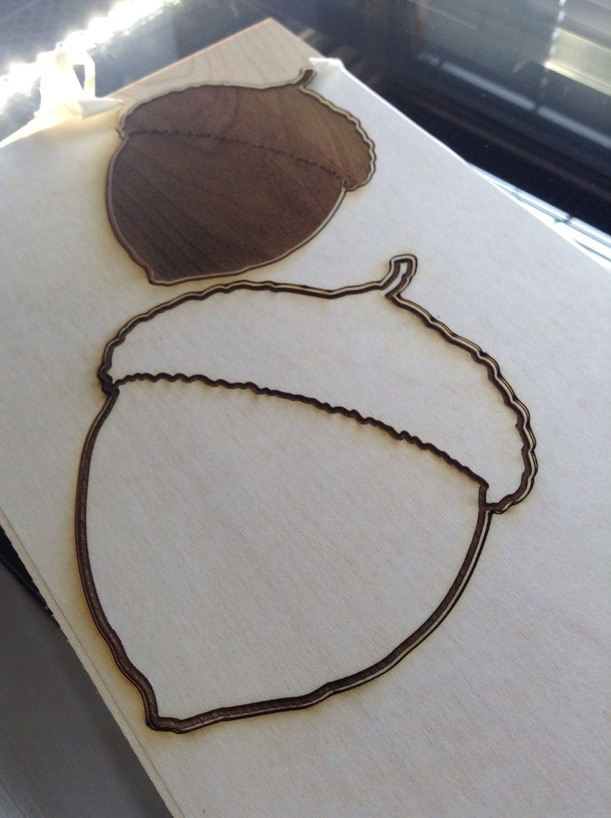
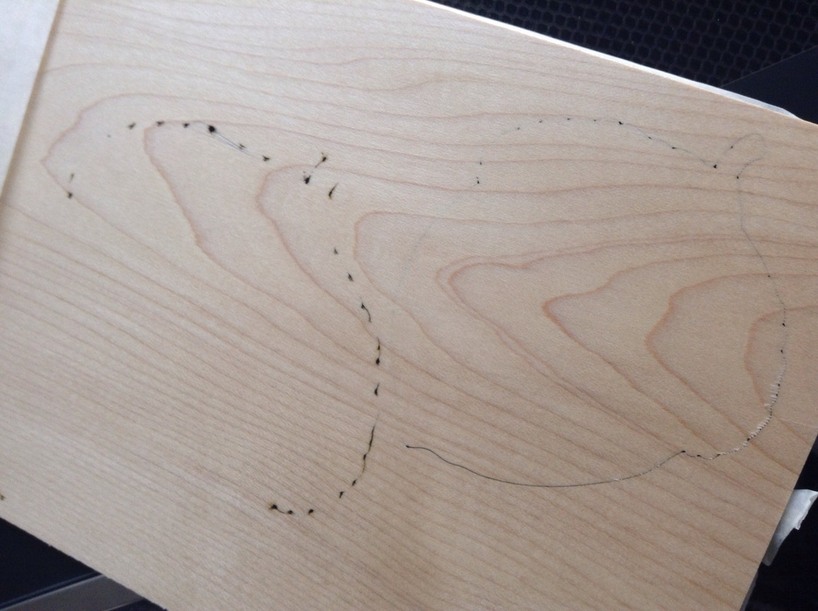
I then carefully retry again and slow down the cut speed and do a x2 overpass and failed again. Like it’s pretty bad. Here a picture of the front and the back.
Wow! 2x and still not cut? Is that medium maple ply? The smaller one looks like walnut, but the corner of the material there and the back looks like maple…
I think support will need to know material and settings. They also often like to know date and time that you performed the operation so they can look up logs.
I suspect they’ll ask you to cut a Gift of Good Measure on some Proofgrade Draftboard and post a picture of the result.
I used the Medium Maple Hardwood (Finished) Proofgrade material with the preset settings nothing changed, the 2nd time around the only thing I changed was the amount of cut passes.
i had a problem similar to this, i decided to try to clean the lens, i found that my lens, mirror, and other affiliated stuff in the printer head werent aligned properly. use the lens removing tool and try cleaning it, also check the state of the rubber o-ring above it.
How did you go about doing all of this. I am very cautious when it comes to this stuff as I don’t want to ruin anything. Did you watch/read a detailed tutorial or did you just very carefully fix all of that?
Another important thing you need to check for is that the feet of the tray are sitting completely down in the dimples in the floor of the machine. You can open the front of the machine (drops down) to see if all four feet are fully seated in the dimples.
Other than that, slowing it down and two passes should have gotten through just about anything, so you might need to wait for support to get back to you.
after doing what Jules said, here’s the email that was sent to me afterwards, you should do the same just to speed up your process. im still waiting for the email tag to finish.
Would you mind checking one thing for me so I know how we should proceed?
Turn off your Glowforge
Open the lid and gently move the printer head to the center
Firmly grasp the top edge of the printer head
The top of the printer head is held on by strong magnets. Grasping and pulling up carefully, remove it and set it aside
You’ll find a little green mirror holder. Check that the flat portion of the handle is parallel to the ground. Let me know if it isn’t!
Gently remove the mirror holder
Take photos of the mirror’s surface
Put the mirror back down so that the little green part is more or less parallel to the ground (so you can see the glowforge logo easily)
Replace the top of the printer head
Close the lid and send us the photos you took in step 7
So I saw that little green piece it was talking about and the mirror was without fault. It looked fine had a miniscule spec of dust on it but I doubt that affects it right? Should that green piece be sticking out this far?
at this point you’re as far as i am, be sure to send a picture of the mirror face to support to expedite your repairs. was there anything wrong with the lens?
I had already cleaned off the lens before thinking of taking a picture, but on the back side there was a clear burn mark through the smoke caused by the burning rubber, and it was off center. Im still waiting to hear back from support about what the next step is.
Ok so I took out one of the two wipes I was given and wiped everything ont he laser that looked like a lens:
The One under the right side of the laser far in the back, The Green Mirror thingy, the lens on the side of the laser head, and all three of the glass thingies on the bottom of the laser head. I even used the green tool thing and removed the lens that’s located on the bottom of the head and wiped the crap of it.
It works! I was able to cut the proofgrade nonsense with any problems whatsoever. I’ll keep you guys updated.
Turns out that When I first installed the laser head (The Black Box) my phat thumb touched the orange lens on the side of the head. When I was cleaning all the lens I noticed that my phat thumb print was on it. Truns out this stuff is fancy schmancy and very delicate so if you’re having this problem try that. Those wipes we found at Walmart same brand and everything for a very affordable price so have no mercy on the cleanliness of those lens.
Just a reminder to everyone… A dirty lens, window, mirror can cause more than just the reduction of power. Regular cleaning of the windows, lens and mirror is important to keep the laser beam from destroying them.
If you neglect cleaning those surfaces, at some point you will need to buy replacements from the Glowforge store (shop.glowforge.com) at your own expense.
The company suggests something like 40 hrs of use but it depends a great deal on what material you are cutting. (https://glowforge.com/support/topic/cleaning-service-and-moving/cleaning)
In my opinion, nothing wrong with gently cleaning the outside windows and lid camera lens every few days. I inspect the internal head mirror when I pull the head lens, but be very careful with it. Can’t recommend touching a first surface mirror and the cleaning instructions don’t discuss it so I’m not comfortable suggesting what I have done.
@miss.aventurera I am glad to hear you are up and running again. I’m going to close this thread - if the problem reoccurs, go ahead and post a new topic. Thanks for letting us know about this.


 and look forward to seeing what you create !