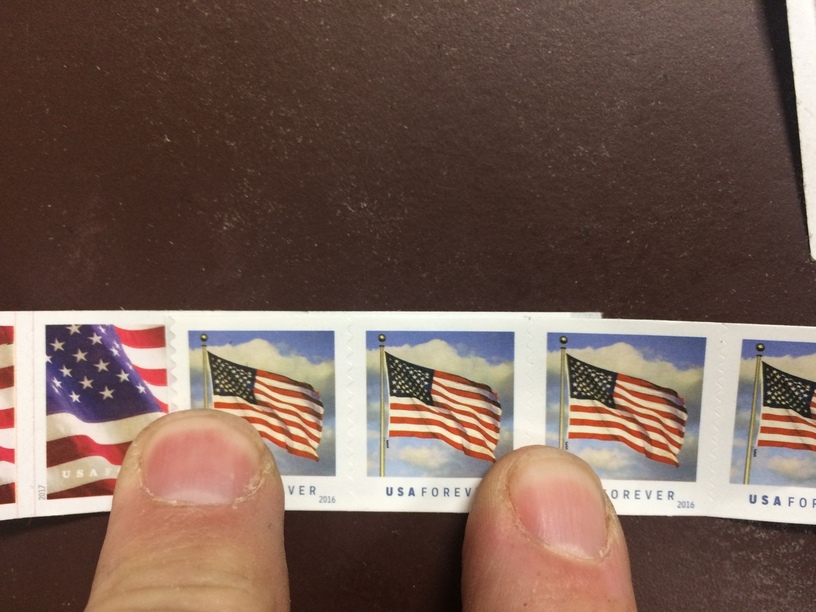
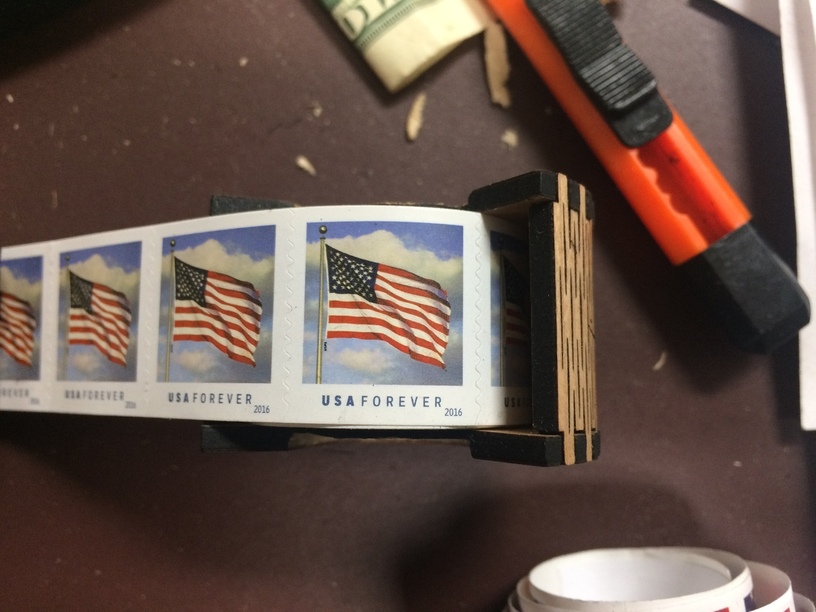
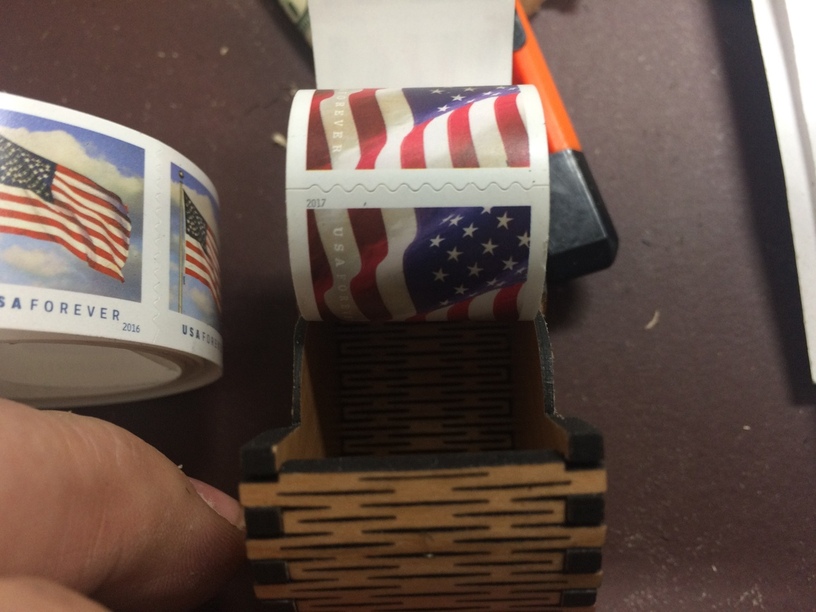
@cynd11, you were fortunate to have a roll of stamps that fit this box. I found out today that there are different widths of USPS roll stamps. Very slight, but enough to make a difference since I designed the box around a certain roll and had it just fit so it would unroll freely.
Will update the design to accommodate the wider roll.
Also, I tested engraving the sides. 12 pt. text works just fine at 340 lpi. This was a place on previously cut parts so it isn’t quite positioned exactly. Next time I’ll just flip the smaller top tab without moving the matrix or the design and then engrave the lettering since it has to go on the other side.
Just thought of something–when I made mine I only did 2 passes on the engraves since 3 went too far down. Now I’m thinking it would have worked perfectly if I had done 2 passes on the “innies” and 3 on the “outies” (or vice versa).
That’s a good idea. Do the bigger bottom engrave three passes and the top smaller tab two passes and that should give a little more room for it to float and remain flush.
There is more tweaking to be done to get that gap closed enough that it looks like an inlay when it’s closed. I think if I do a score to clean up the inner edge of the engraving, that will help. As longs as I start the score off of the piece and go up and around and then finish off the piece, there should be no burn through since it is a gradual enough arc.
It never ends. You get it looking good, and then you note that something could be improved and then another thing. Each time sneaking up on perfection. Then you go and forget to set multiple engravings and leave it at one pass.
But wouldn’t it be more fun to unroll the stamps and laser off a smidge down the whole roll till it fit? maybe some sort of arduino controlled automatic re-roller to pull it through?
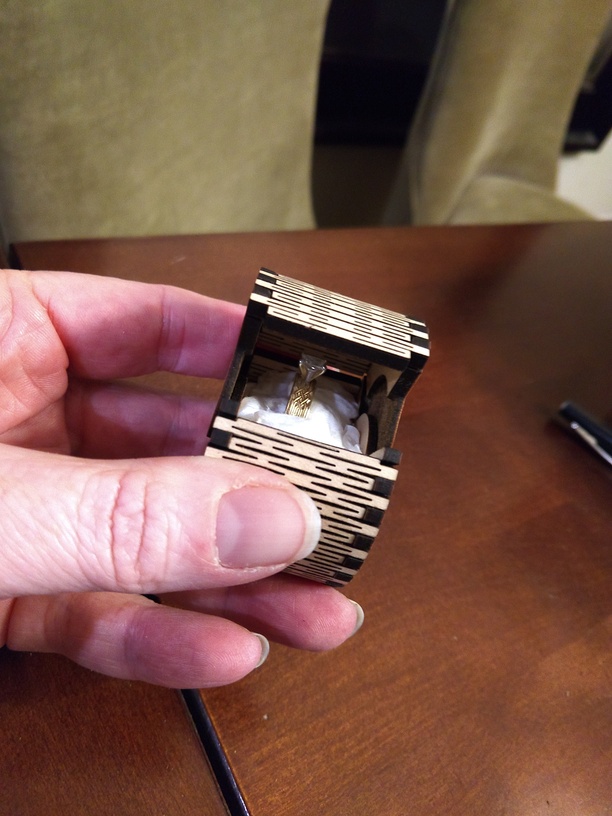
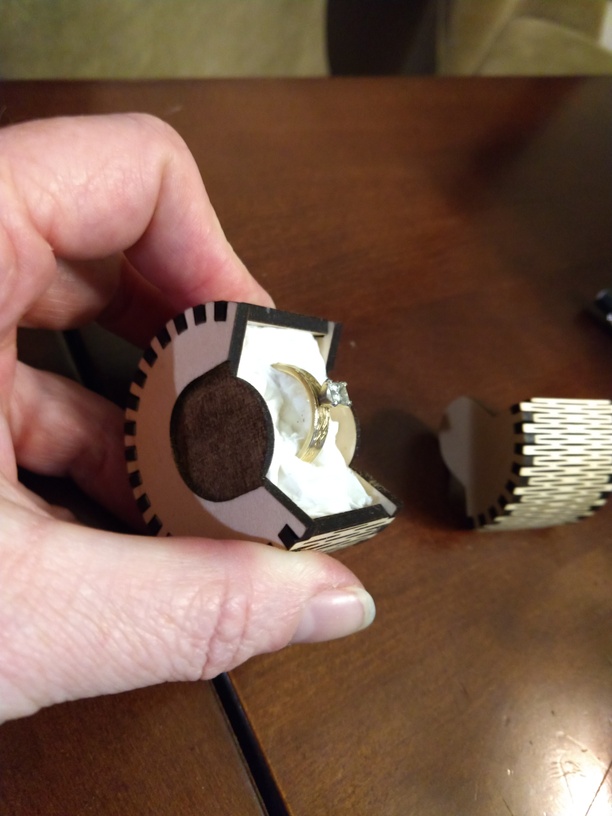
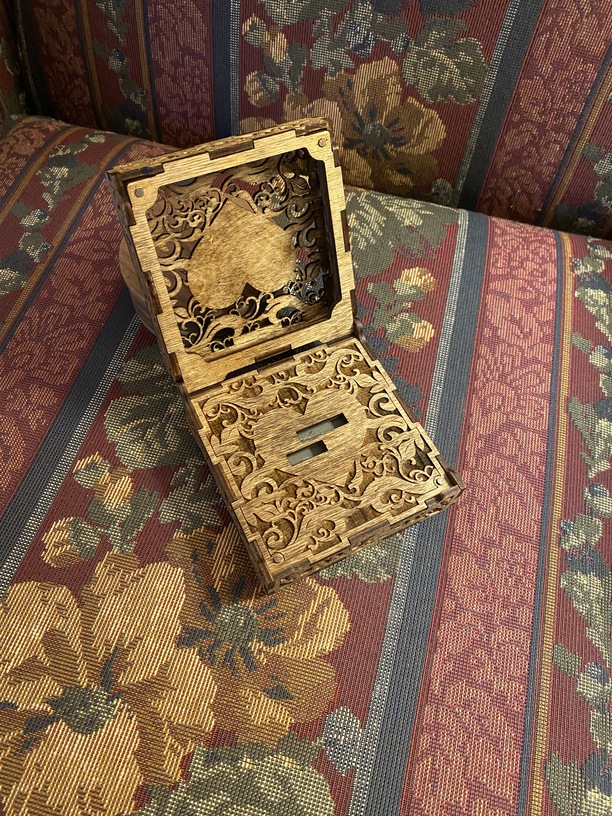
Thanks so much for this pattern! I wanted to show my MiL the capabilities of the machine and I thought a living hinge would be a great example. The box was a total win, despite me not getting the depths correct on the one I showed them - I went back and did a significantly deeper engrave the 2nd time (technically 3rd) and it’s beautiful. It’ll also make a fabulous ring box
That is really nice. It works great as a ring box.
Tweaking the engravings to get them perfect takes a bit. I usually have to do a little manual sanding and scraping to get the overlap perfect.
And you assembled them well. The first couple I tried, I messed up some of the tabs trying to stretch the hinge. But it is cool when it all locks together and doesn’t need glue.
I keep the masking on and then go at it with a dental pick at the edges and with a light brass brush that I have that isn’t as aggressive as a steel brush. A good stiff toothbrush will work wonders.
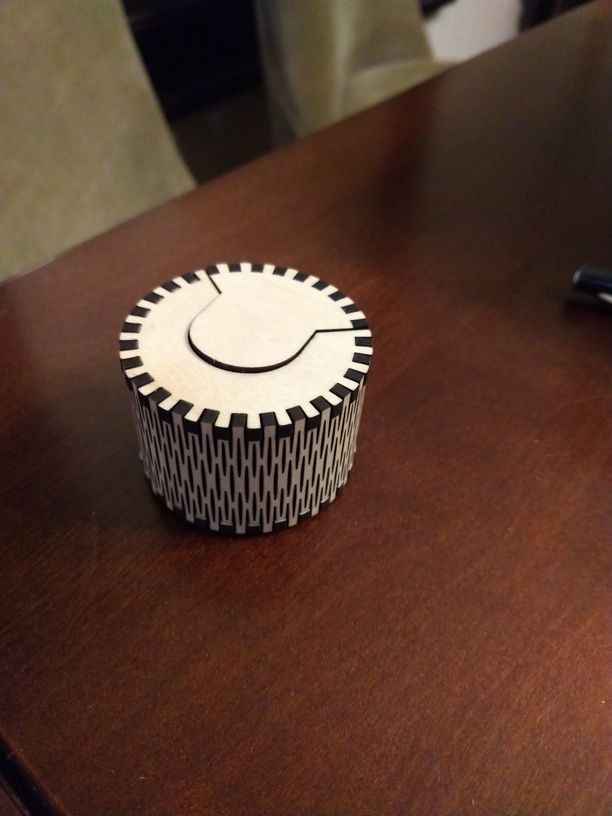
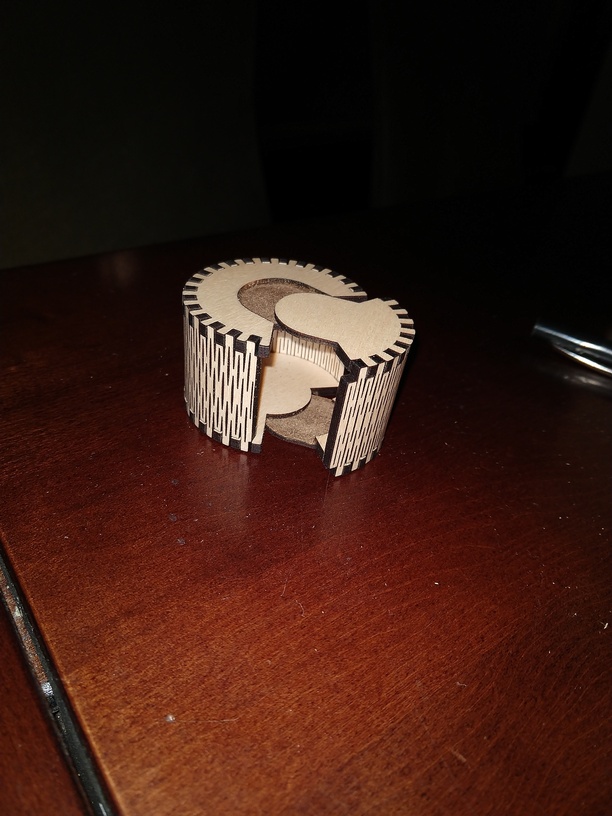
I just tried making this box. It’s for a ring box my future grandson-in-law will use to propose to my granddaughter. I was having trouble with the living hinge part on my first attempt, so I made a new one from proofgrade basswood hardwood. I got it wet with warm water (not soaked, but wet) and it did bend much easier. I still proceeded to crack one point, so i decided to put the two pieces of living hinge on. I then dabbed a bit of super glue. The area is noticeable but mostly by me. My wife didn’t see it at first.
Unfortunately, I found that using the settings for the engraved sections on top and bottom was too enthusiastic! I cut back to two passes and had a satisfactory result. Here cometh the next lesson: Don’t get any part of the tops or bottoms damp! That area of the wood is not only very susceptible to absorbing the water, it is also going to warp. One side engraved wood, the other proofgrade finished. Wood will warp under those conditions, no matter what. It may be that the wood will return to “normal” on drying, but I won’t know. I tried to straighten it out and it cracked across the “tongue” of wood on the lid. I was happy with the way the box looks, but worried it might not be sturdy enough for the presentation. I’ll try another box method.
Thanks very much for all the advice and information you and the others show on these discussions. I would not have had the nerve to try them out. Now I know I can make these kinds of things! I just have to be careful.
I used it as a ring box too! Though, not for an engagement
Living hinges in hardwood are hard, I’ve never managed to make one that survived for more than a few months. I went with PG plywood, but the water trick is still definitely the way to go. I cut everything, took the two living hinges and soaked them and wiggled them back and forth until they were very wiggly, and then when they dried attached them to the sides. Pulling out straight so the gaps are large enough to place onto the teeth worked for me.
Since you’re making the box I’m presuming you approve of the relationship - good luck on the engagement!
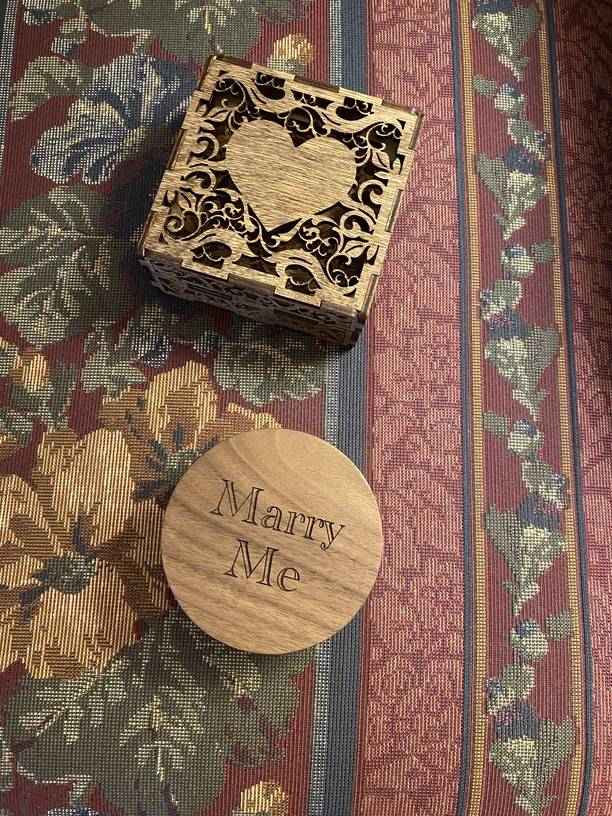
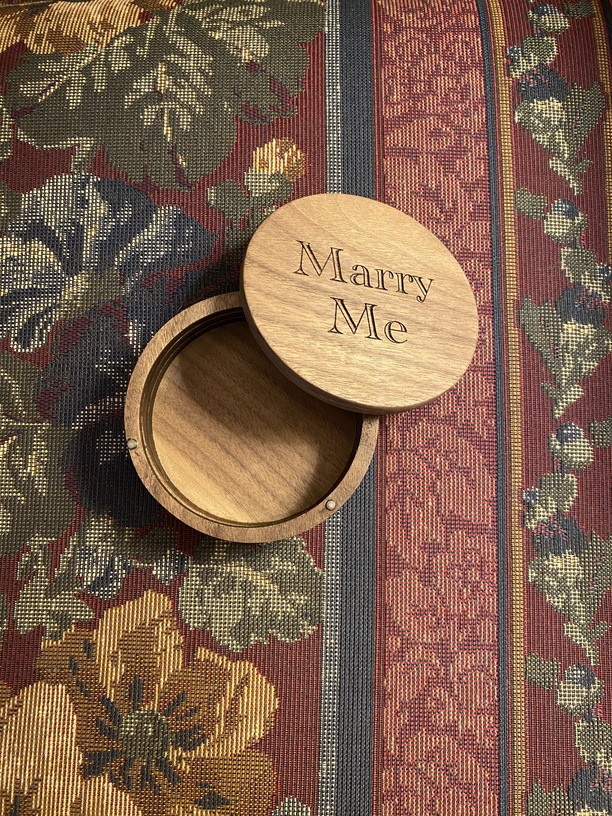
Yeah, I decided it was too fragile a construction method. Both the living hinge and the half-thickness tabs are too delicate for something that may get opened and closed several times. I have switched to a round box (contradiction?) using some 1/8 inch walnut I have. I made a base disk, a second layer which includes two holes for 1/8 dowels, 6 more rings which each have holes for the dowels, then a top with a ring layer and a cover engraved with “Marry Me.” The longest part of the whole thing was the sanding of the outside to get rid of the burn and smooth out the surface. It’s not great, but it was my first creation.
I’ll probably try some other kinds of boxes with living hinges, just not like the one I did.
And yes, I do approve. They’ve known each other for several years and have lived together for a couple of them. Both are good people and good for each other.
Well, I finished two boxes for the engagement ring. One is a circular stacked ring design with a magnetically attached lid. The other is from an Etsy design that caught my wife’s eye. I’ll let the future grandson-in-law decide which he wants to use.
If I can do this right, I’ll post pictures of them in this note.
Those are gorgeous! You should really create a new post in Made on a Glowforge and show those off (instead of buried here at the bottom of the stamp box thread )