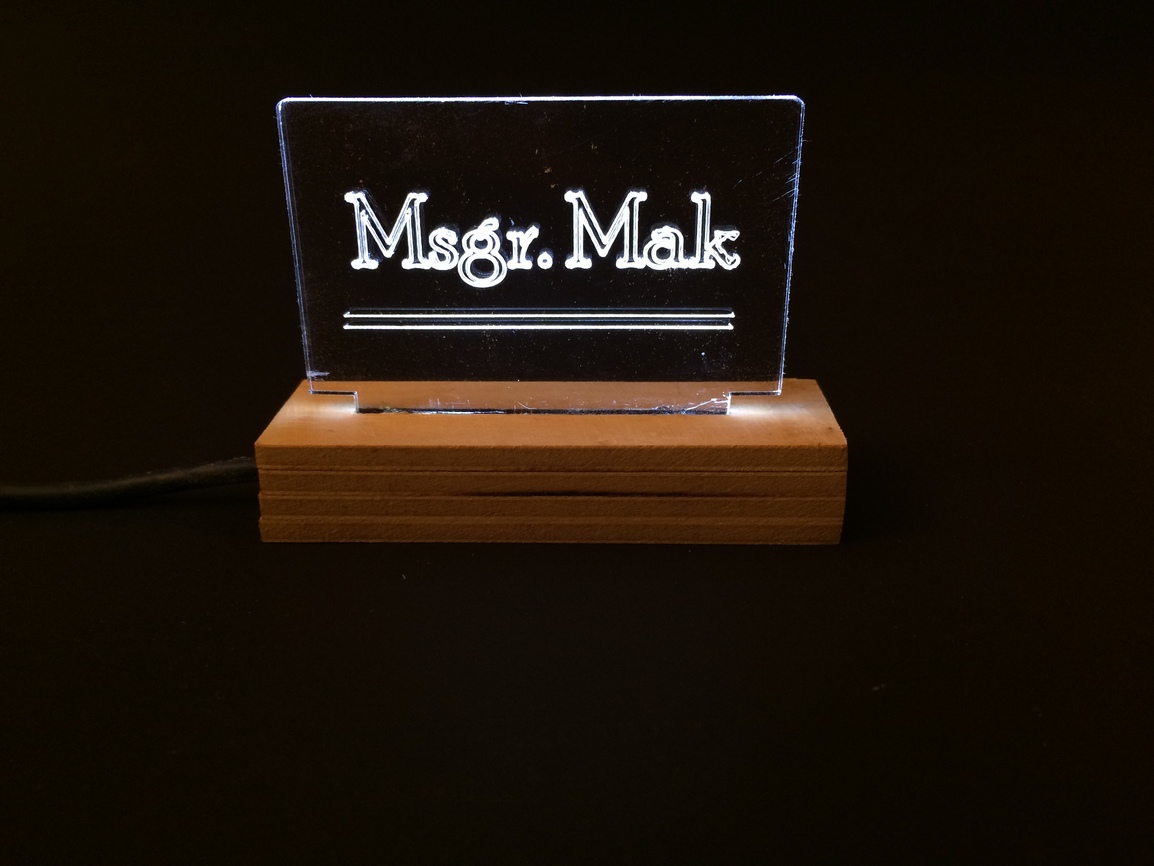
Of all the cool things one can do with a Glowforge, I think the one project that will instantly justify the purchase to anyone curious is an edge-lit acrylic sign. We have had many examples on the forum. I was inspired by @smcgathyfay, and with her blessing came up with my own.
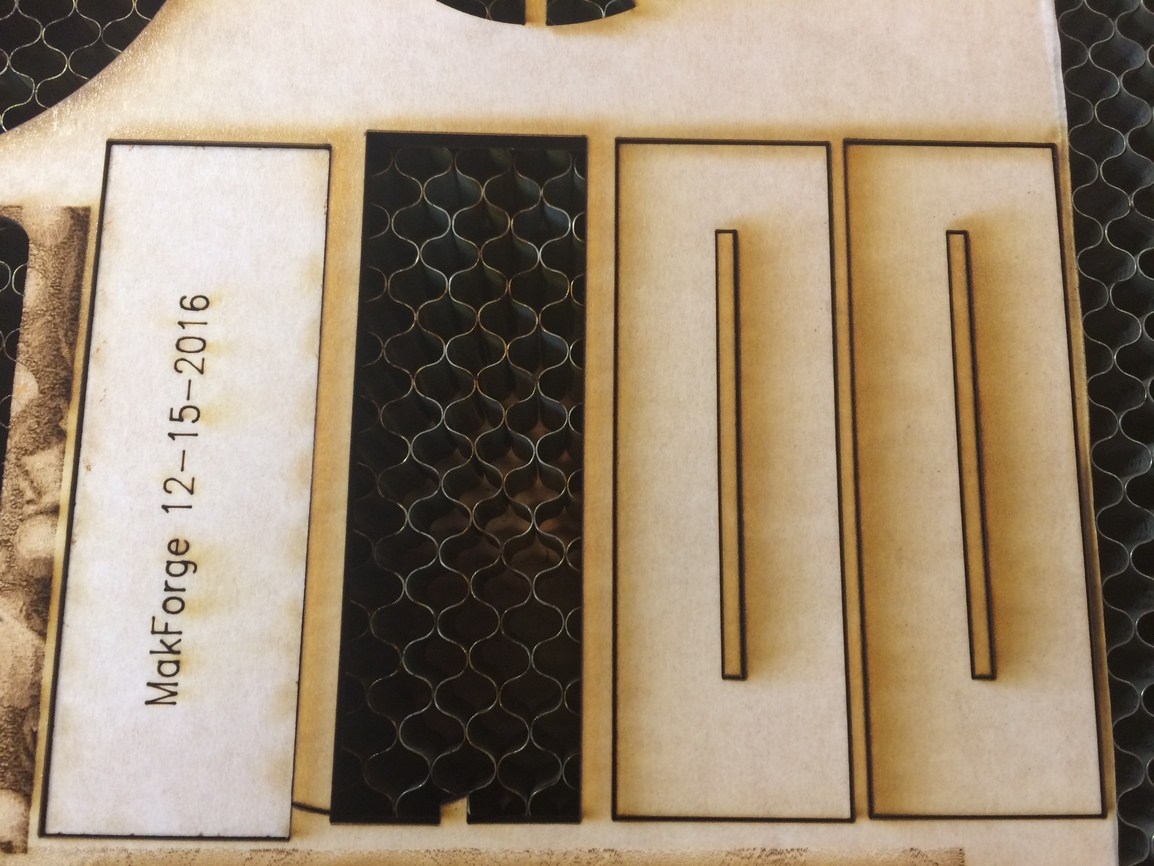
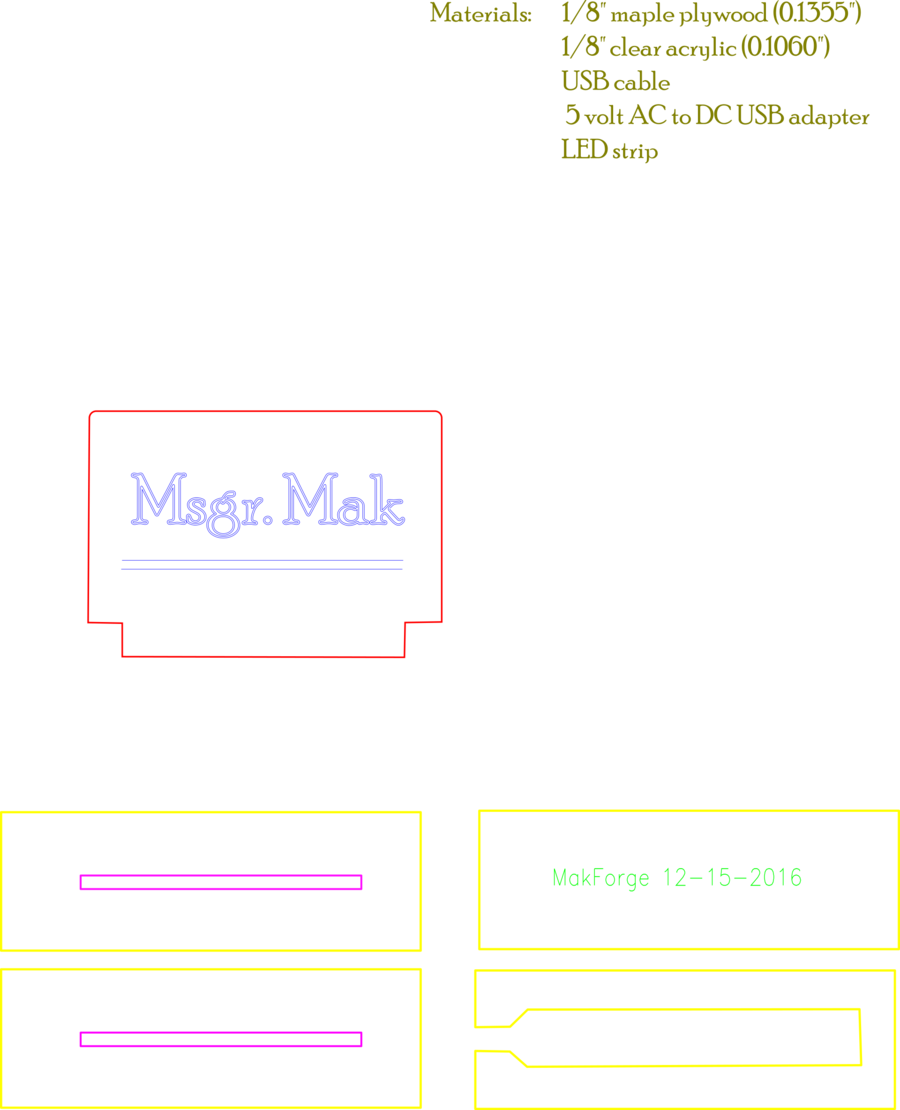
I had the LED strips, an old USB cables and an extra 5v AC/DC adapter. The only real challenge to this was getting the slot for the acrylic dialed in for the top layers. The acrylic is labeled 1/8" but is thinner than that. My first attempt made slots just a hair too small for the top. I placed those pieces back in where they were cut out. I went back to inkscape and enlarged the rectangles ever so slightly, positioned them over the existing cut and hit print. It was a perfect alignment. The laser only slightly grazed the top of the slot and at the bottom of the slot shaved off just inough to make a press fit for the acrylic. If you zoom in you can see that the bottom line of each slot is ever so slightly wider. That same print also scored the MakForge and date on the the bottom layer. Pretty good accuracy for this one.
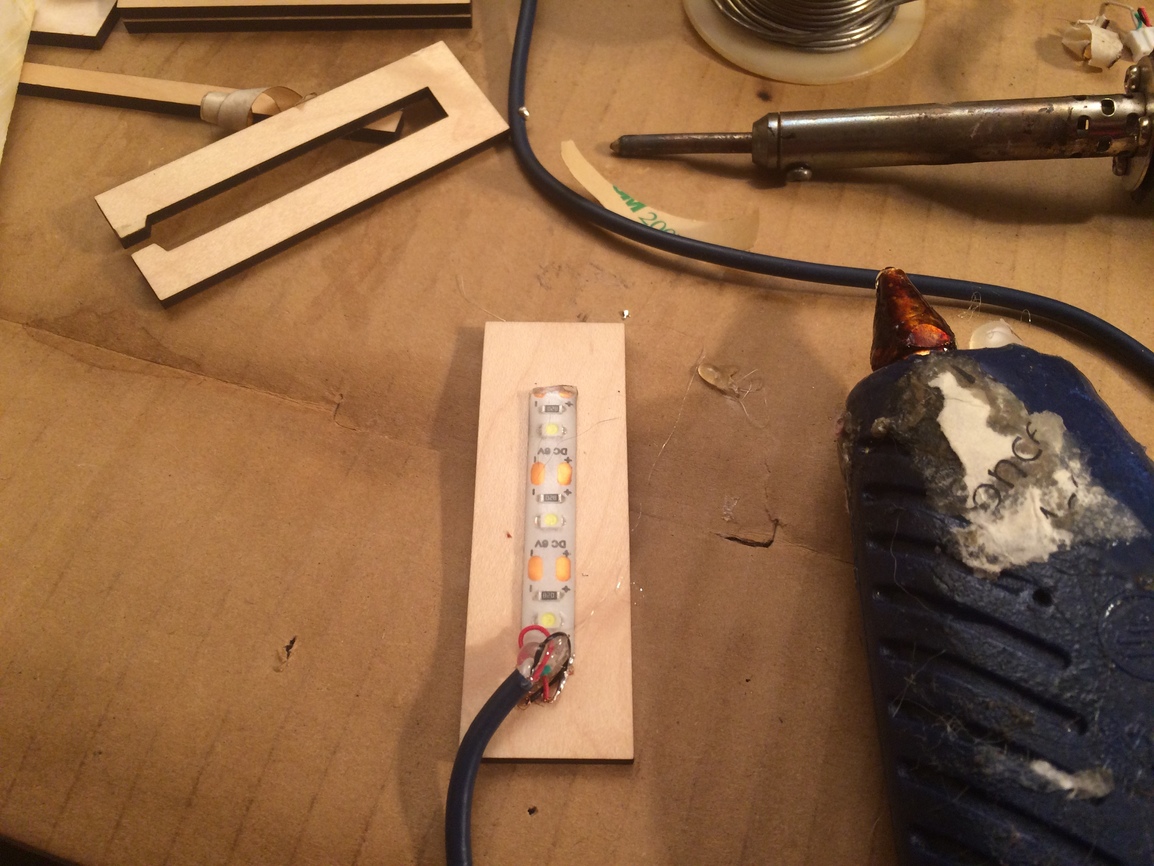
So in addition to an assembly bench, I need an electronics bench.
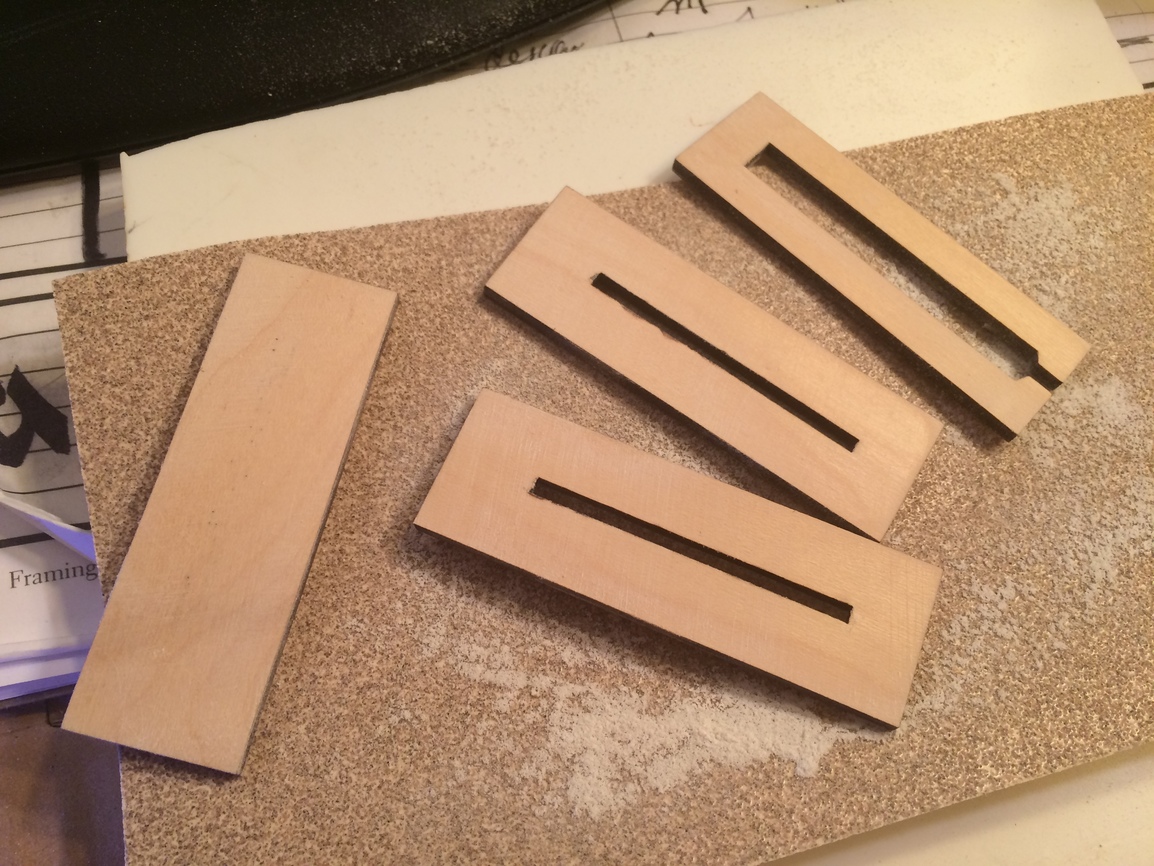
And a sanding station to rough up the finish on the maple plywood to take the glue. I also sanded the edges after glue up to even things out and give a lighter edge to base. Still a little sanding is needed. It’s also good to sand the edges before inserting the acrylic. Got a few scratches on the acrylic. There is also a little stress crack on one inside corner of the acrylic where it goes into the slot. This was from trying to force it in when the slot wasn’t quite wide enough. Might want to put a slight inset radius there to relieve stress, the dog bone thing.
I’m learning that using layers and distinct colors make it much easier when importing your design into the workspace. The layers and colors help you keep track of what is scored light or heavy, or what is cut or engraved in the design, and then the different parts are parsed out into different operations that are much easier to handle. Here is the design.
That’s wonderful I’m thrilled that it was so easy to put a piece back in for a slight correction. The sign is gorgeous! Thanks again for all of your hard work and for sharing it with us.
I think this was number 4 or 5 on my list, but it may jump right to the top now after seeing yours! I know what your schedule right now is like, so thanks all the more for what you continue to do for this forum.
What is interesting is my 3D printer has a laser cut perspex (yes, Perspex brand, it’s a british printer) frame. So I had 3D printed a hook to attach my Raspberry pi to the frame, and it didn’t fit. Then using my calipers founds that different sheets of the frame had different thicknesses (subtle, but significant to friction fit joints). When I asked, it turns out the thickness is +/- 10% tolerance (that was way larger than I ever thought it would be) on cast acrylic. Extruded acrylic has tighter tolerances apparently…
It looks great! Good job!
I really appreciate you putting so much effort into keeping us in the loop and giving us great pictures and steps. Thanks again for letting us live vicariously.
so, when all the “u’s” are lowercase Duuuuuuud mean’s “groovy, man” but when the first few “u’s” are uppercase, that means “What you said really ticked me off.”
Since the ProofGrade has finished surfaces and I am sandwiching layers together, one gets a stronger bond if you can rough up the surface slightly. Not sure if it is necessary for this application, but since I do that for regular wood working if I have to glue a finished surface, I just figured it was appropriate.
I also sanded the edges to get the charring off so there was a better match with the top. Although the edges are pretty much perpendicular to the surface, there is a slight shaping to the beam, so the sanding can even it up better for a more standard finish look. I also thought about getting some black spraypaint and a clear seal coat and do the whole bottom black. Lots of differernt ways to do this.
Finallly, I didn’t have the best glue up and clamping so the layers weren’t quite in line. I needed to glue them to a reference surface. It is a challenge to glue things stacking like this without them sliding all over from the glue. I used binder clips that were just barely wide enough and that caused shifting in the layers.
Yeah, 1/8" isn’t usually .125" - often it’s .120 or even .118".
Another trick is to shave the base of the acrylic with a lightly (or more) engrave. I often use 1/4" acrylic shaved to fit a 4 mm slotted base. The extra thickness of the acrylic gives you more depth to do a deeper engrave. Deeper engraves will reflect light better than shallow engraves.
Fabulous. I’ve got LED strips and connectors and battery boxes in my Amazon cart. The day I get a ship message from GlowForge, a UPS truck will be delivering the LED goods.
That stuff may arrive earlier, even, because I want to play with LEDs; but it will be so much better on a laser.
I’m enjoying all the learning and discussion, here, too, about tips and tricks and how to do it better.
Woodworkers tip for you @marmak3261, If you don’t want the pieces to slide around on you after you’ve laid out the glue. Take your normal table salt shaker, and sprinkle some of the salt onto your glue before putting your pieces together. The salt doesn’t mess up the glue, but it helps to prevent the pieces from sliding around on you.