Very happy with the new addition, however…
Thought I would have a play with the photo engrave capabilities and was super impressed with the results. I mean mind blown, flat out amazed, pick jaw off the floor impressed.
Until I realised that all of the fine detail in the lighter shaded areas of the picture were perfectly grayscale engraved onto…The Masking Material!
After weeding the results were … Meh.
4 Likes
yea I learned this on the first photo engrave, just take the masking off for those, and if you need it on everywhere else if you can, just draw a score line around where the photo is going, do the score first and nothing else, pull masking off of the scored area while its in the machine still and don’t move the material, then reprint everything except the score so the photo hits unmasked area perfectly and the graphics hit the masked area, thats what i did on my wine box.
Heres the link to the wine box I did for examples, Walking dead wine box but no its not proofgrade that i did it on but same concept.
5 Likes
Oh no! I’m so sorry your engrave didn’t make it through the protective layer.
Would you mind sending me a photo of the print result? If it’s more comfortable for you, you can email it to me privately by sending it to support@glowforge.com.
Here is a pic.
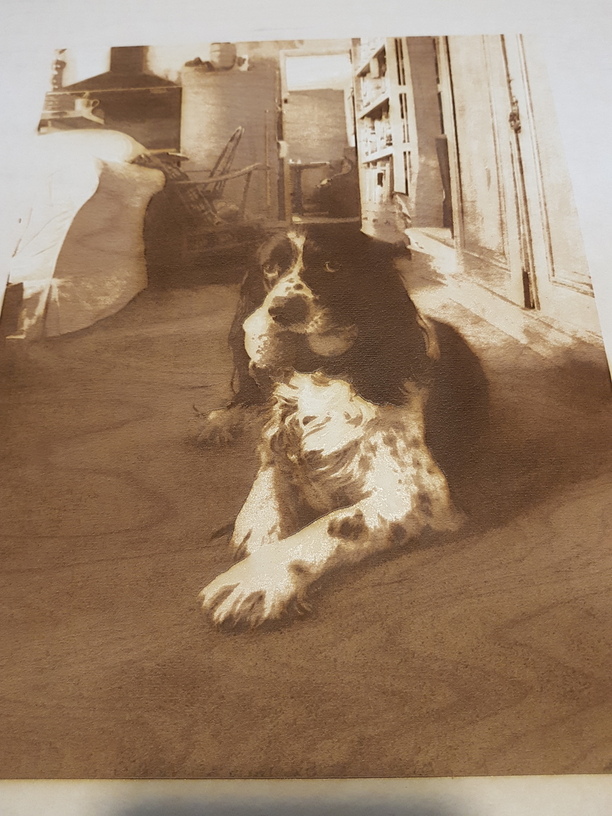
Partly cleaned up, you can see on his paws and upper chest that nothing has made it through the masking.
2 Likes
You are working with support so not giving advice.
Just a question about how you expected it to turn out. I don’t quite understand. You indicate that the paws and chest didn’t cut through the masking. They appear to be white or at least very light. White would normally be no power and black maximum power for an image. It would be impossible to get white on any of the Proofgrade material. So the best a laser can do for a light color is to do nothing at all. So I wouldn’t expect white or even very light colors to go through the masking. So I’m just confused.
3 Likes
I suppose it depends if PG engrave settings are intended to work with masking on or off. If on white should have just enough power to remove it. If not they should make it clear the masking needs to be removed.
Sorry, wasn’t very clear.
These areas did, before I removed the mask, have some quite detailed shading on them, which was lost when I removed the mask.
It seems that the software is doing its job very well, but not compensating for the masking layer.
You do that by changing the minimum power to 5. (That works on my machine - you might need a bit more or less.) The lightest colors will burn through the masking but not the underlying material. White will still not be lasered as it’s unaffected by the minimum setting - white means “no laser”.
3 Likes
Thank you for posting that photo. I’m looking into this, and I’ll be in touch when I have more information.
Thanks for that James. I’ll give it a try.
Thank you for the feedback - I’ve shared it with the team. I’m sorry for the inconvenience.
If you have any other suggestions or questions, please post a new topic.