You could put a flat fishing weight in the bottom to add some heft (or maybe some pyramids in the corner depending on how much space there is) - but honestly, most tape dispensers you have to hold if there’s anything more sticky than cellophane tape on them.
I’d be tempted to modify the middle “spacer” pieces to include a space for BBs (or other weights) and add them at assembly, pouring glue into the cavity to keep them from rattling, before attaching the final end piece.
I use this technique to make weighted mallets with my CNC and it works a treat.
My brother used that technique in the 90’s to add weight (but with pellets) to his pinewood racecar at church. He made sawdust and mixed it with glue to hide those drilled holes and then painted it.
He won the race.
And they knew my brother and knew he cheated.
Everyone kept inspecting his car but no one could figure it out.
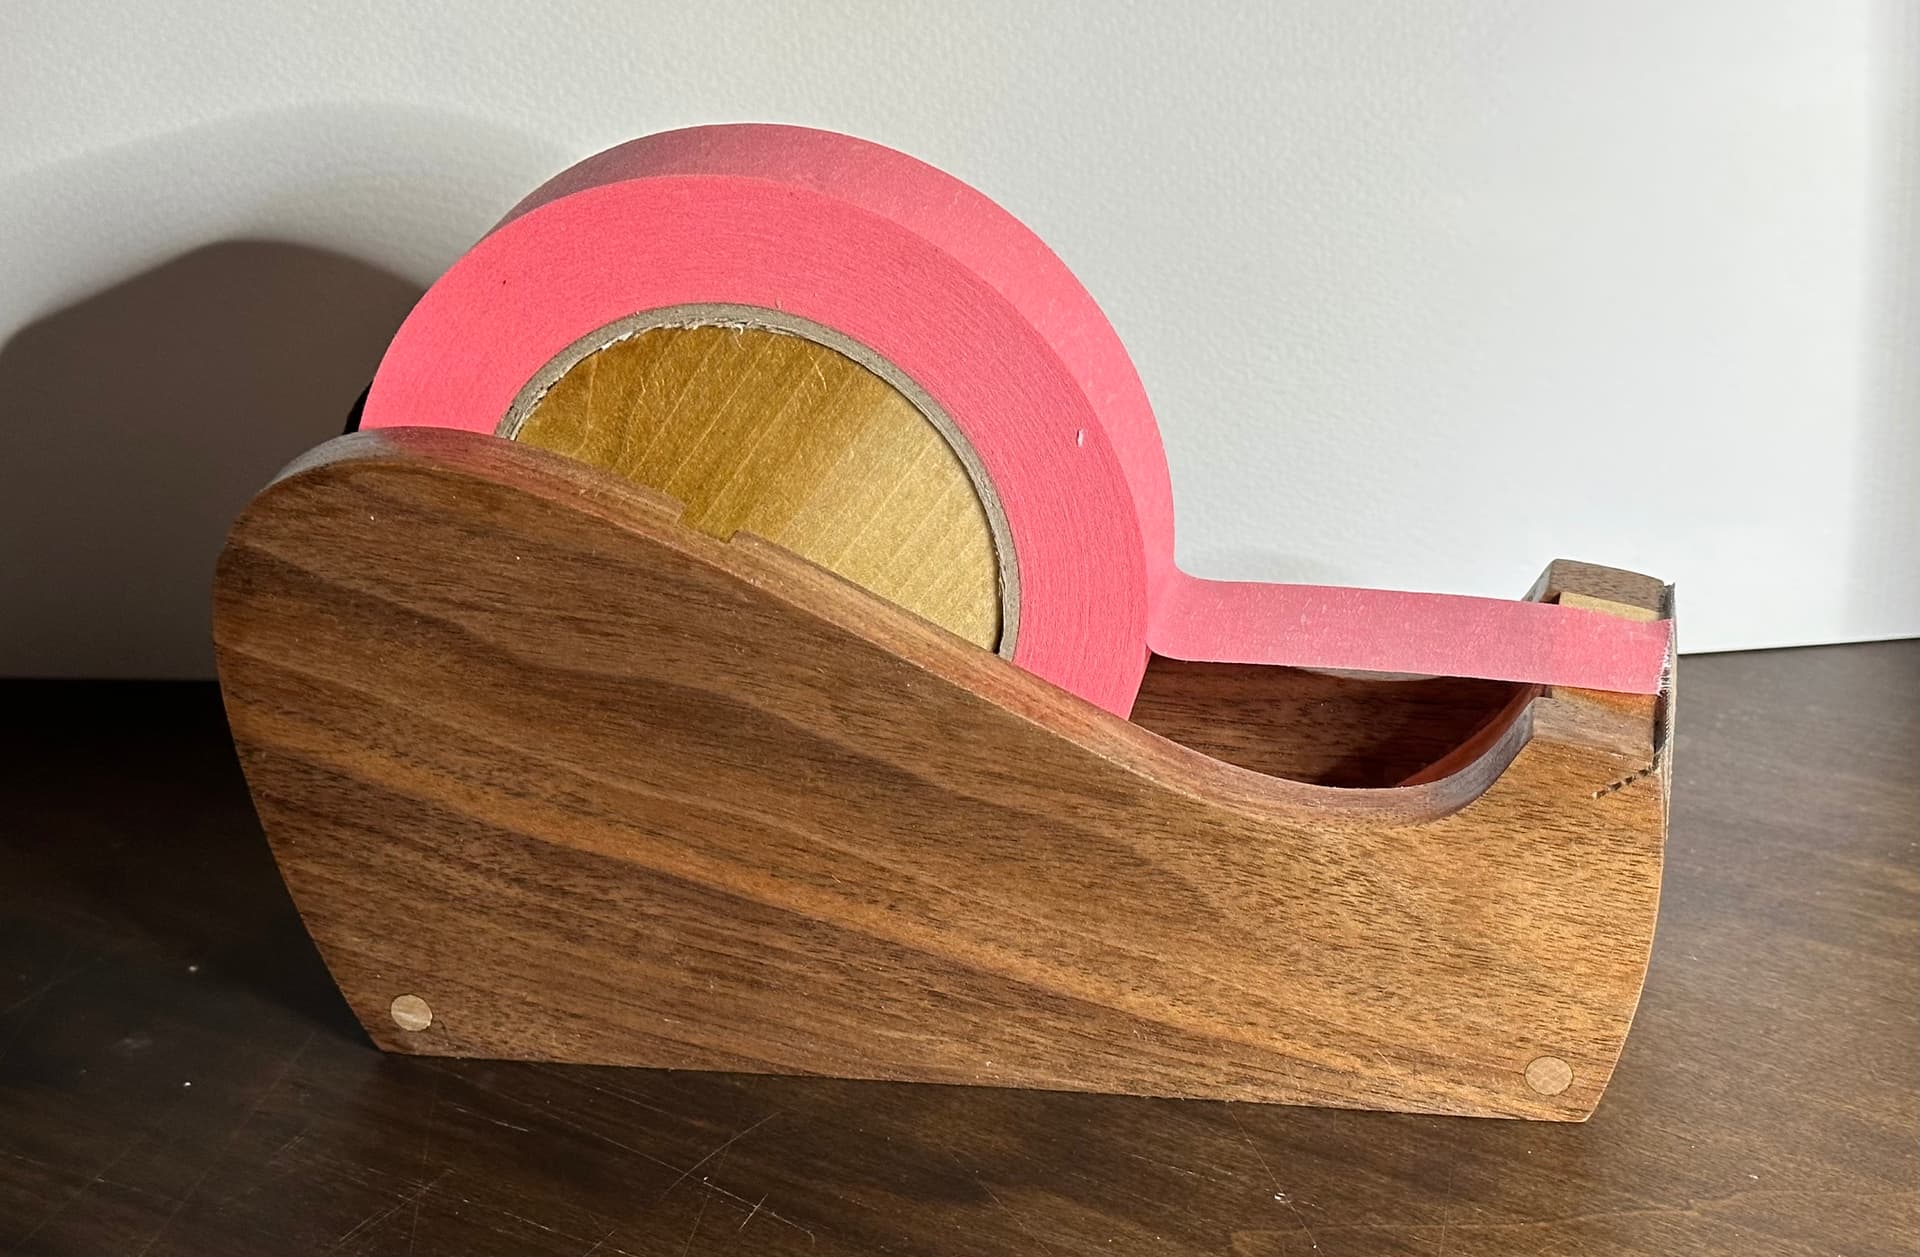
And @Purplie , that’s a really nice looking tape dispenser! Good job!
Thank you for the share! What wood did you use? I need another tape dispenser and just have put off buying one. Now I don’t have to!
I wonder if adding suction cups to the bottom would help hold it down. If you buy the kind with hooks, just remove the hook, make smaller holes in the bottom that are a little smaller than the “knobs” that hold the hook and squish the knobs through.
The wood was what I had lying around… probably from Home Depot. It was 1/4" walnut for the outer layers, and 1/2" poplar for the three inner layers. Cutting 1/2" is pushing it; probably better to go with six 1/4" inner layers.
I used regular wood glue for the face joins. I forget which variant of Titebond it was.
The edges required extensive sanding; by the time I was done, the outline had changed slightly.
If you’re going to try it …
Be sure to test the slot width and depth for the teeth
Use a brass pin for alignment, not dowels. Dowel widths aren’t consistent enough. Make sure the hole is tight-fitting.
I’d suggest the following assembly order. (I got this wrong the first time.) Apologies if this is hard to follow.
Align and glue the inner layers first, taking care not to glue the brass pin (since you’ll have to remove it later). When it’s set, sand and finish the top edge of the inner assembly.
Align and glue the right-side outer layers together, and the left-side outer layers. When both those side assemblies are set, align them together (without gluing), and sand the top edge.
On the left side assembly and the right side assembly, finish the portion that is going to be exposed on the inside (the interior walls). Might help to cut out a piece of masking paper the same shape as the inner assembly, to avoid getting finish on the part that will be glued.
Then align & glue it all together, and sand the exterior sides, bottom, and ends. Then complete the finishing.
modify the middle “spacer” pieces to include a space for BBs
That’s a good suggestion. You can also get finer shot than BBs, to fill the space a little more efficiently. I’ll probably require adding a couple more layers to make some space.
The only thing i can think of for weights would be the ones they sell at Michaels for the derby cars- we used to buy them every year for daughters girl scout pinewoord derby. And then wheel weights for car tire balancing, since they are flat and have squishy tape on the back.
But that’s all my experience with low profile weights. I added some once to a napkin holder i designed for someone who wanted extra weight on the bottom. I just made a cavity to put them in that was easily covered.
Under traditional rules that’s not cheating. The basic rules are you needed to use the official pinewood block, nails (axles) and wheels. Anything else could be added or removed (like carving away all but a skeleton for the body) except rubber bands or other similar active power producing devices.
We routinely used .45 caliber lead bullets to add weight to the car up to the maximum (weight = power = speed). They provided maximum weight density for volume and also allowed us to shave off bits if needed to bring the weight down if our scales didn’t match theirs.