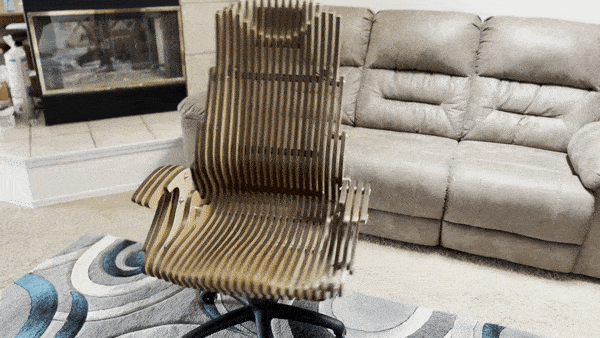
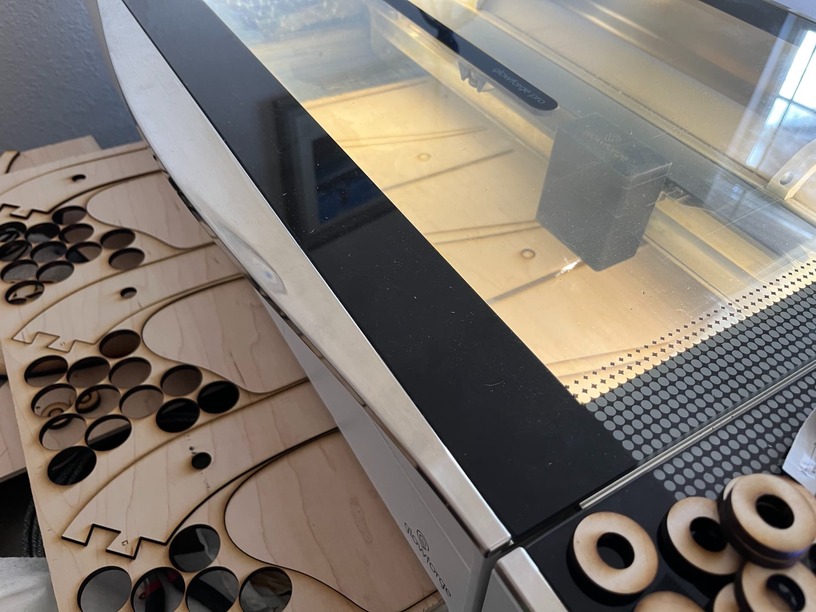
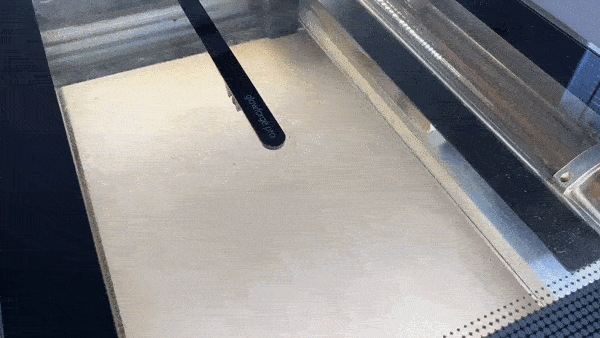
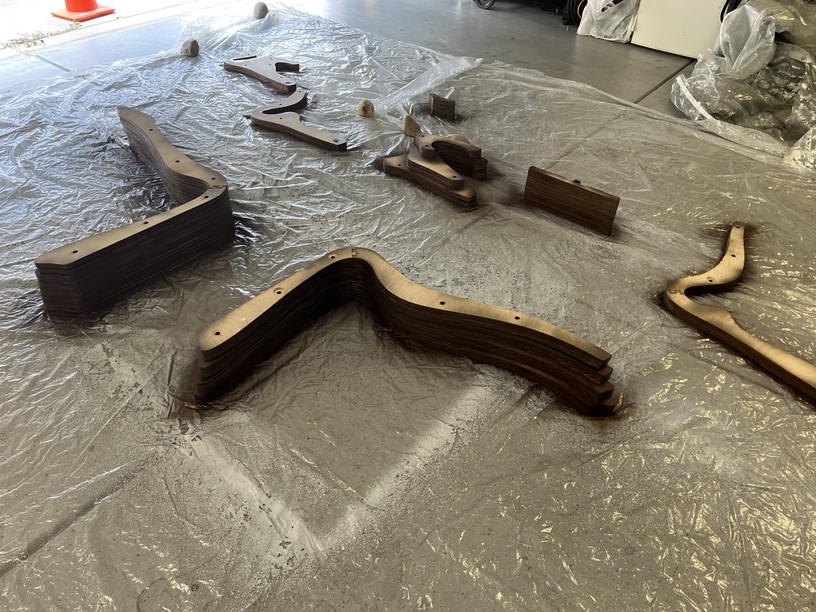
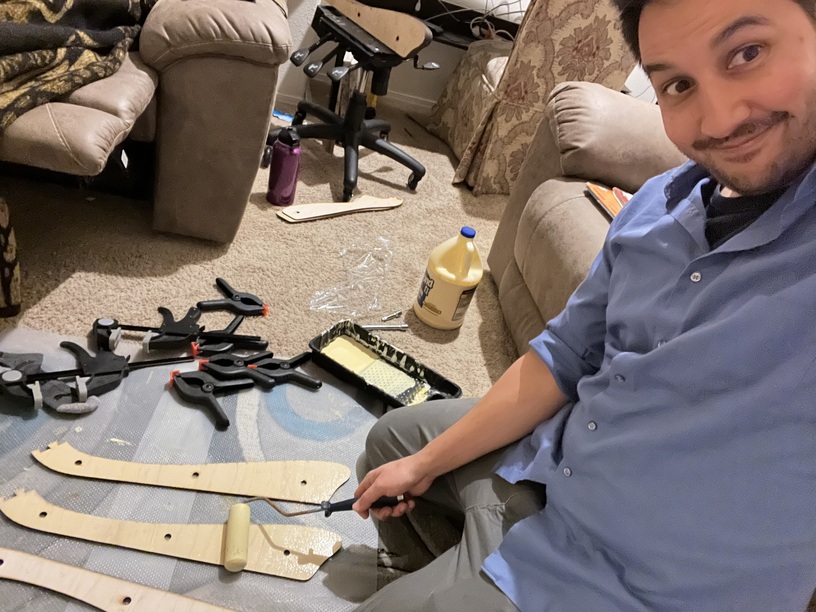
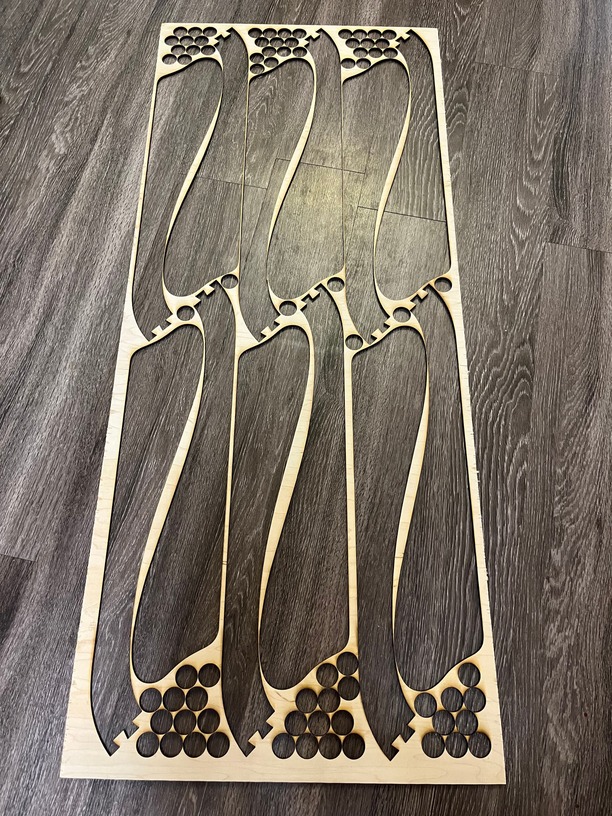
May I present: Parametric Office Chair cut entirely on my Glowforge Pro! I spent a solid month arranging the layers to cut from 20"x48" panels of 5mm plywood. Each layer had to be cut 3x and glued to achieve the necessary thickness of 15mm. and all the spacers double-cut and glued to achieve 10mm thickness. This thing is purely EPIC. After all the layers were glued, then sanded to smooth out the roughness and minimal overlap, I decided to metallic bronze spray the “burned edges” with 3 cans. Then sanded the sides of every layer to achieve a really cool two-tone effect. 7 cans of Gloss clear spray later (3 cans per side + one can after assembly to help shine the bronze), from straight on, the chair is one color, but as it rotates or as you walk around it it shifts back to the natural amber wood color. Finally attaching it to an old wheel base where I swapped out the wheels with roller-blade style wheels. It’s super smooth people! This is one of those projects that really showcases the power of the Glowforge Pro machine! *EDIT: added timelapse gif of one of the panels being cut.
Making furniture was one of my big reasons for crowd funding the GF. When it arrived I basically felt overwhelmed by the lack of size on the cutting bed and decided that was never going to be an option.
I was wrong! That is amazing. Clever thinking, smart application of design, building to the limits of the tool and making the most of the tools limitations.
Kudos to you for this really exceptional project! By parametric, do you mean you can tweak the dimensions of the individual pieces to do an exact butt fit? If so, it’s even more epic than it appears!
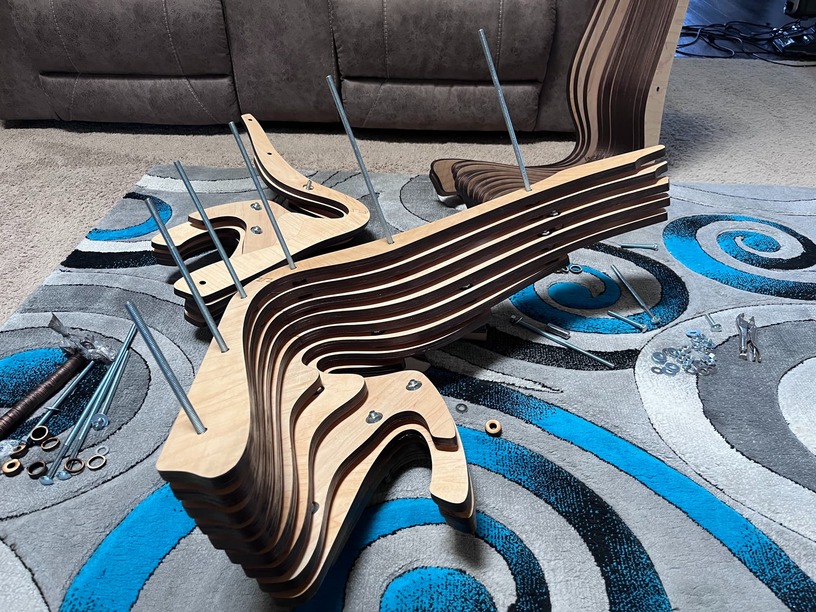
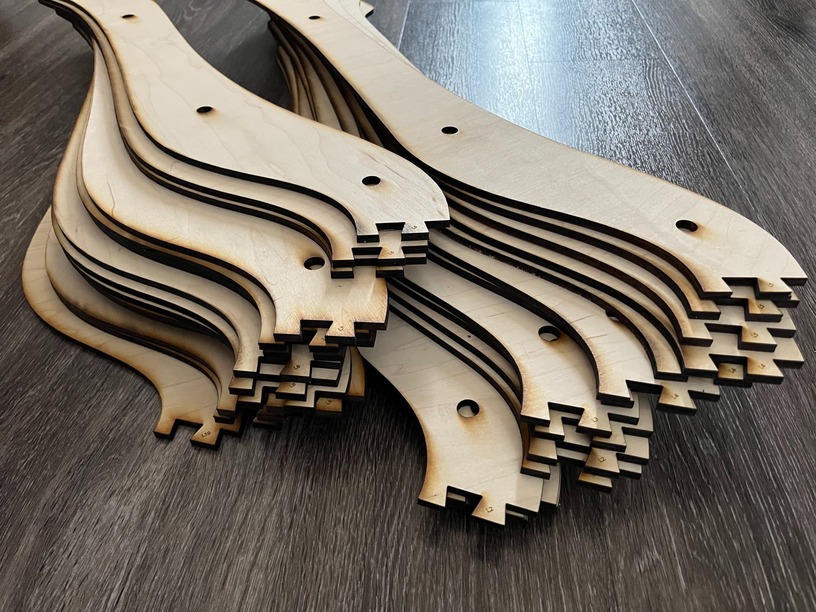
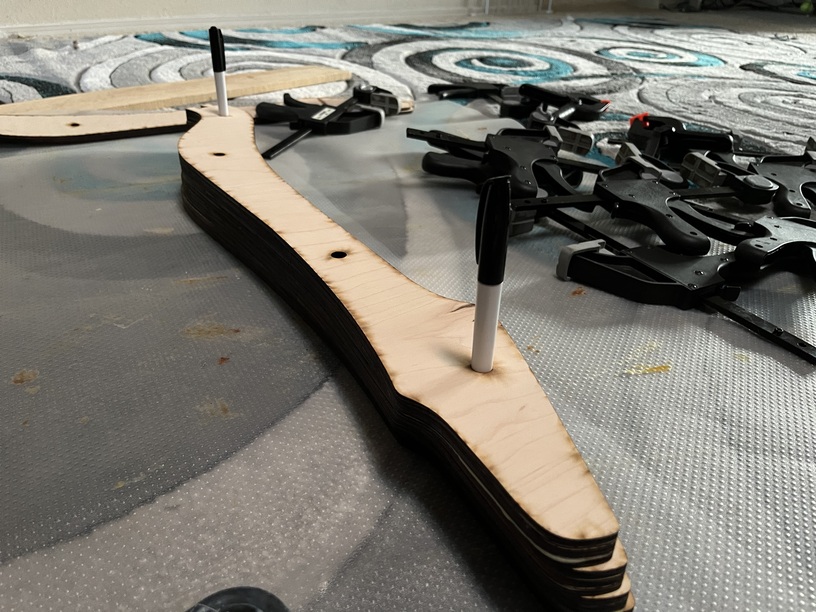
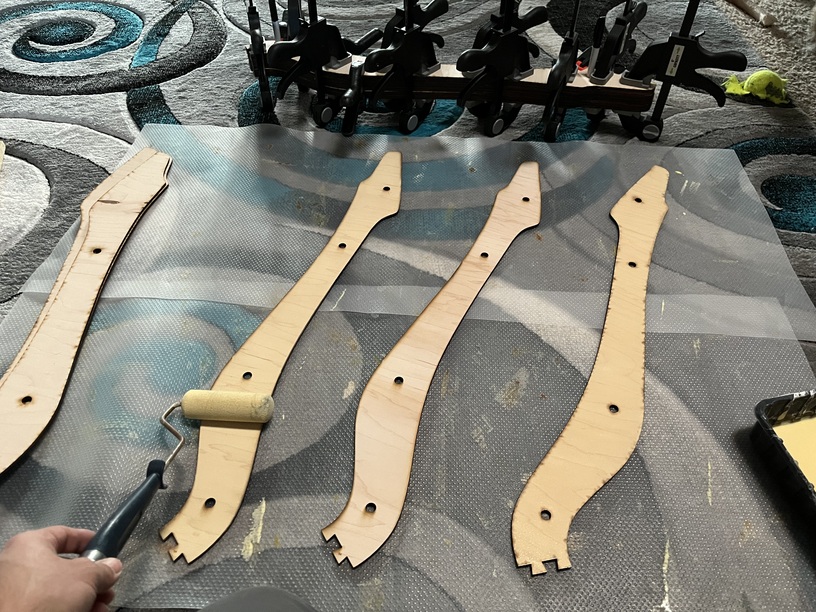
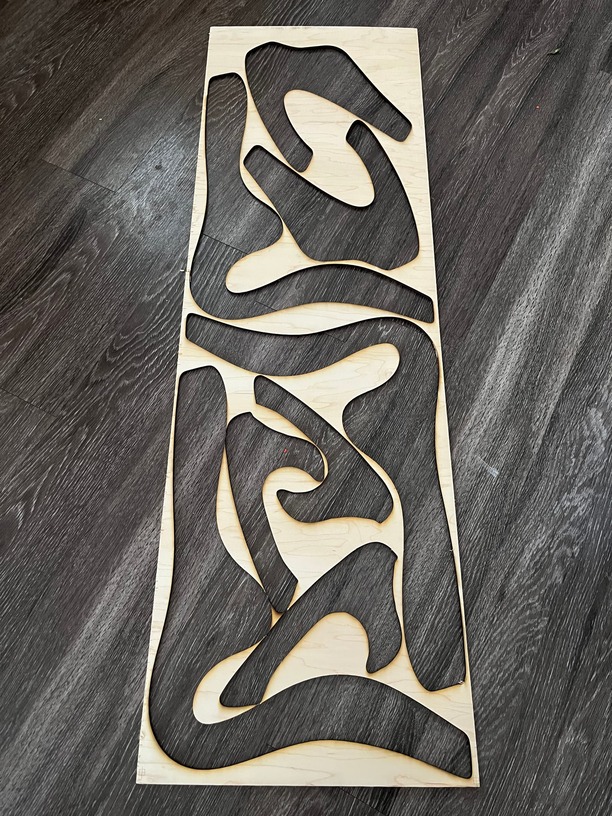
@sqw, I saw this chair design digital file on Etsy and decided I HAVE TO FIGURE OUT how to make it work with the Glowforge! The key ended up have to add dovetail notches where the back rests meet the chair base. That way I could easily cut everything the long way and later puzzle-piece glue them back together. Then it was arranging everything to best fit and maximize the plywood area. Even still… it took four of the 4’x8’ panels cut down to 20"x48" lengths. I used just about all of them including some recuts. Came pretty close to the edge of some.
You gotta appreciate large-scale projects like this. The determination it takes to see them through is always impressive to me.
You mentioned it took you a solid month to arrange things, were you including al the cutting and assembly there too, or no? If not, how long would you say it was from idea to complete?
^ That month was completely digital. I used Adobe Illustrator to add dovetail cuts to each main chair section and then arrange them like a puzzle to get the most out of each panel of wood. I believe I made sure it fit inside a 20" wide svg file with 1/2" margin wiggle room on either side… still pretty tight though! I have somewhere around 12 digital files I uploaded to the Glowforge App to cut… and some of those needed to be cut multiple times.
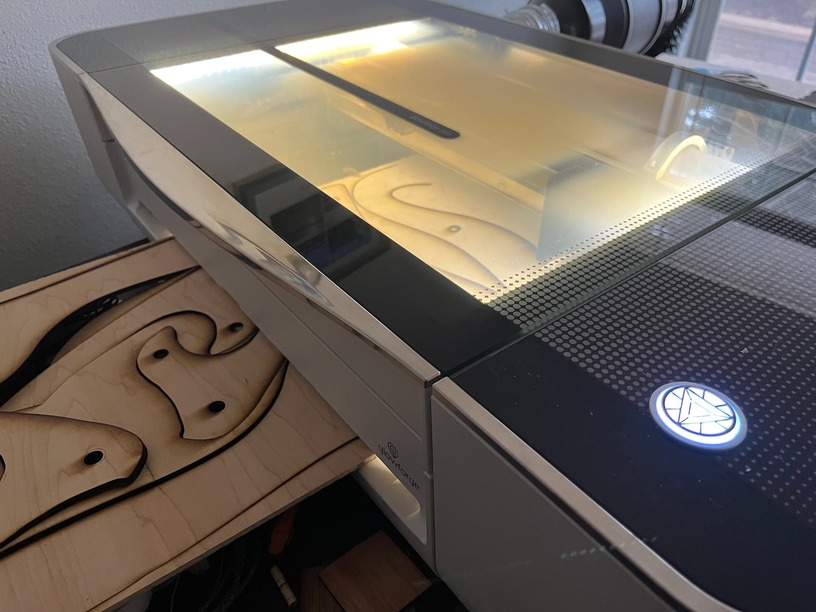
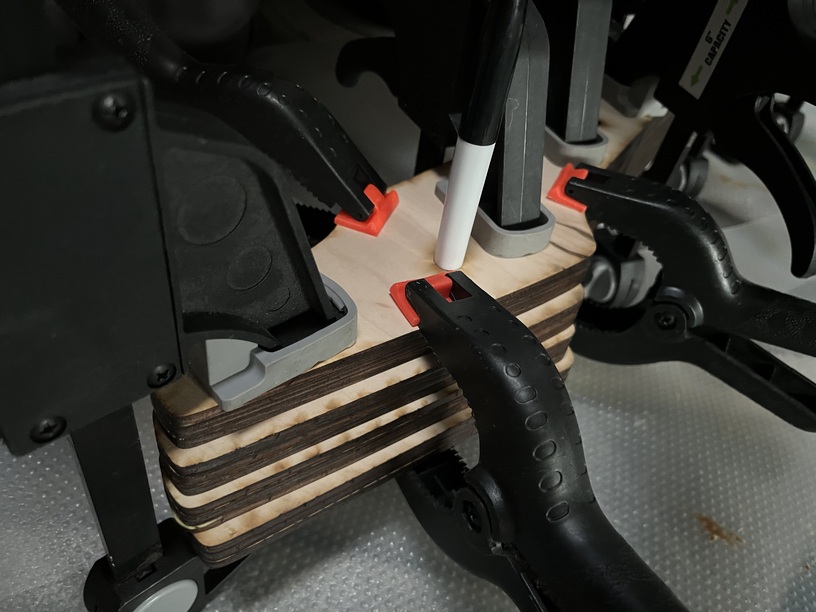
I am guesstimating here, It probably took around 35 hours total to cut all the required panels. I spread the cutting time out over the course of several weekends. Gluing was a pain, but manageable. I’d glue 3 layers together, clamp for around 5-8 mins, then glue another 3 layers, add them to the first stack and clamp together, glue another 3 layers… repeat until I had a 3x stack of 5 complete layers and then clamp together for an hour before repeating the process… gluing took many nights of this as well. All in all… this was done over the course of 6 months of spare time here and there. If I could work on it full-time, it’s possible to do it in perhaps 1 month.