Ok So, (Friday) <— my glowforge name… HAS ARRIVED and so far everything has been great and fairly good on alignment.
However now that I’m starting to use the laser I am wanting to do multi colored projects. I have downloaded the illustrator multiple shade of grey and blacks for the different power levels but the it just shade everything the same color when engraving, I have to manually change the power for each layer, is there an option to have it engrave the whole image and different power levels by itself? or do you need a jpg or something for images to auto shade?
I am just starting out on illustrator and so far think I am doing fairly well at it but does anyone know or have or have had made a detailed easy to understand tutorial on how to do multi shade images and cut paths around said images v.s. just standard black and white cut outs? I cannot find any really good detailed demos of it on youtube. Any help would be great.
Also I seen a test file at one point for testing new material settings with different shades and cut settings in one file, does anyone have that and if so do you actually have to manually setup each item in that file or is it auto shaded to correct settings like I want a phone to do?
Thank you this works, next question on this same thing though. After I rasterize the image when I go to upload I have to select the original image I designed from and it says to embed the file, How do I do that on illustrator to embed the image so I don’t have to keep or find the original again?
Embedding the file in Illustrator is easy - select the image, and on the top row there will pop up an Embed button while it’s selected.
The important part happens when you use Save As to save the file as an SVG though - there’s a radial dial button for Embedding the Image on the Popup - you need to use the settings shown below to save the SVG.
thank you, mine was working with normal settings just had the linked marked, what does the decimal places do? I had 1. and the css properties where different too and the convert to outline thats if i have text in the image I’m guessing didn’t try this yet but will that engrave text with out me rasterizing it then, do those even matter?
Those are the settings that have proven best for this…I think some folks were having trouble with scaling or something with different decimal places, and if you have Convert to Outline selected, if you forget to convert your text to an outline before saving it, that setting will do it for you. (Although they’re not grouped and they make a mess, so it’s better to do it yourself in AI before saving it. In my opinion.)
Anyway, there are fewer problems with the interface reading the file if we use those settings. (They generally stay that way until you open a new file that has been saved with different properties, so if you’re using a file that someone else created, remember to check the options before saving. Otherwise, if you design your own, it’s a one-time setup.)
Decimal places is for accuracy. The difference between an element or point being placed at X-10.1” versus, say 10.185”. I typically use 3 decimal points for imperial units - one is probably sufficient for metric. The only downside is that it makes the file slightly larger, which is mostly irrelevant since we aren’t so worried about serving them over the web where every Kb counts.
Good info, thank you. I am very much starting to get the hang of this now. Only 3 days in and day one I only had time to print the entry stuff. I will be posting everything I have been making later. Thanks for your help.
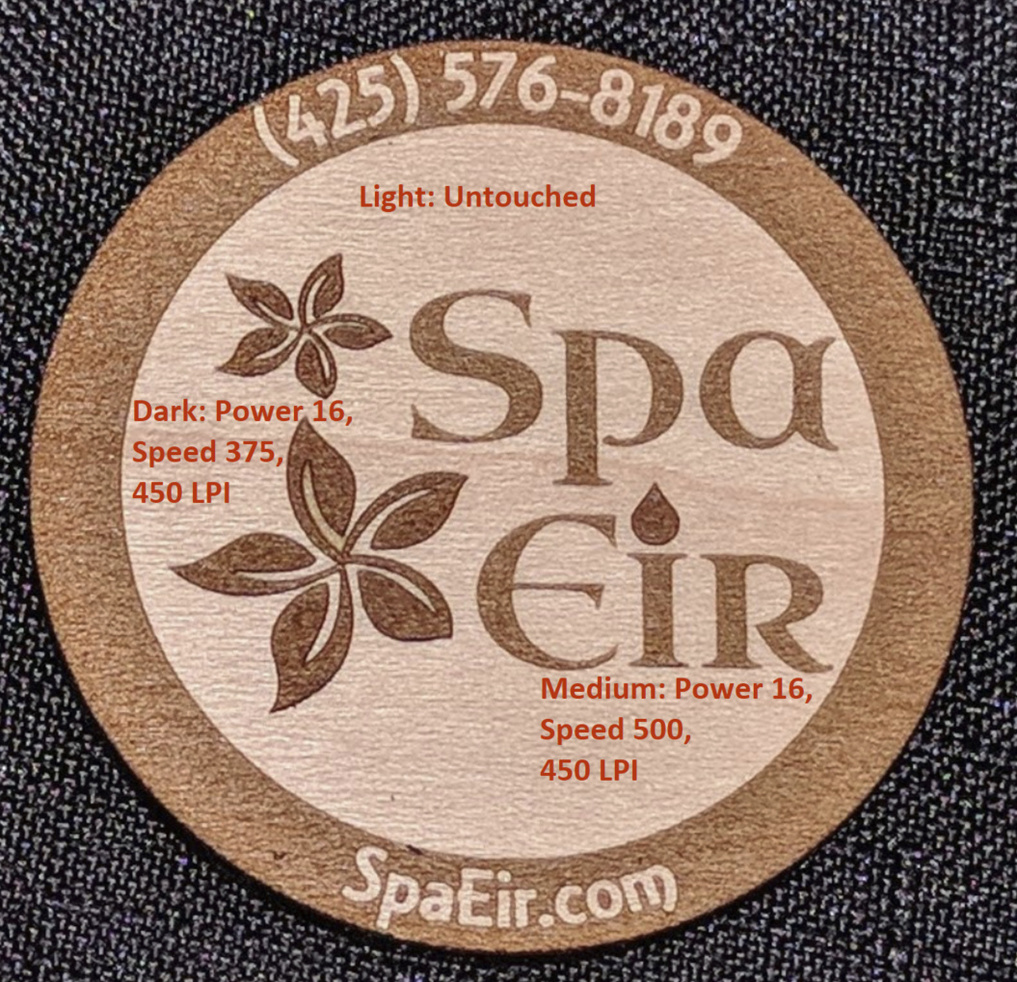
As others have said, you can rasterize your image and use the photo engrave features. I tend to prefer designs with fewer, more boldly defined “colors,” so I do a lot of engraving of vector shapes.
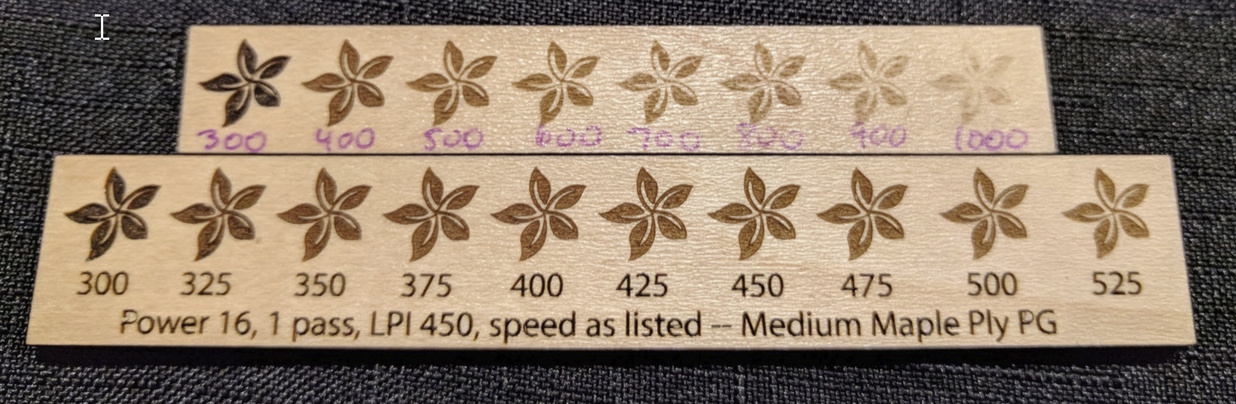
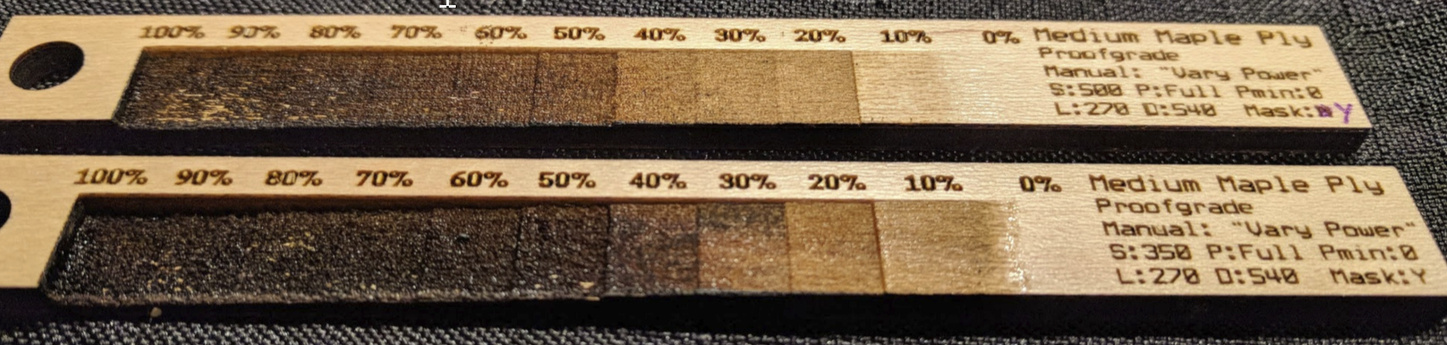
For example, here is an object on PG Medium Maple Plywood.
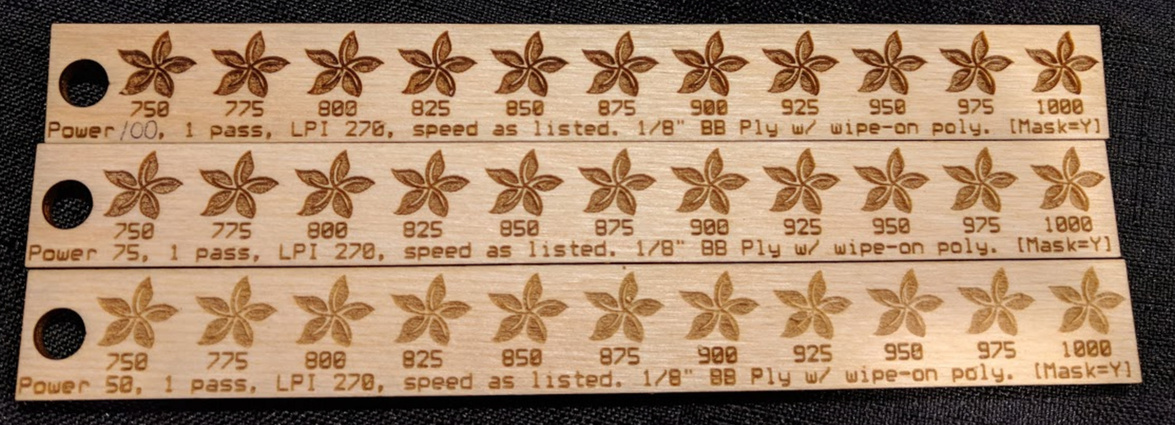
This is baltic birch. You can see it just does not get as dark as PG MMP. I think the inner MDF core of PG plywood is superior for “colored” engraves, but BB is so cheap I will keep using it for a lot of things.
For my “final” settings I try to use as high a speed as possible to keep job time as low as possible. I have also learned to live with 270 dpi for most wood projects. I don’t think most other people will notice increased resolution, but I sure do notice the increased job time…
Unfortunately there is just no way around a lot of experimentation!
As for making cutlines, try this method in Illustrator. I got it from @ekla and documented it with pictures:
Can anybody recommend how you would rasterize images in Inkscape? I am struggling with the same shading dilemmas and aside from adjusting power for each part of image, would like to follow the suggestions from this thread, but with Inkscape. TIA
Select the items you want to rasterize and then click Edit > Make Bitmap Copy. The raster image is going to appear right over the top of whatever you selected though, so you need to drag that out of the way and then delete the stuff underneath if you don’t want to have a really complex file created.
I will say that this is the simplest way to do it, but it’s not ideal if you want higher-resolution images.
For that you should use File->Export PNG image. You can choose the DPI on the PNG, and get a very high quality resulting image. If you’re doing something very detailed, I would recommend this method.
Basically, you export the PNG, then drag the resulting exported file back into your inkscape window. Now you’ll have a raster copy of your vector art, just like bitmap copy, but with much more flexibility.
@evenasd2 I just took some 70’s clipart my granddaughter liked and converted it to the bitmap format in Inkscape! Wow, that was very simple and worked very well. I keep finding more and more things to make and learn on this neat platform (Inkscape > Glowforge)! Thanks for your help and ideas as well as those of the other contributors on these fora.
So since this post inkscape has been upgraded a few times. You can now select the dpi of bitmap conversion in the preferences, so you can use the “make bitmap copy” command to get 300+ dpi images that will engrave nicely. Something to consider.