With the forum’s search likely bringing Affinity Designer Stitching Holes queries to this thread, I thought it’d be more appropriate to provide the best start-to-finish process. It’s effectively three major steps.
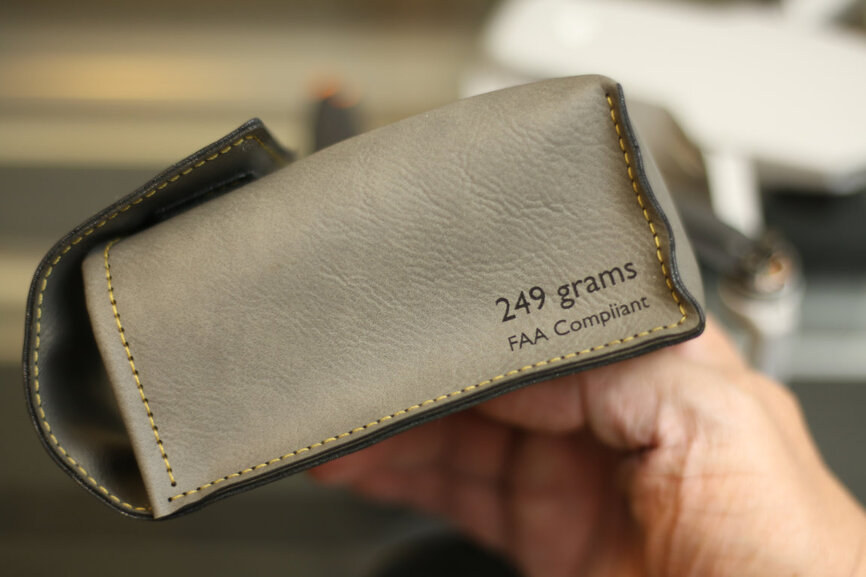
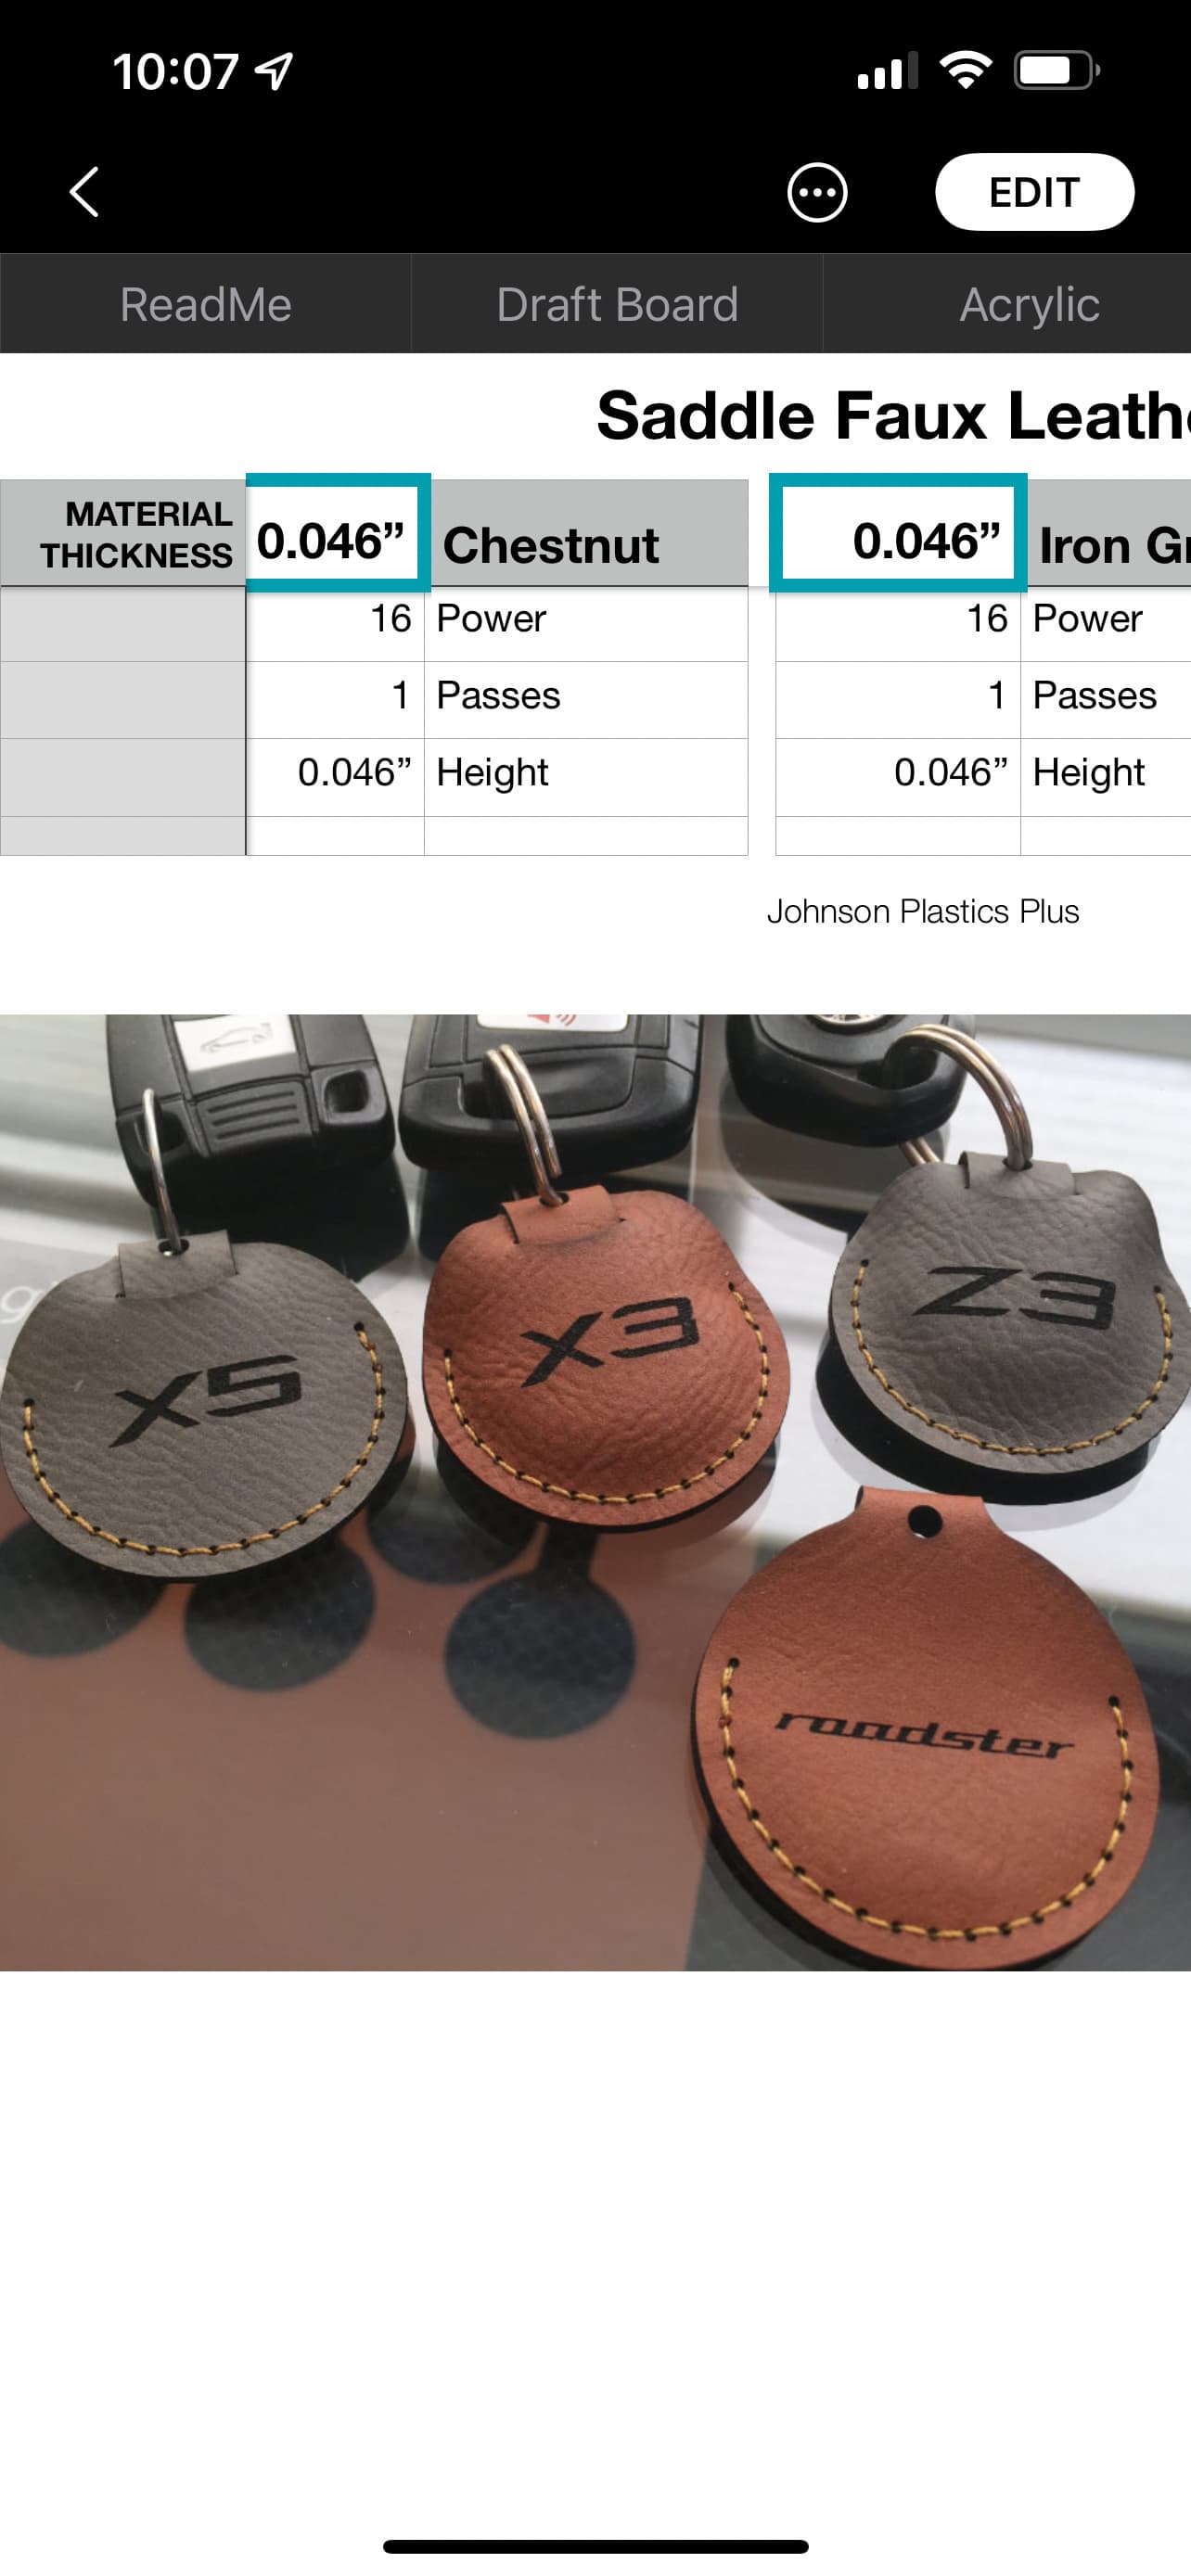
This is the very process I used to control the lay down of stitching holes for the MINI 2 carry case and AirTag Key Fob pouches back in 2021
 .
.
I’ll do this demonstration entirely on the iPad version of Affinity Designer to show it’s equally as powerful and full-featured as the MacOS and Windows versions. Since Affinity Designer’s now FREE,(For iPad too) Stitch Holes ought to be part of everyone’s arsenal.
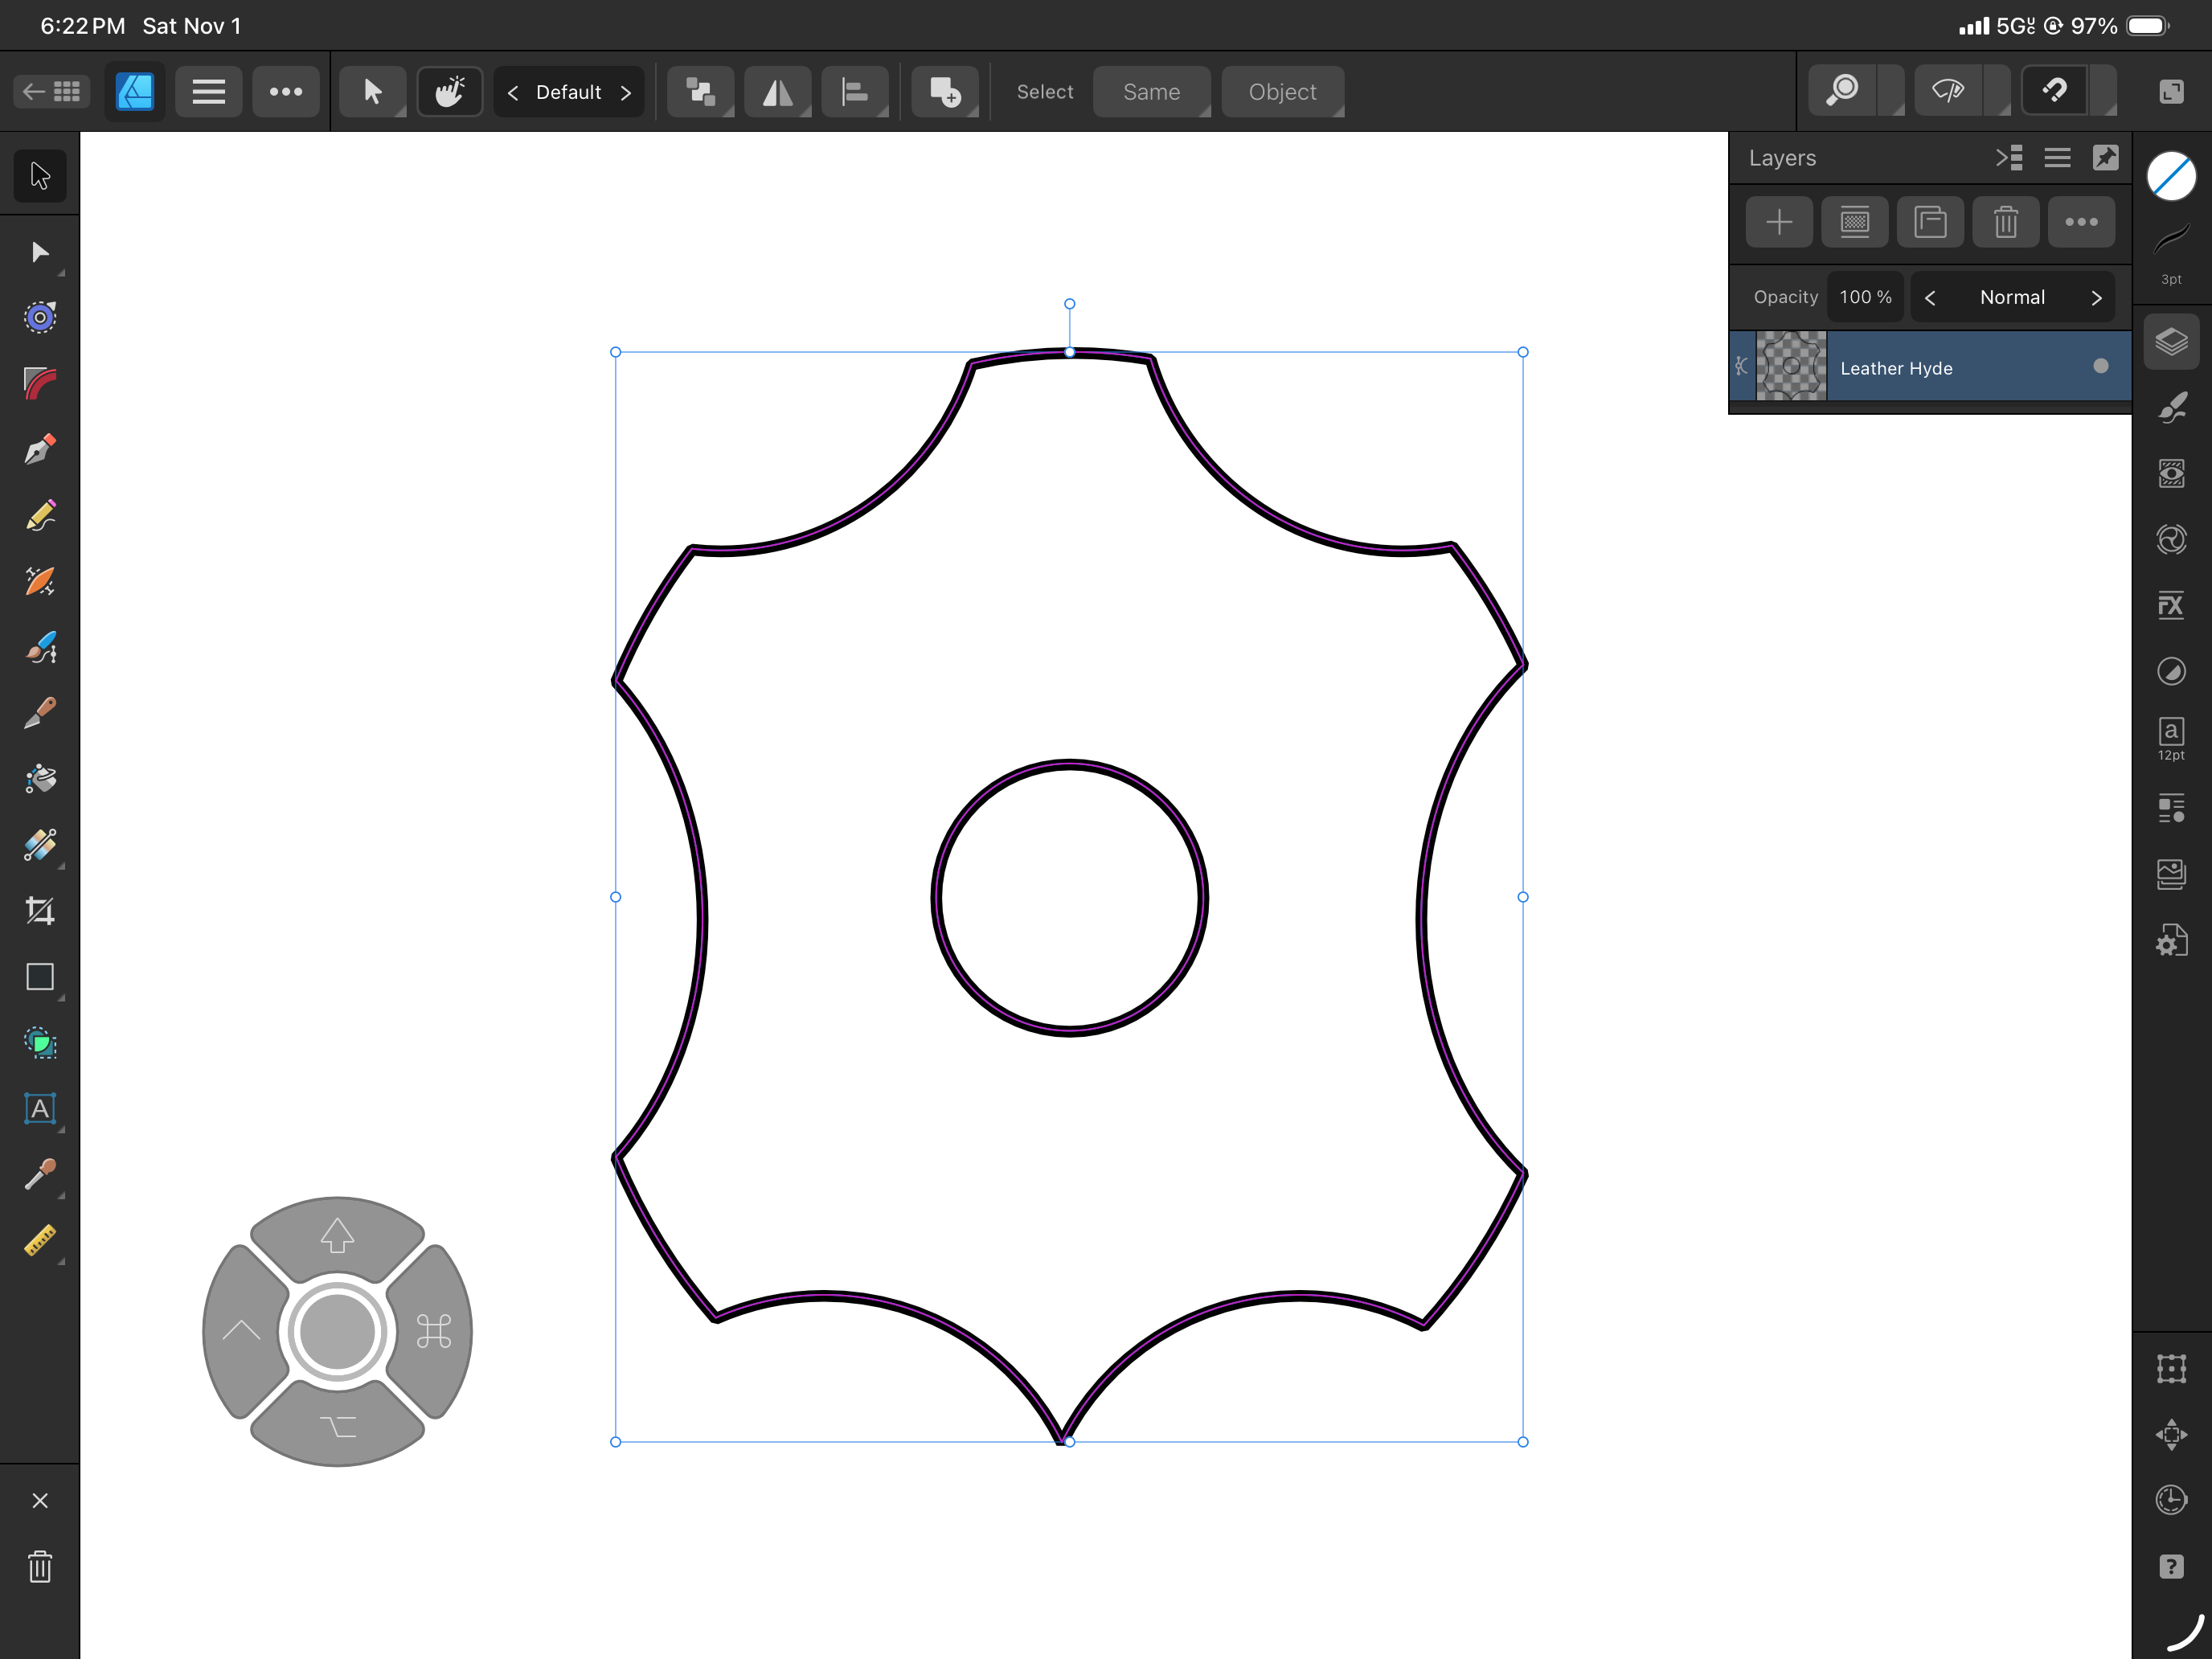
Step 1
We’ll start at the deep end of the pool with a complex shape. Let’s work on a duplicate copy. Typically, the quick-gesture way to duplicate on a touch-interface like iPad is to hit the gray button near the bottom left to fly-out the Alt/Shift/Command buttons. Command-Dragging your object makes a copy, however this copy is ultimately dragged away from it’s initial location by that very action
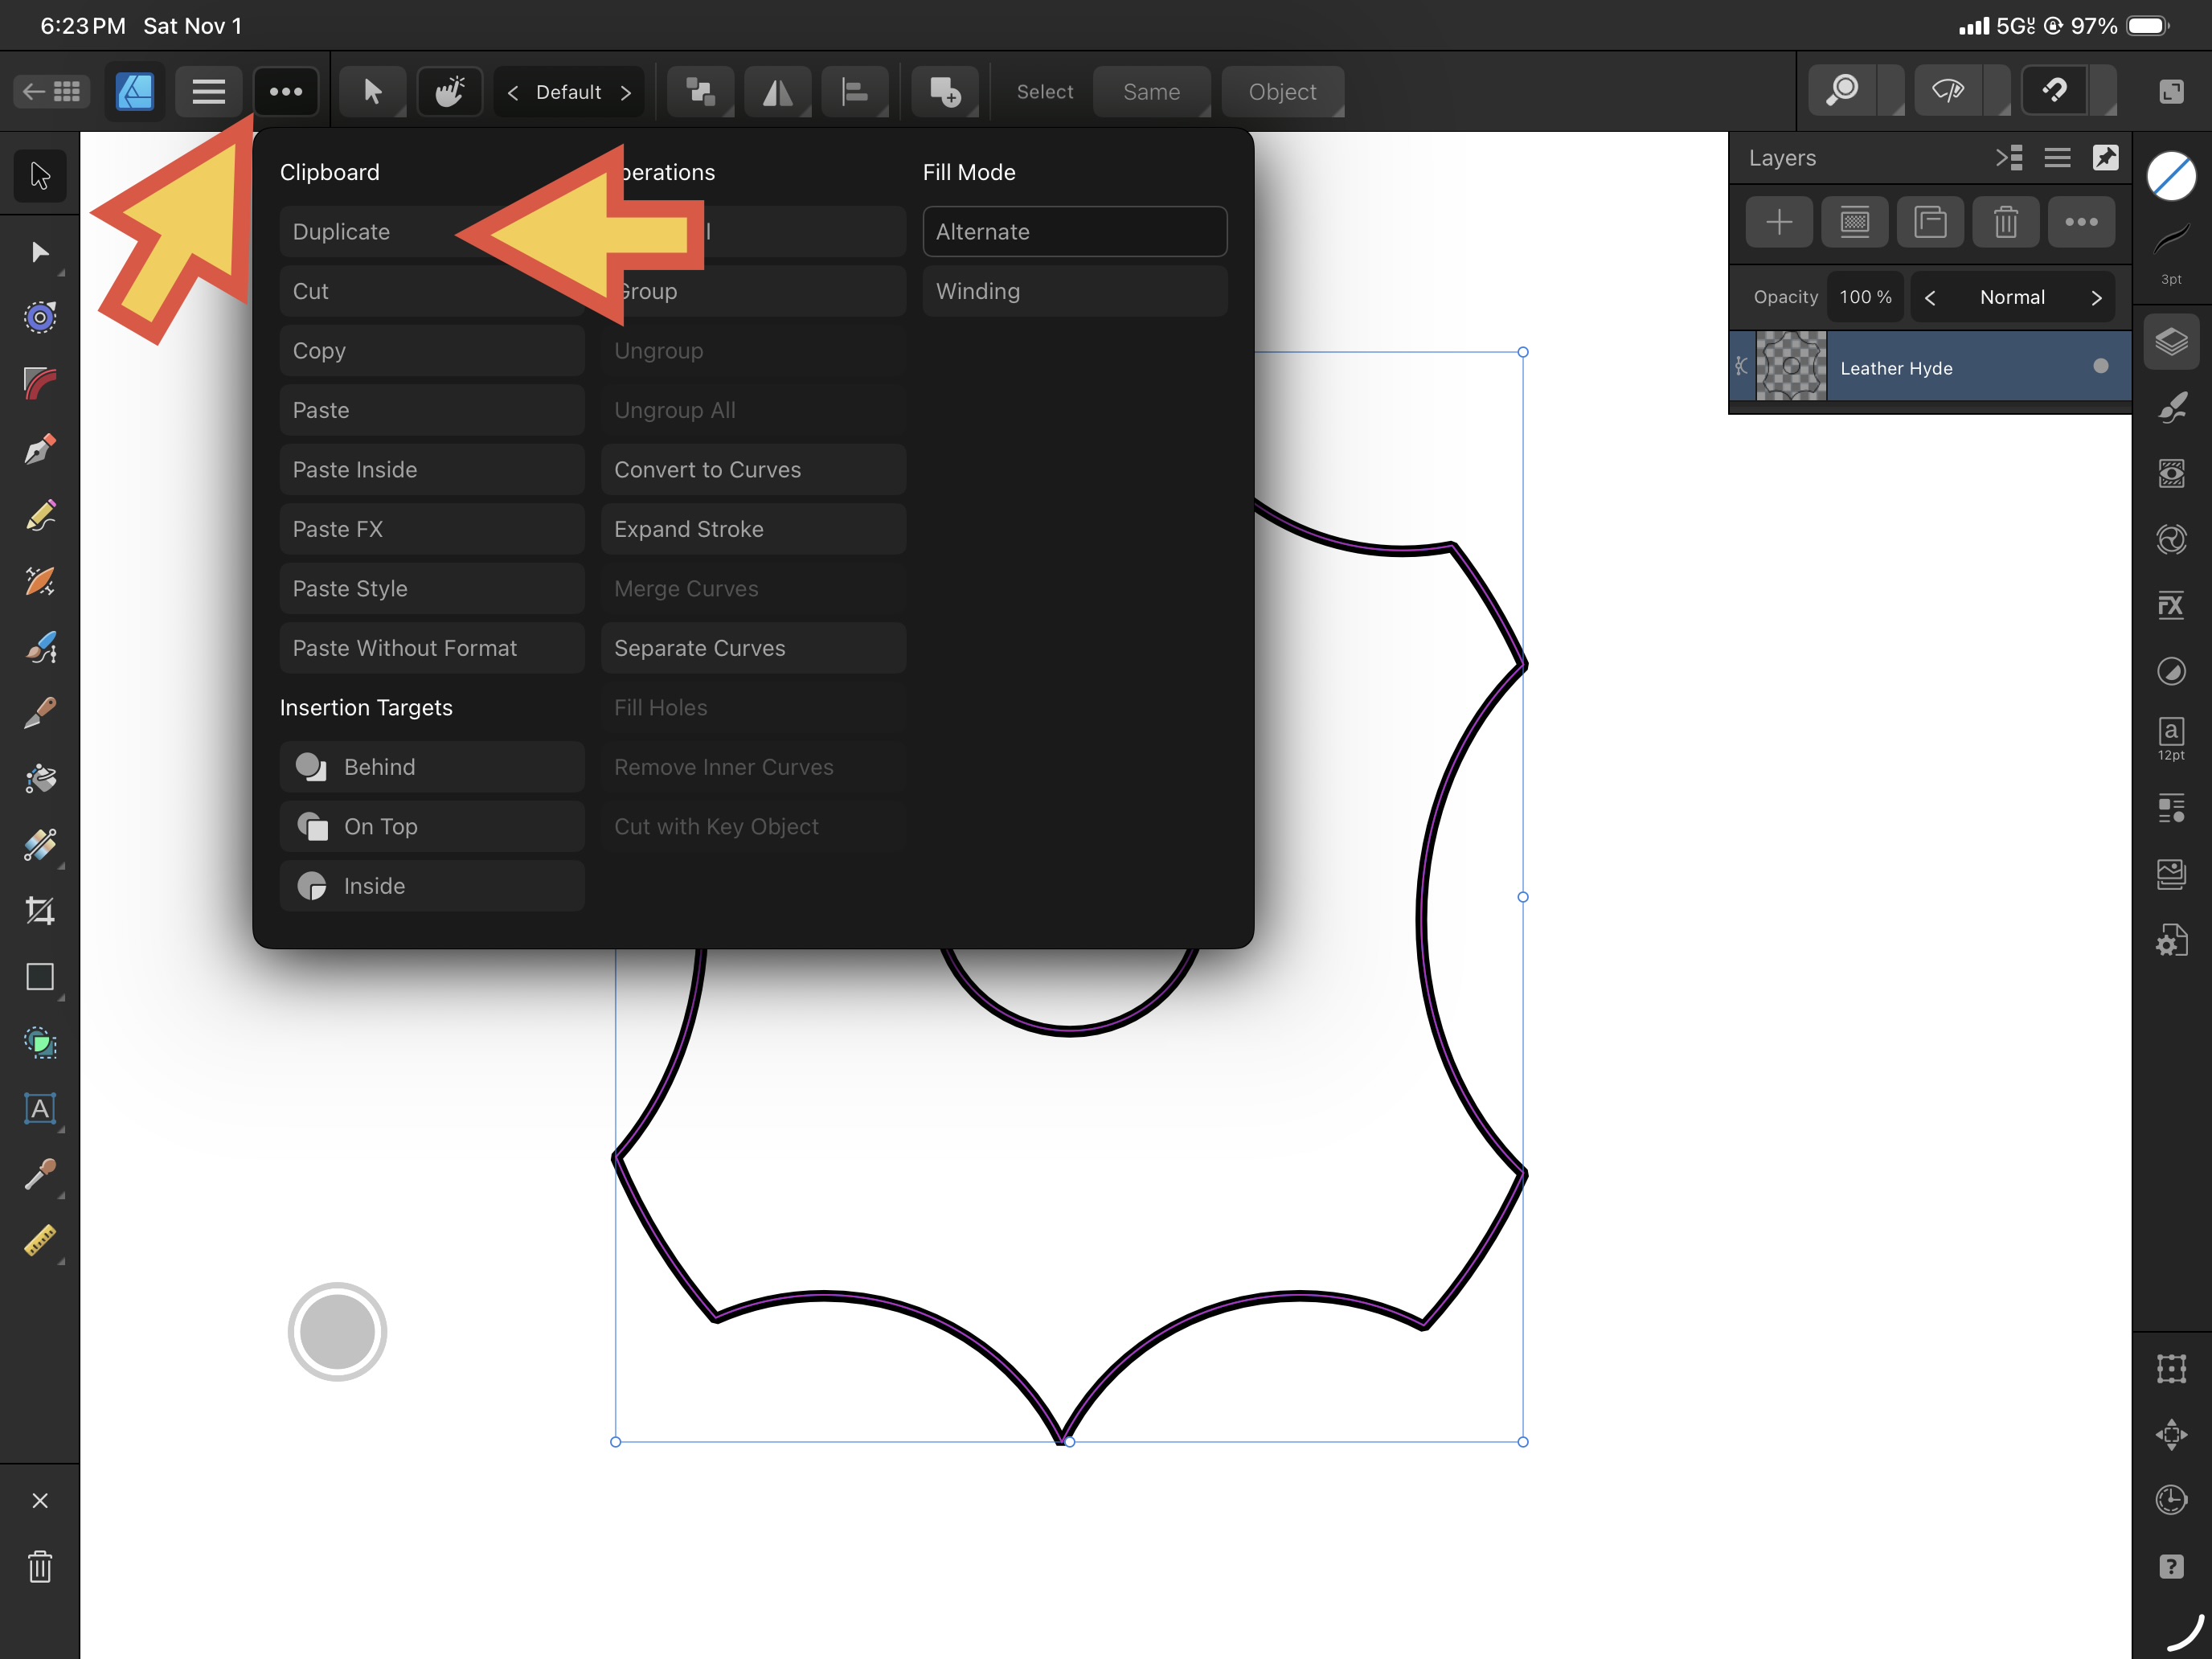
Instead, we’ll hit the ellipses and select Duplicate, or for MacOS/Windows it’s Menu > Edit > Duplicate. Or for keyboard-wielders, it’s Command-J.
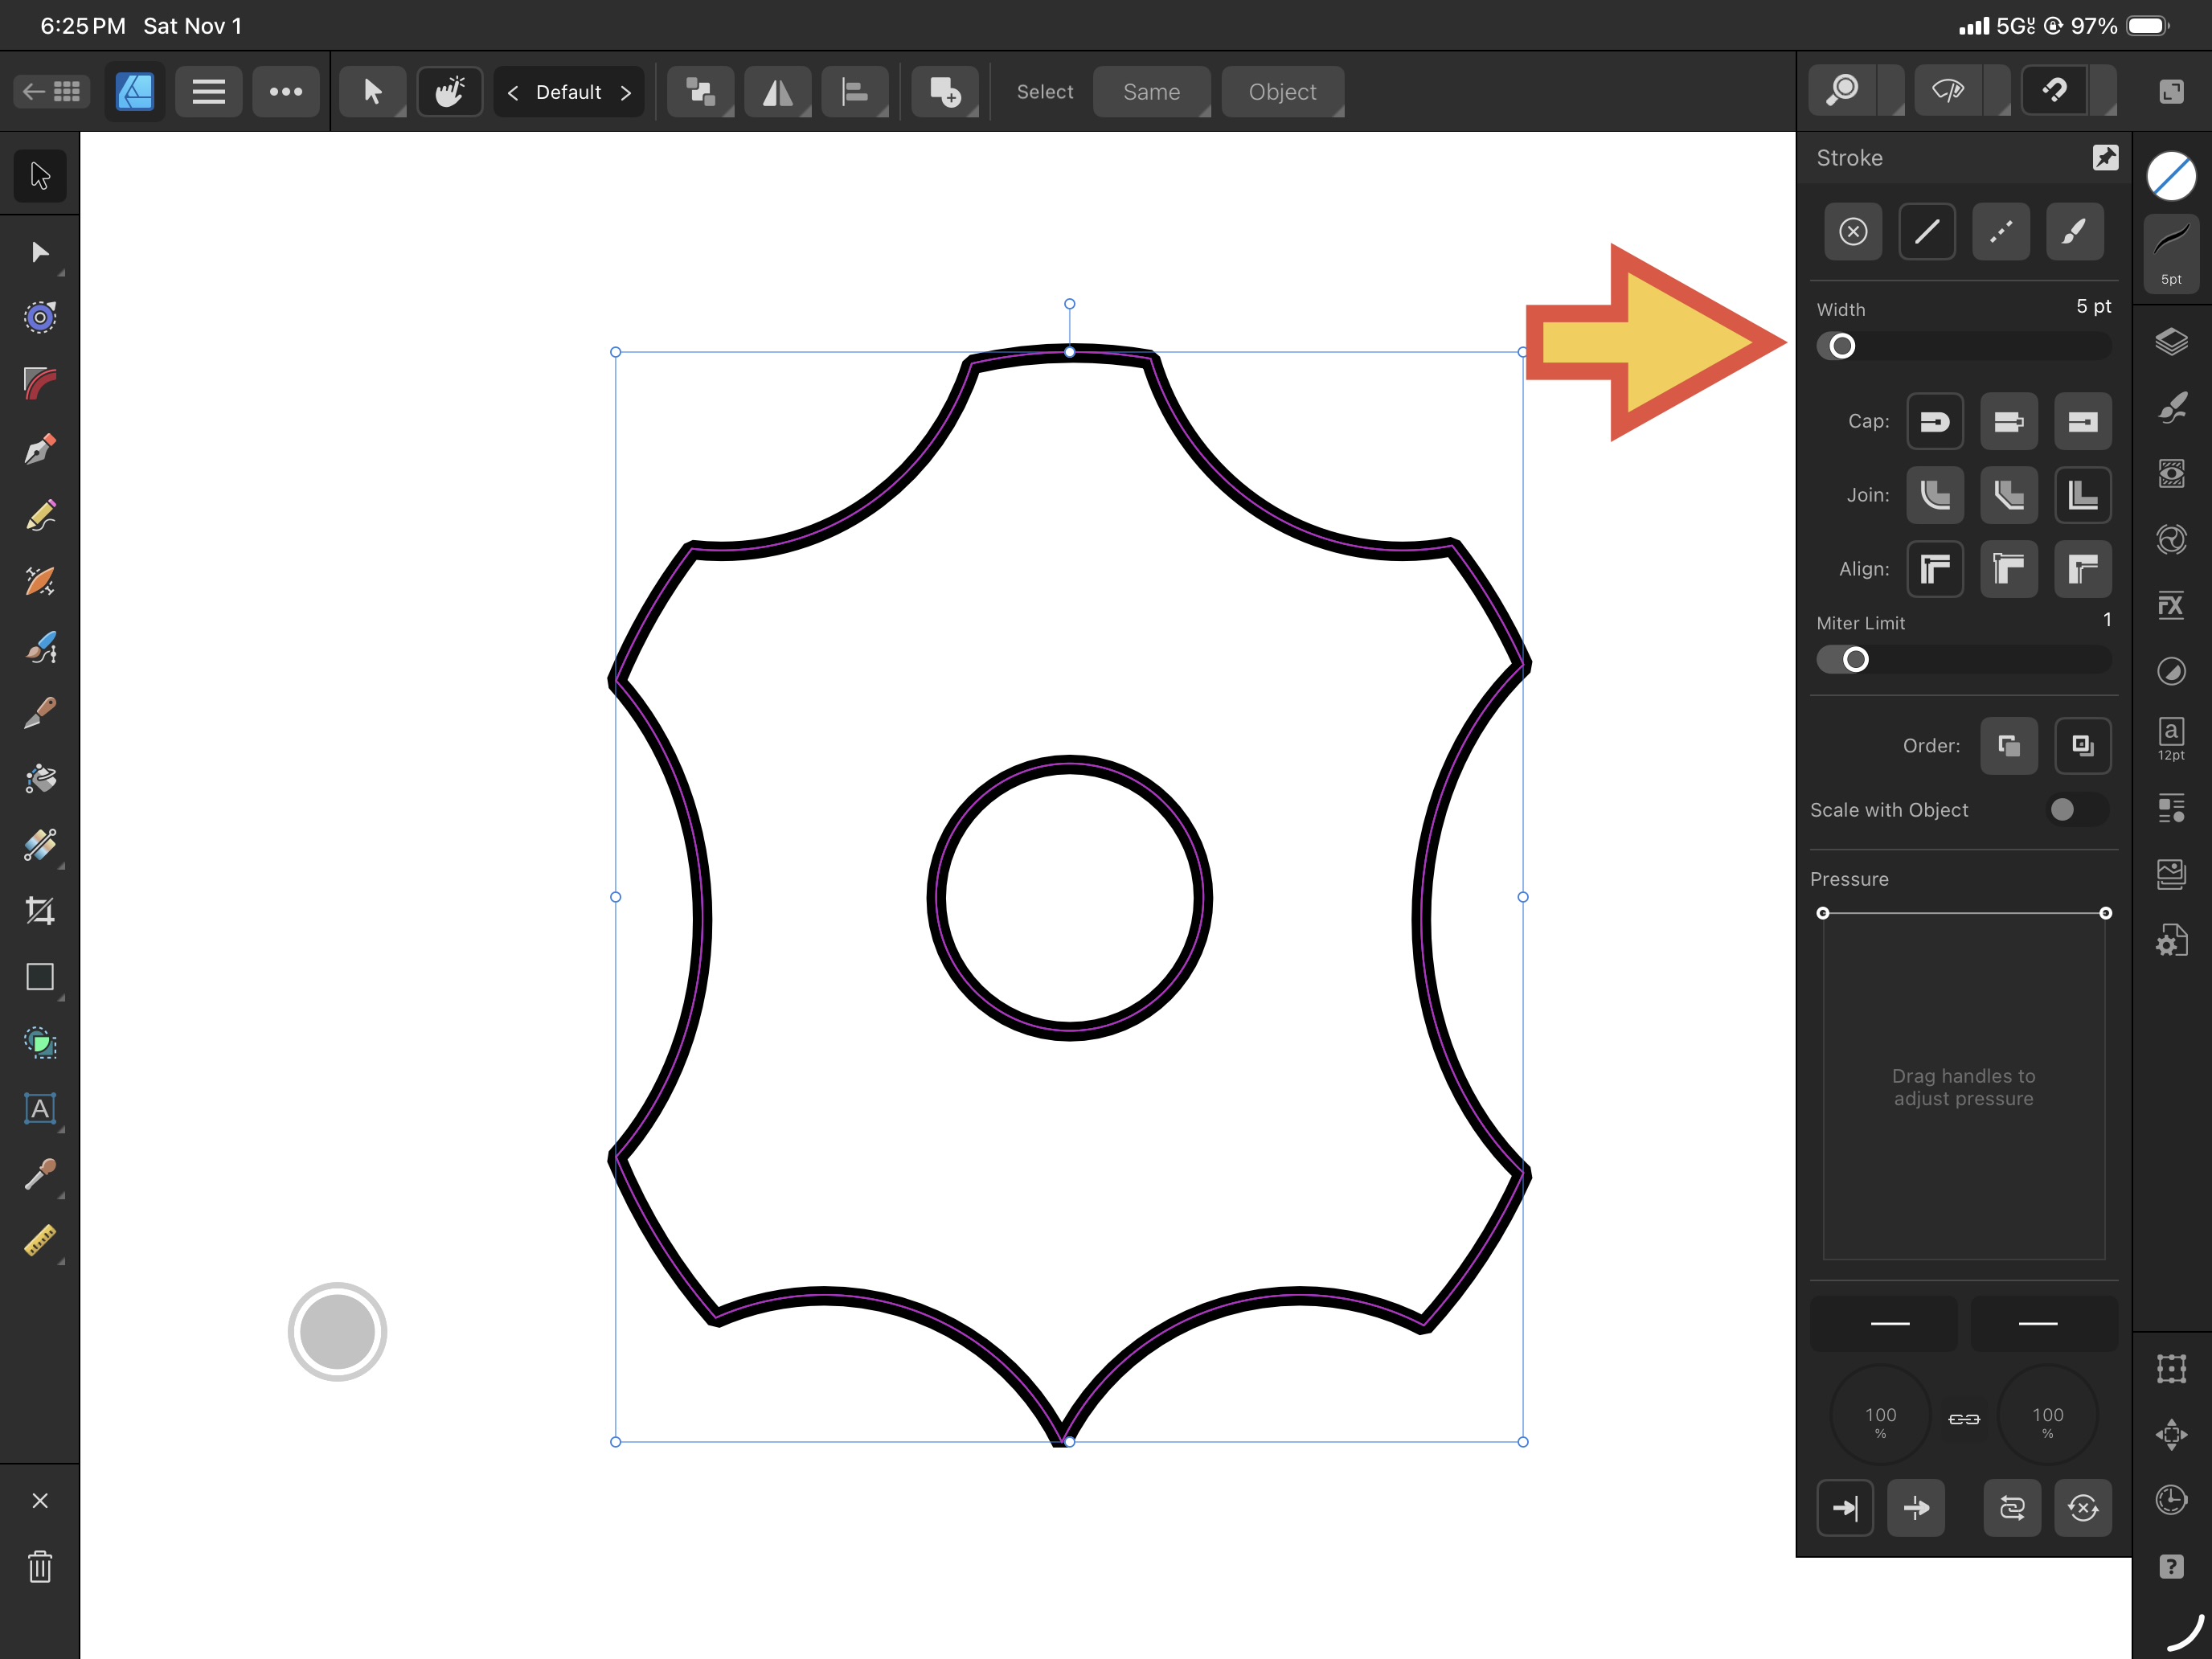
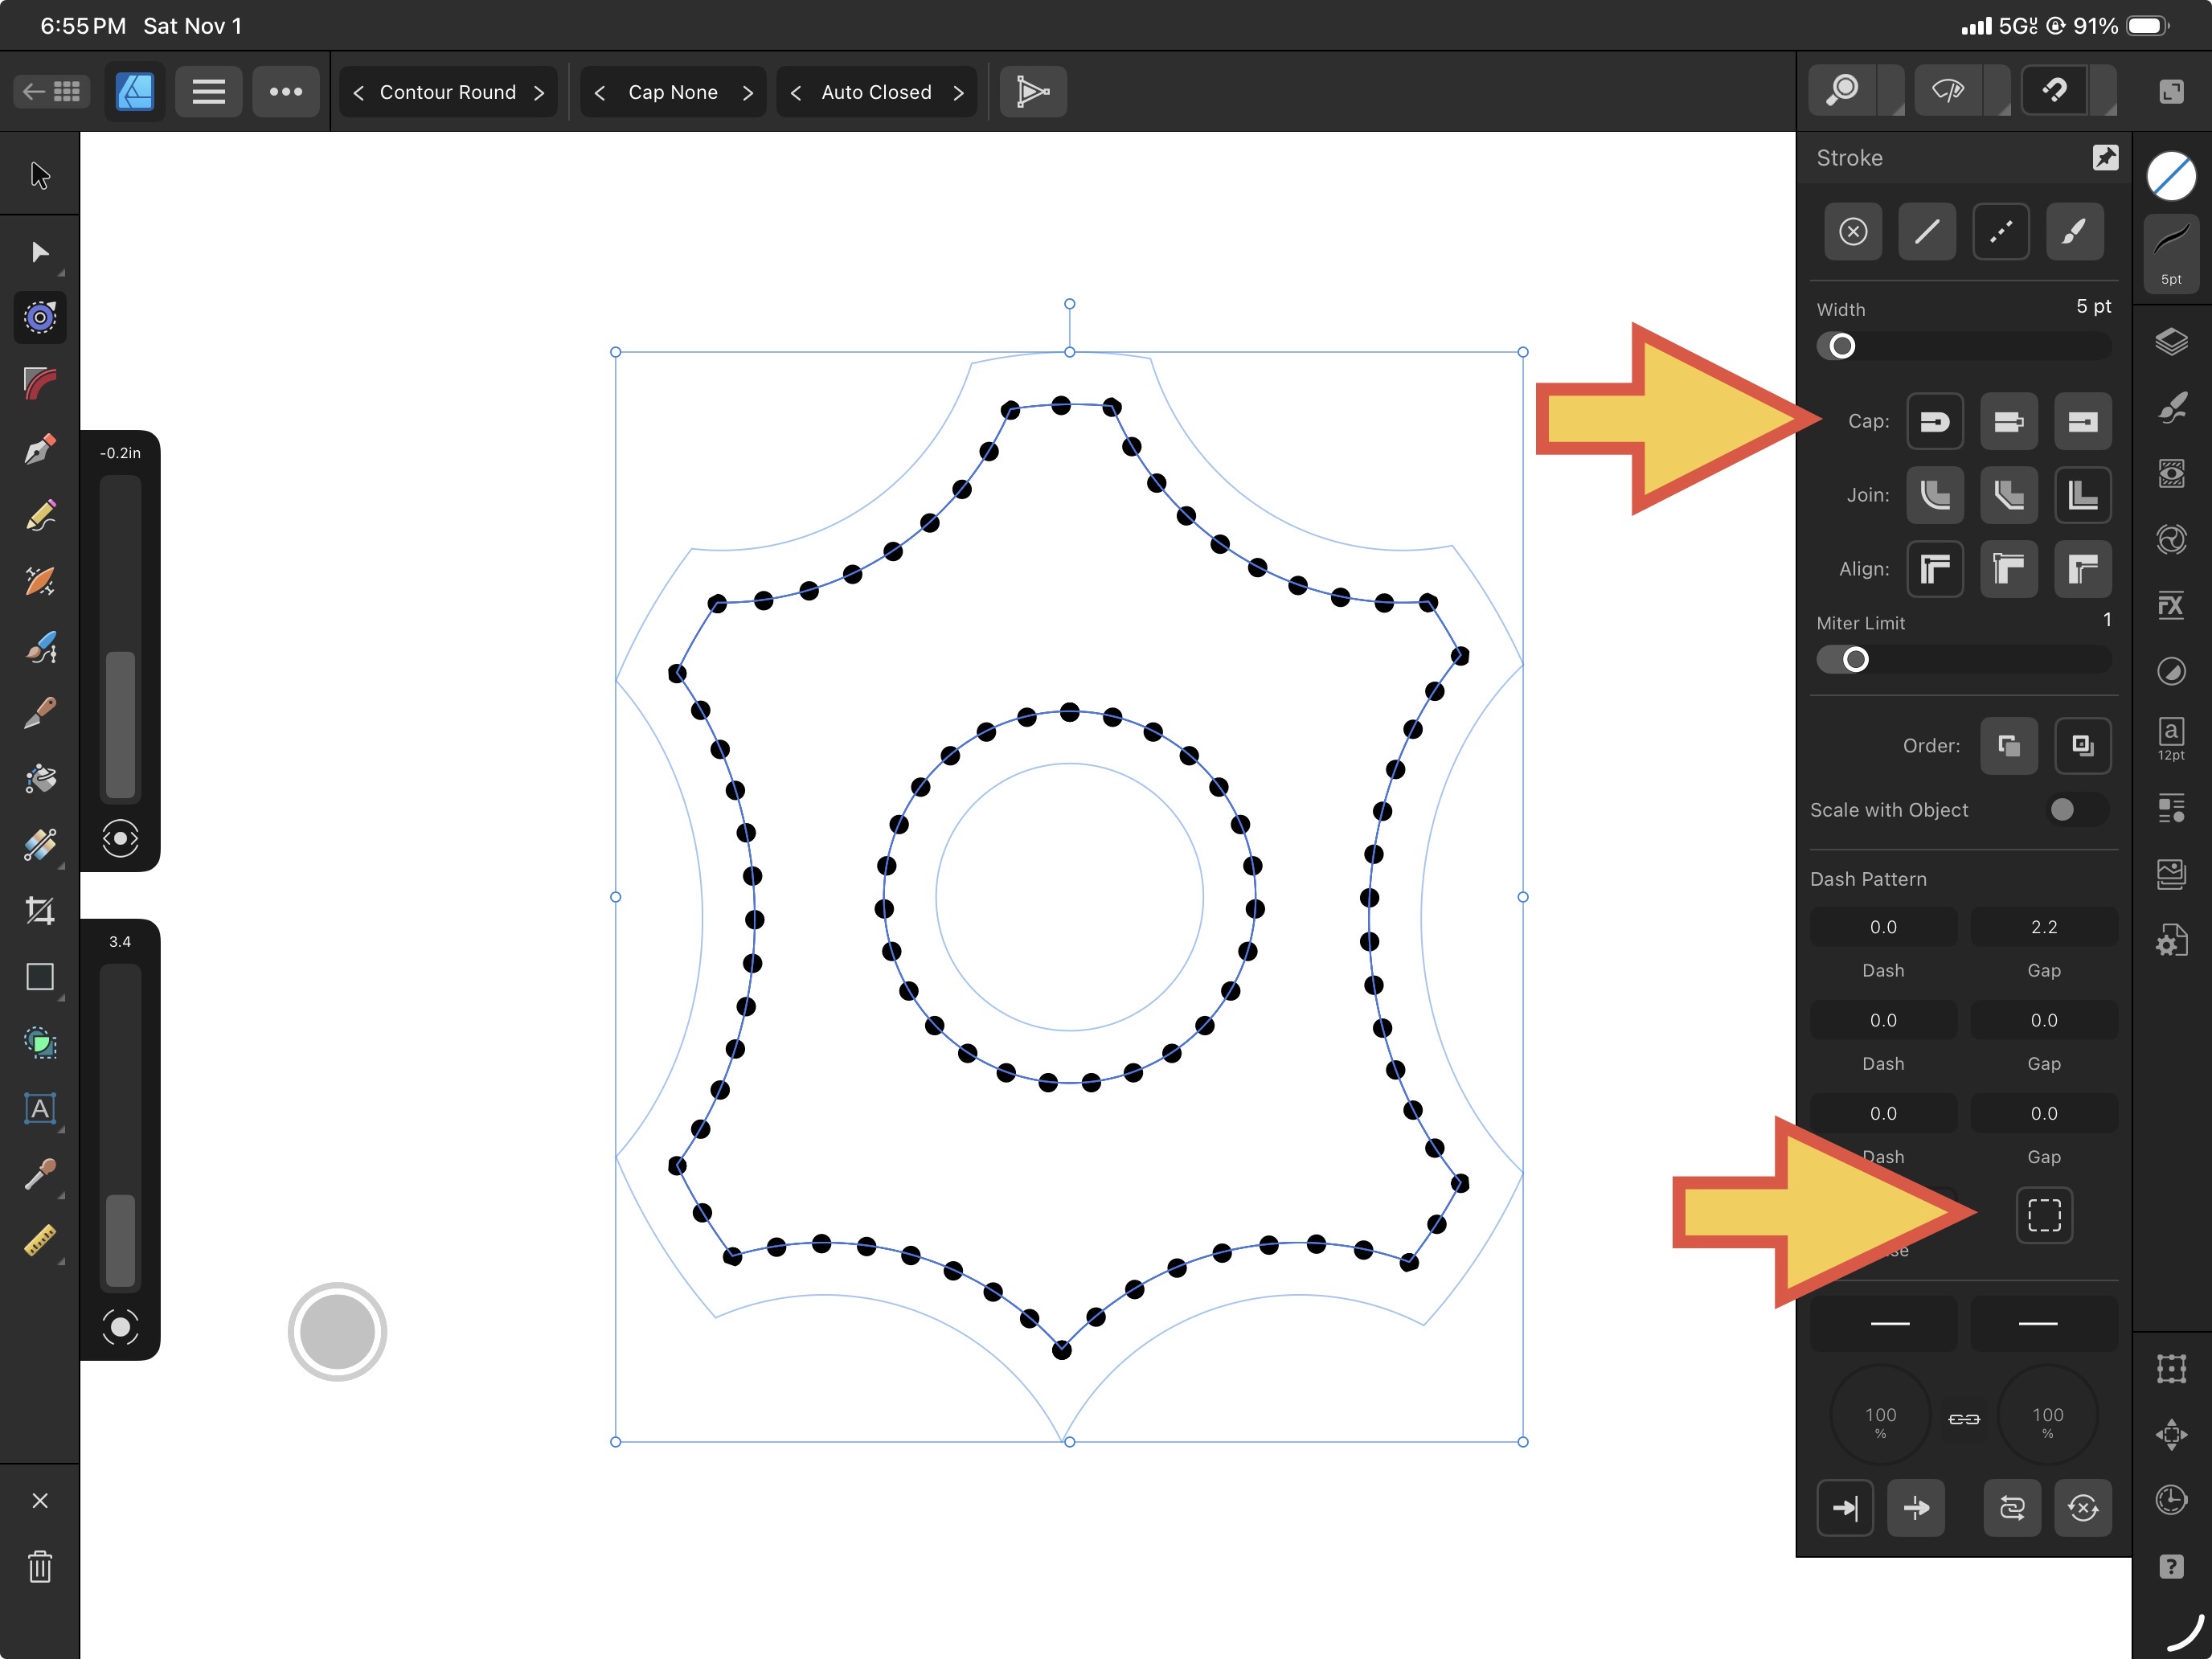
For stitching holes, setting the Stroke Width correlates to the resulting size of the holes, so I tend to want mine larger than the diameter of a thick sewing needle but not much more. I like a value somewhere from 5 to 8. Use the slider or tap the number above it and a number pad pops out to type a precise value.
In the Layers Panel, turn off visibility for the original shape to keep it safe and hit the Contour Tool. It was introduced around version 2 of Affinity and will be one of the crucial game changers here. Be sure the duplicated shape is the one selected.
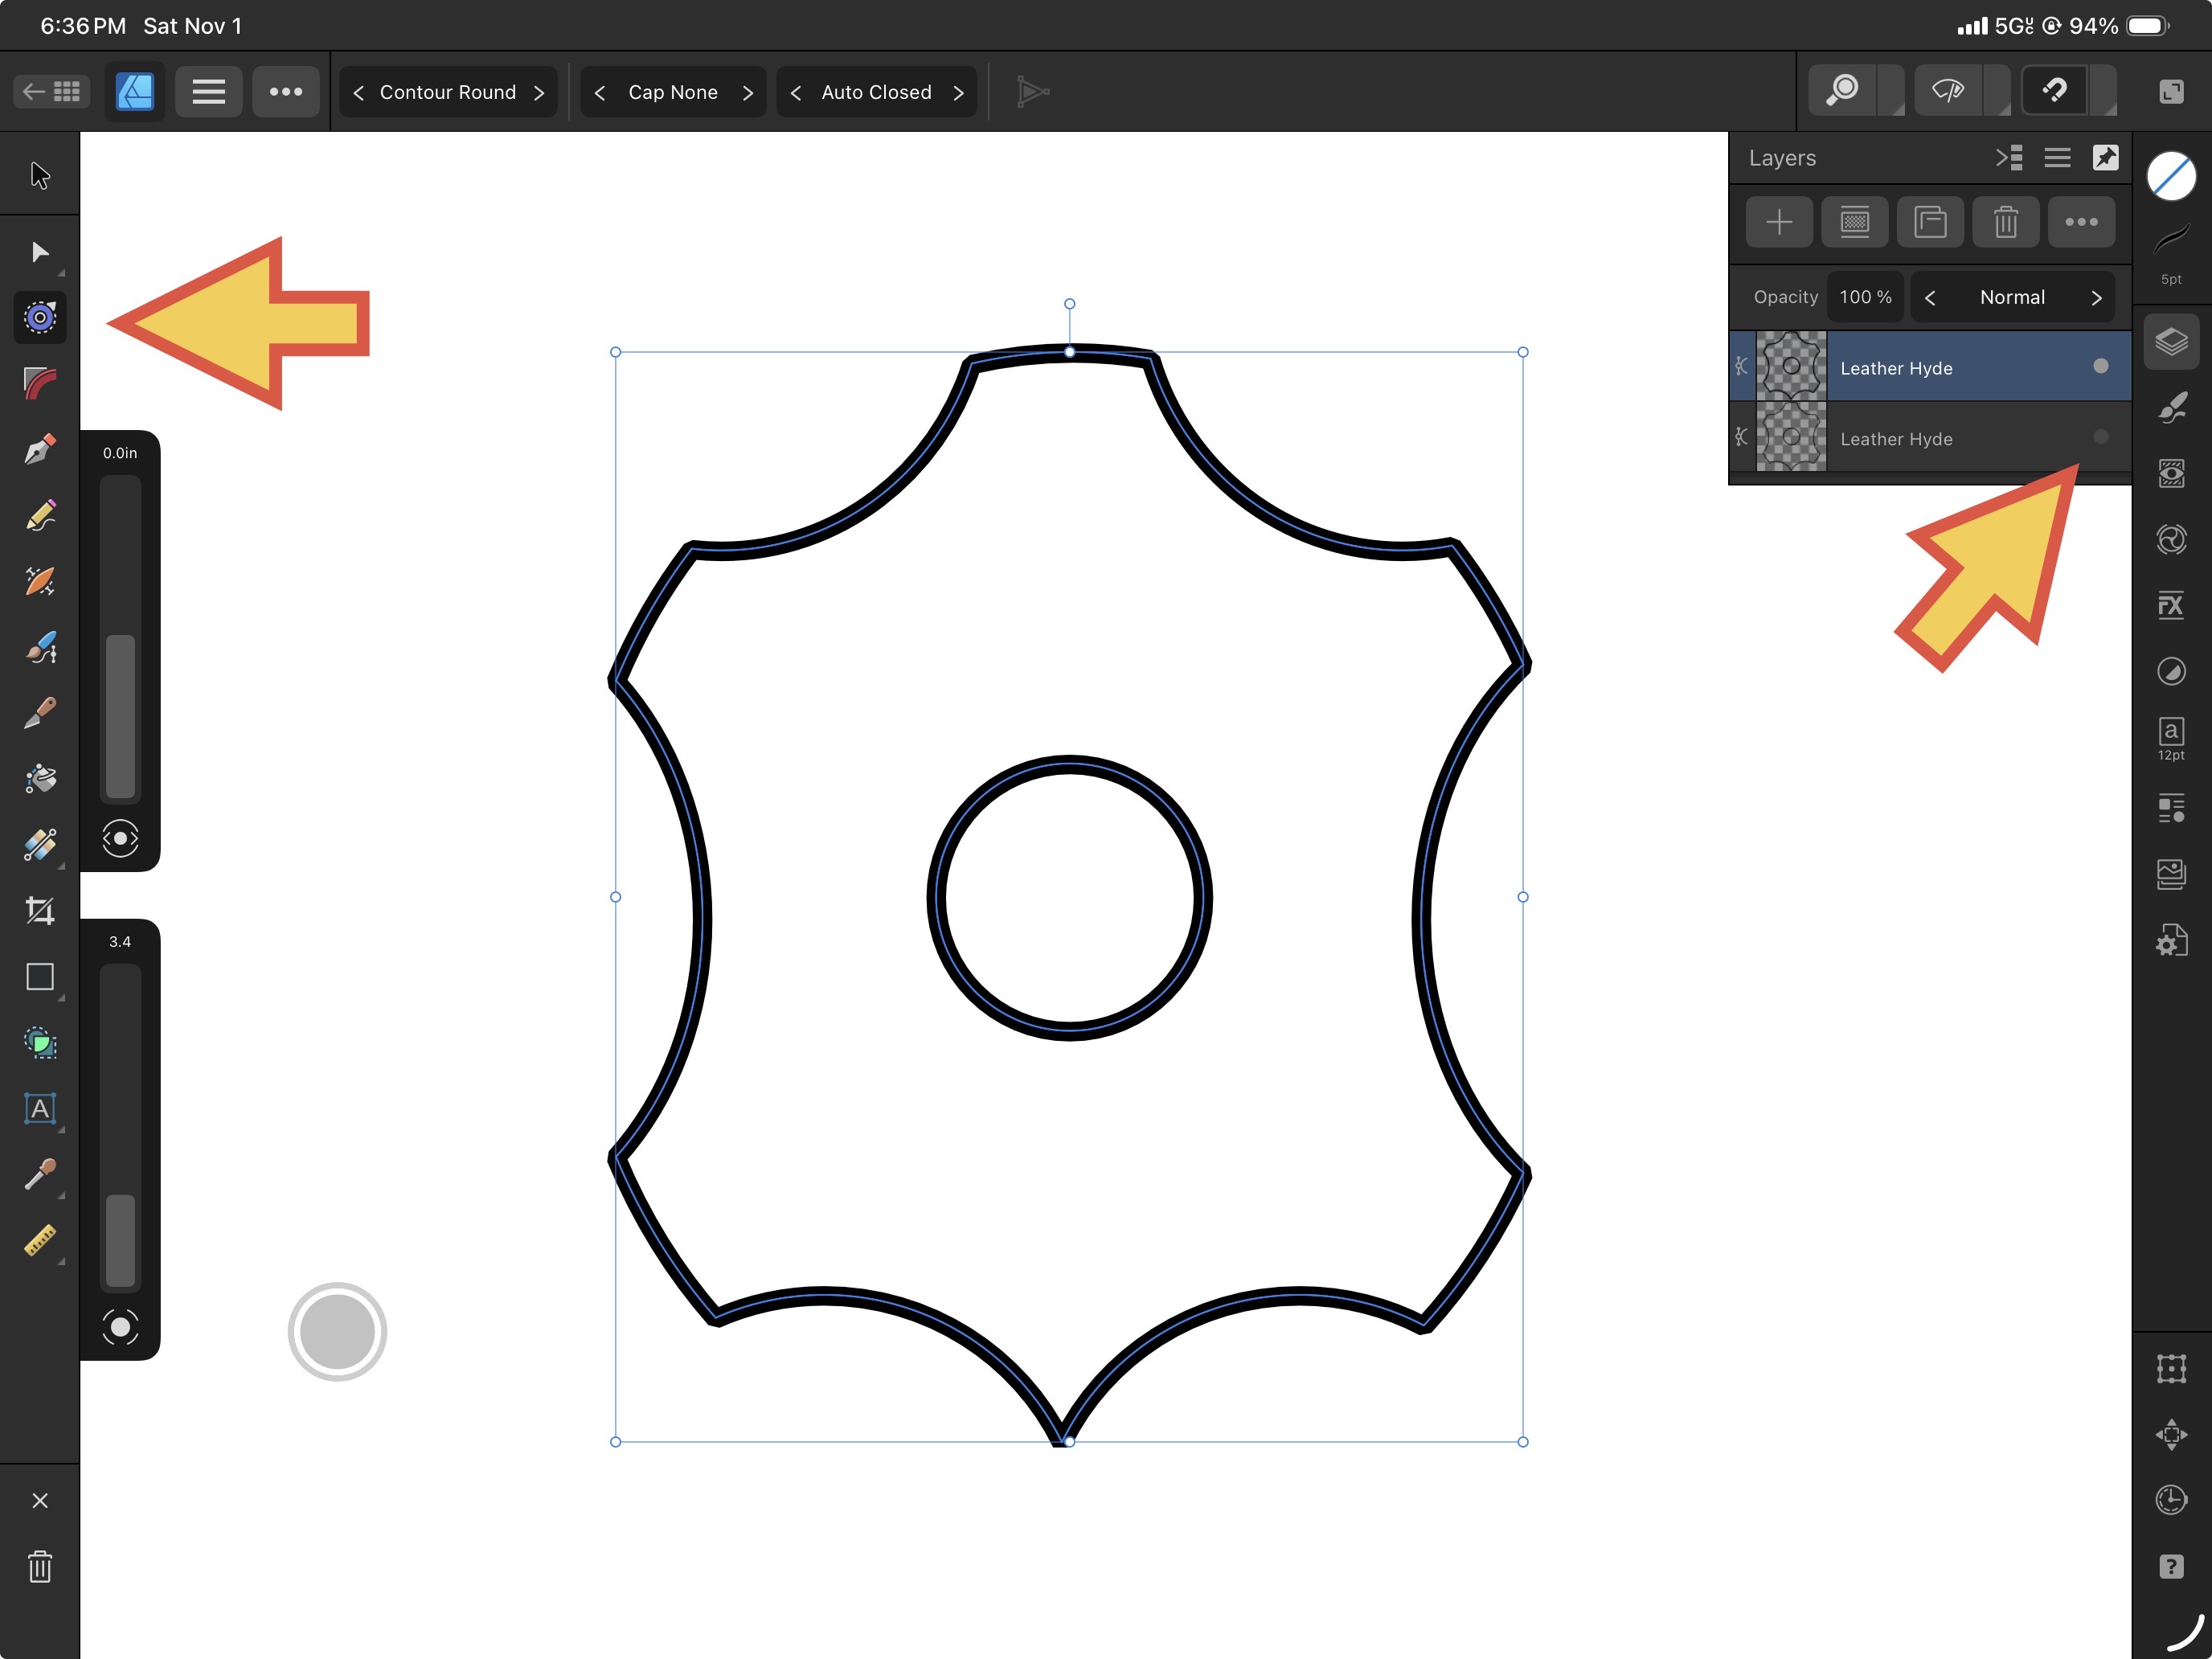
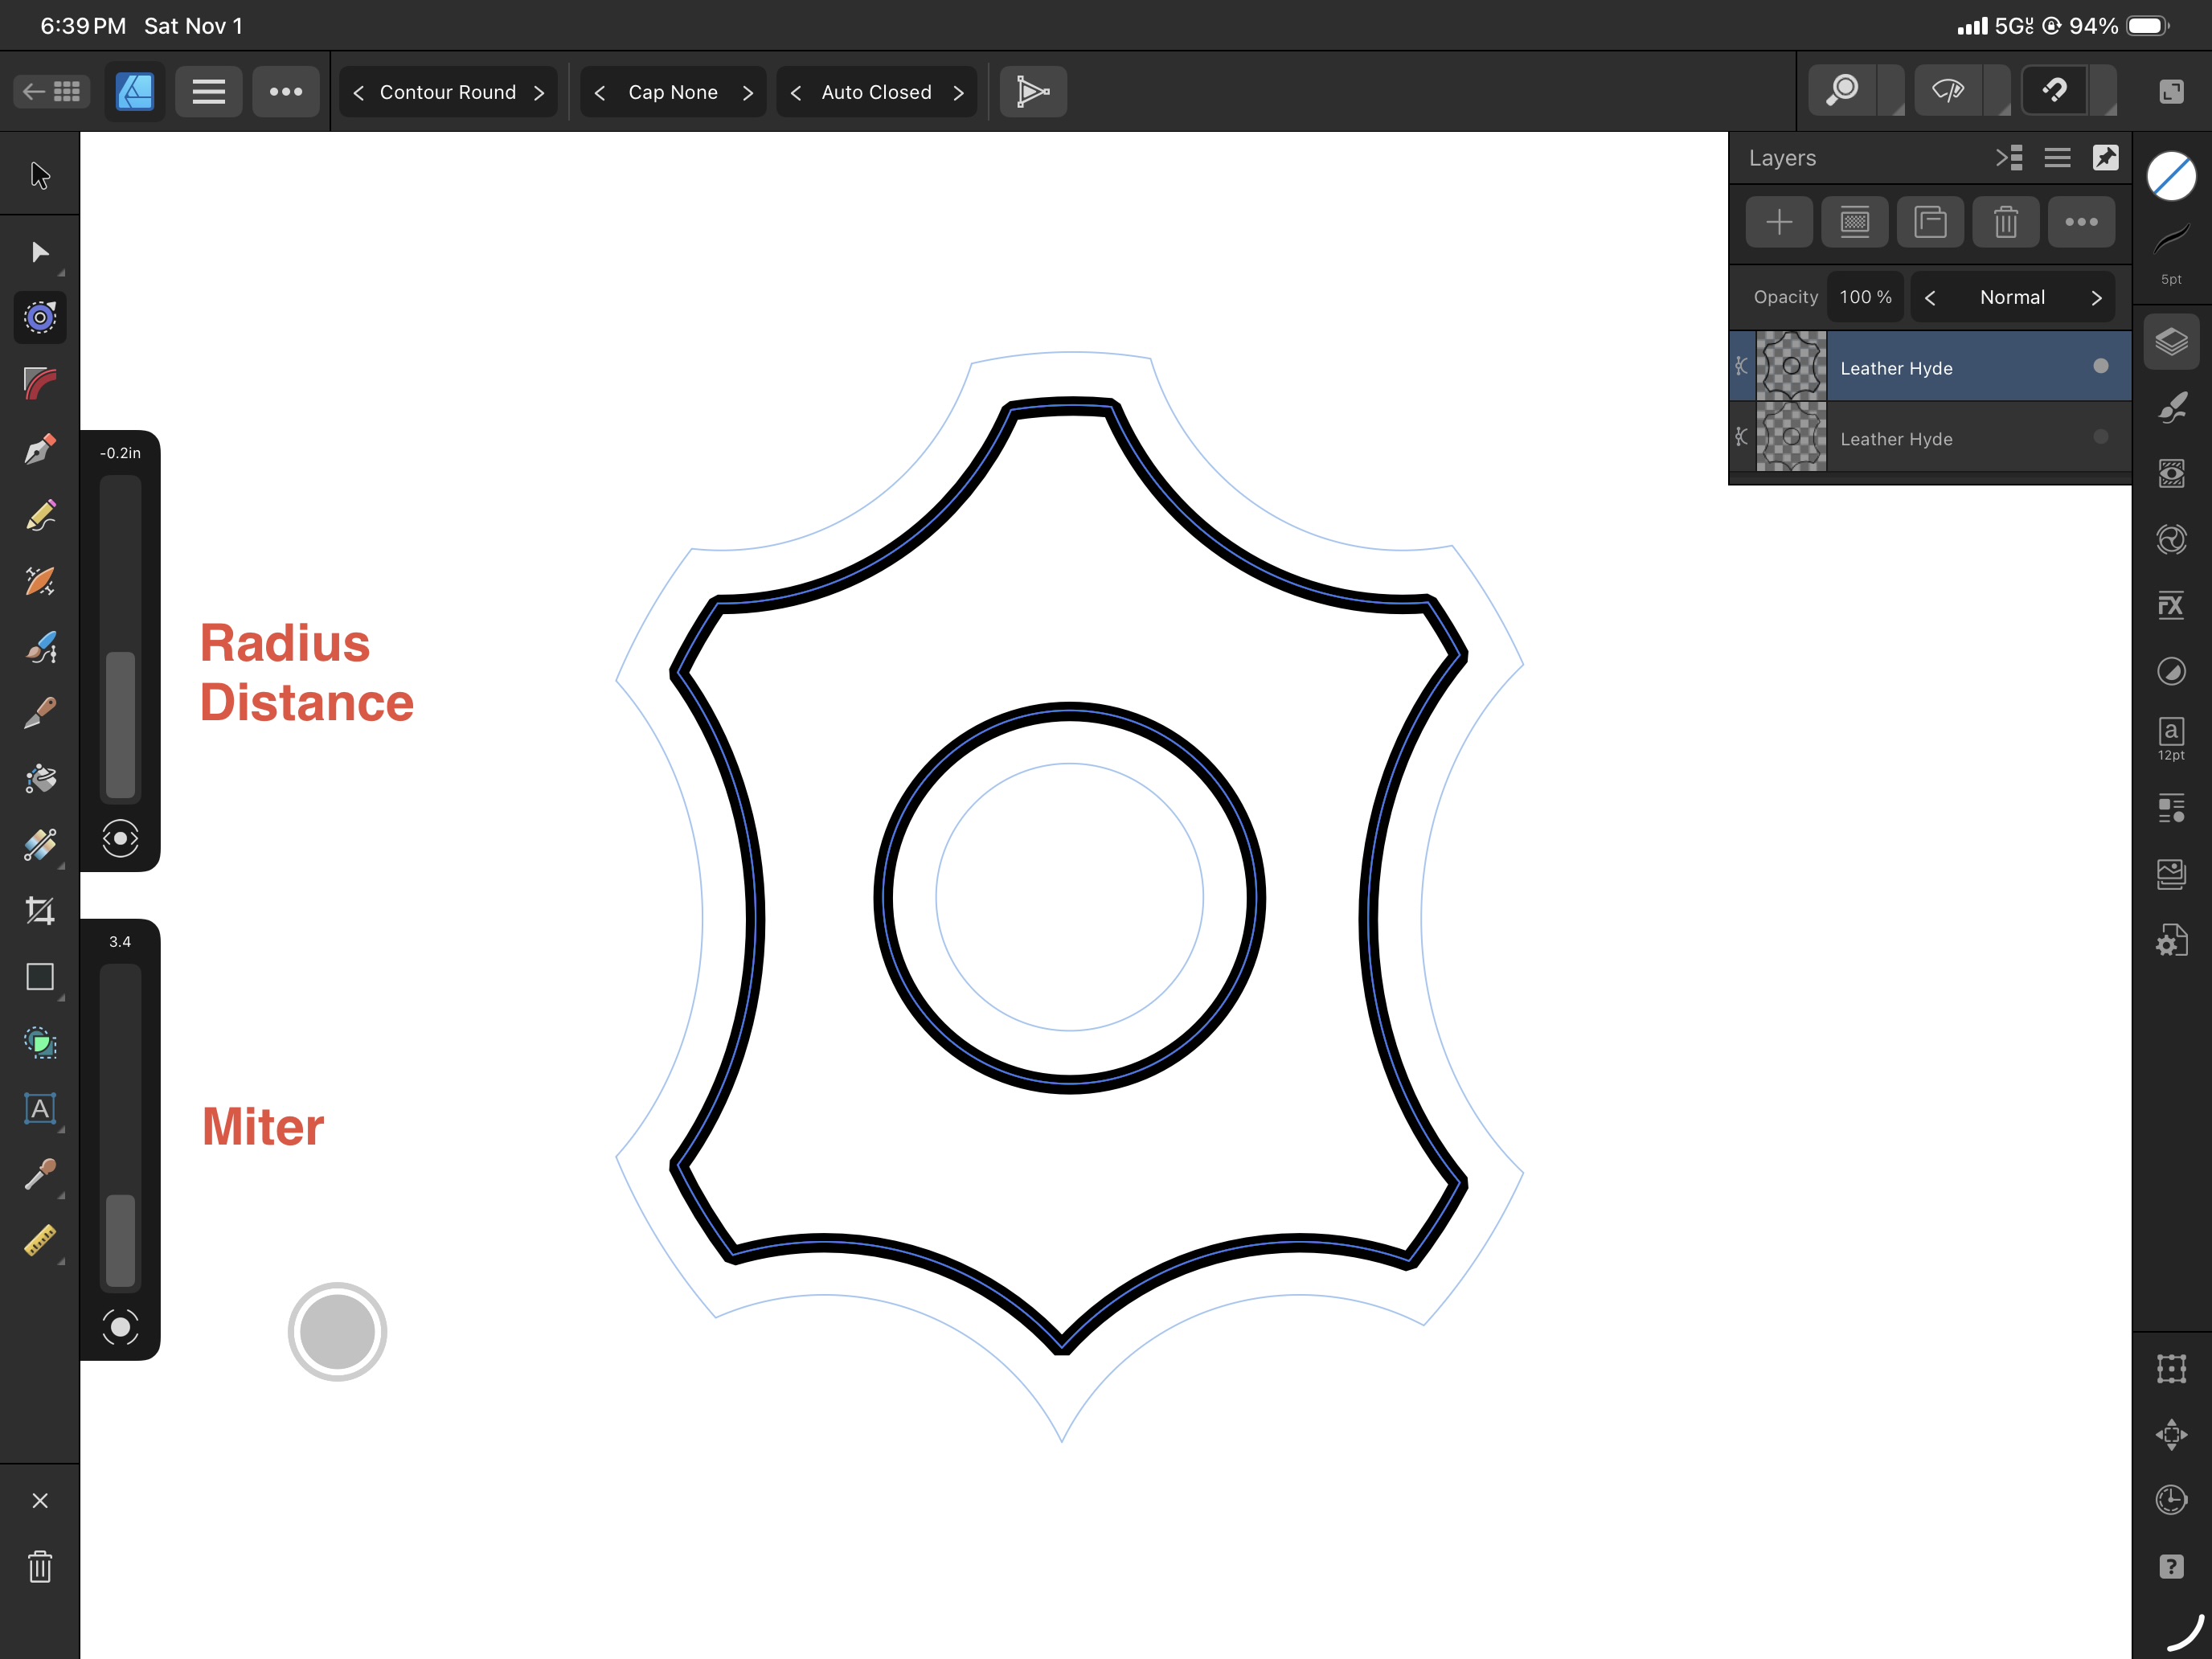
On the iPad, selecting this Contour Tool will fly out the Radius and Miter sliders. For MacOS and Windows users, the context bar above your canvas shows all the relevant parameters. Either change the Radius parameter -OR- hover over the curve and drag it in one direction or the other. Notice how ALL CURVES belonging to that object offsets appropriately. Being able to fine-tune how far the stitching holes are from the overall edge is the intent here. Note that Contour Tool lets you operate with multiple objects selected not only to save time, but ensure all pieces in your leather pattern are consistent.
Step 2
Go to the Stroke Panel and change the solid continuous curve to a dotted one. The Dash Pattern is likely at its factory-default of 1, 1, 0, 0, 0, 0. As iPad users can see, the first number is for the length of the Dash, the following number is for the Gap. The subsequent dash and gap numbers after that is to set a specific pattern in a Morse-code like way. Zeroing out the rest will make it a simple repeat cycle. For OUR uses, set the first Dash to 0 and more crucially, it’s Gap to a higher number. Best I can gather, these values are the multiplier for the stroke width you had set. A Gap value of 2.2 on a 5 point Stroke Width should result in an 11 point distance for the gap.
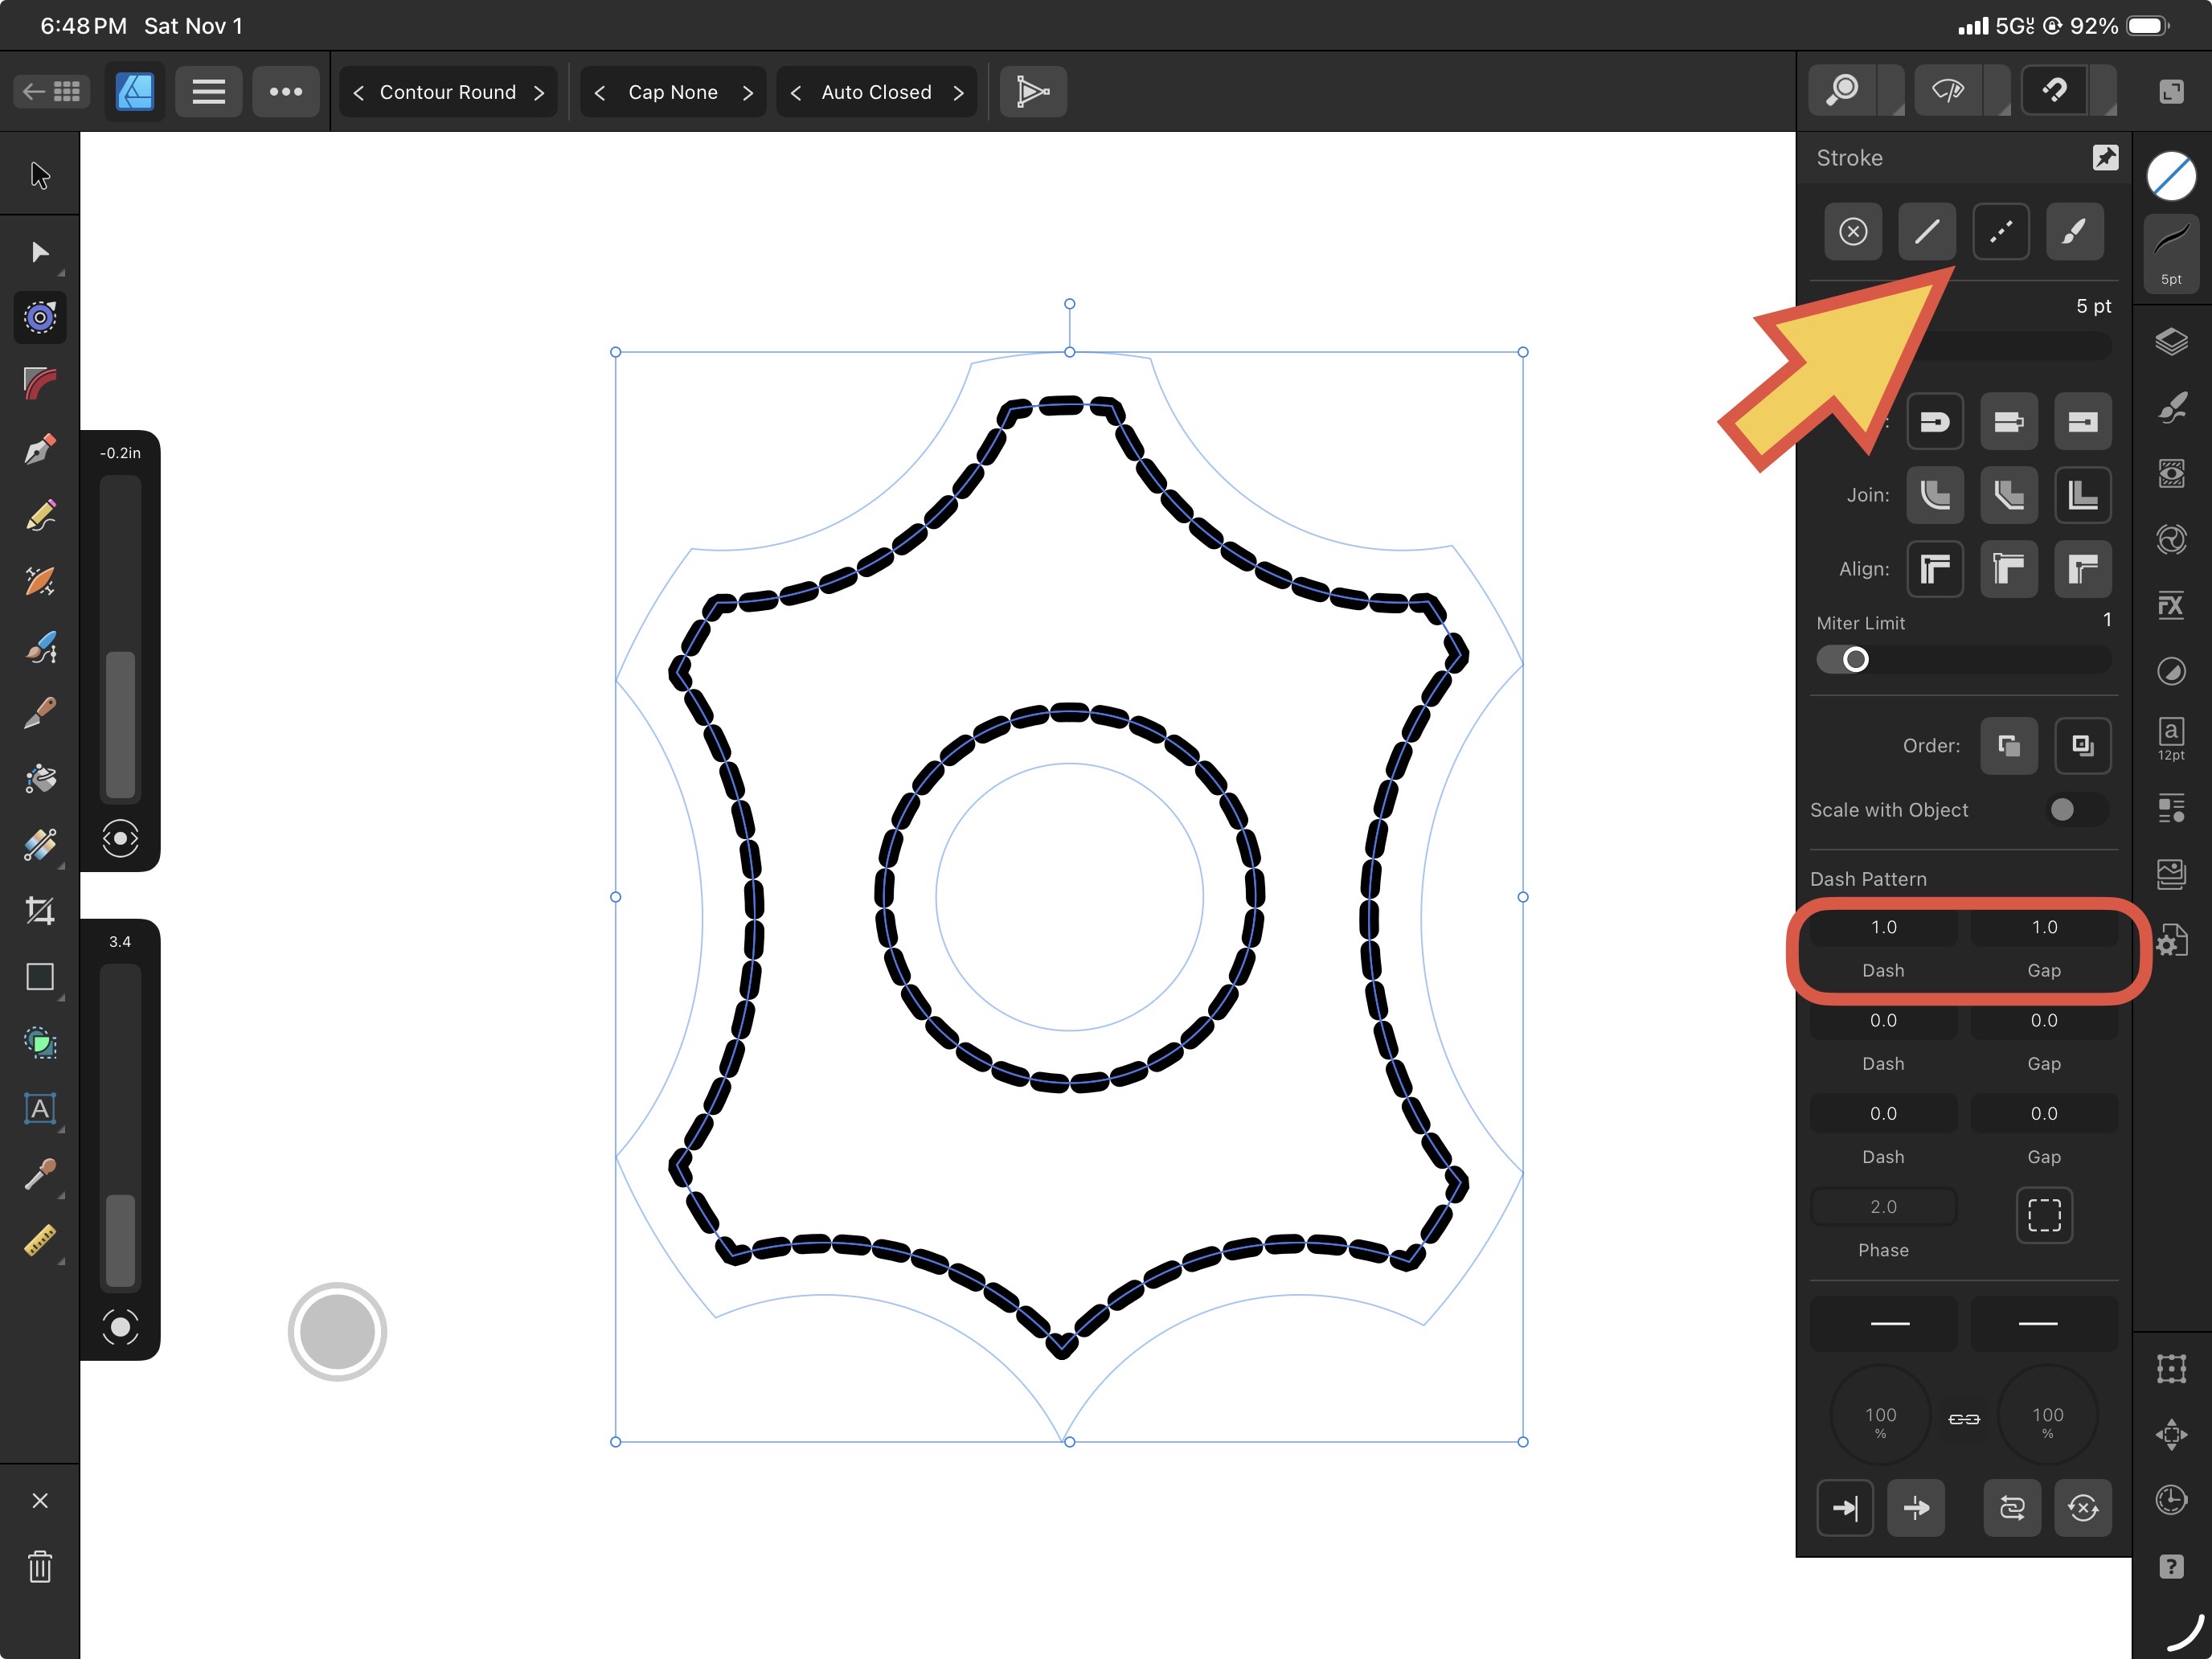
The reason why “0” still produces a valid “Dash” is because it defines the actual straight “line” portion but excludes the end-caps, which in this case should be Rounded as shown. Rounded end-caps butted against each other means you have a perfect dot. The dotted box icon is to activate a “Balanced Dash Pattern” if things don’t look quite symmetrical. The nearby Phase value is to nudge those dashes forward or backward along the curve.
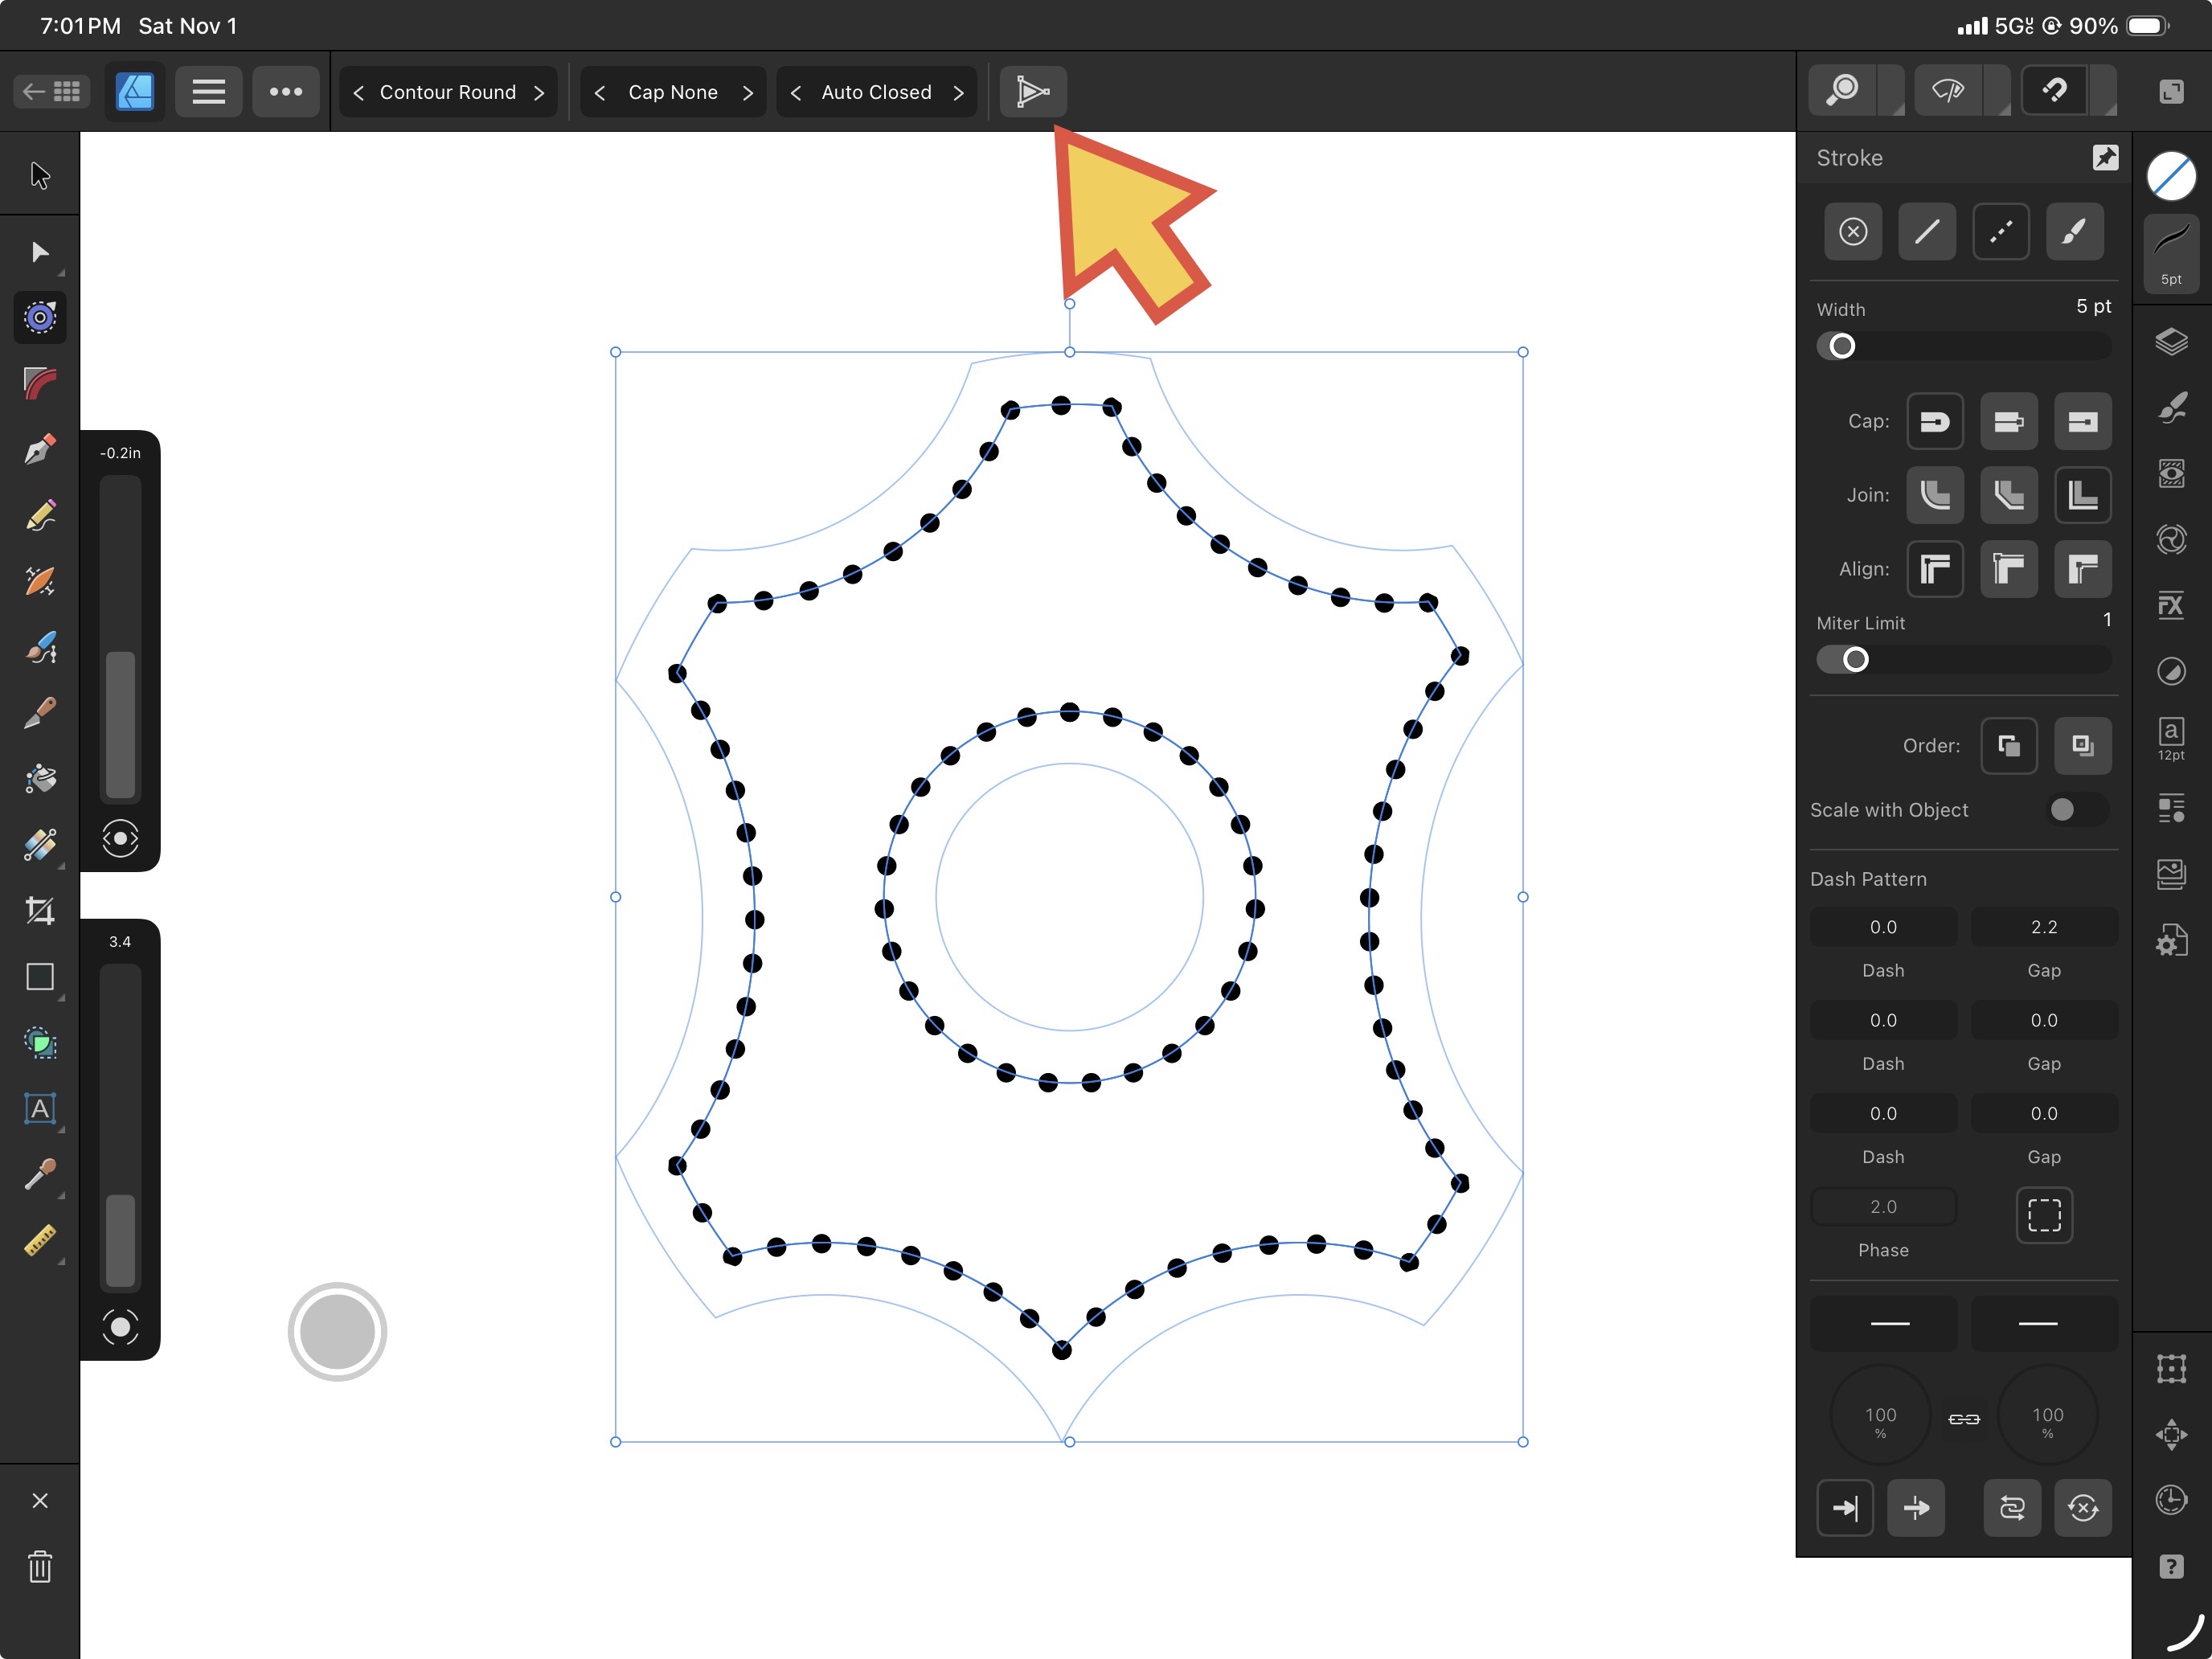
When the layout of the dots are looking great, go back to the context parameters of the Contour Tool and hit the Bake Appearance button as depicted by this icon in iPad. This converts the curve from a Contour-in-progress object into a properly-recognized curve — albeit a very special dotted one.
Step 3
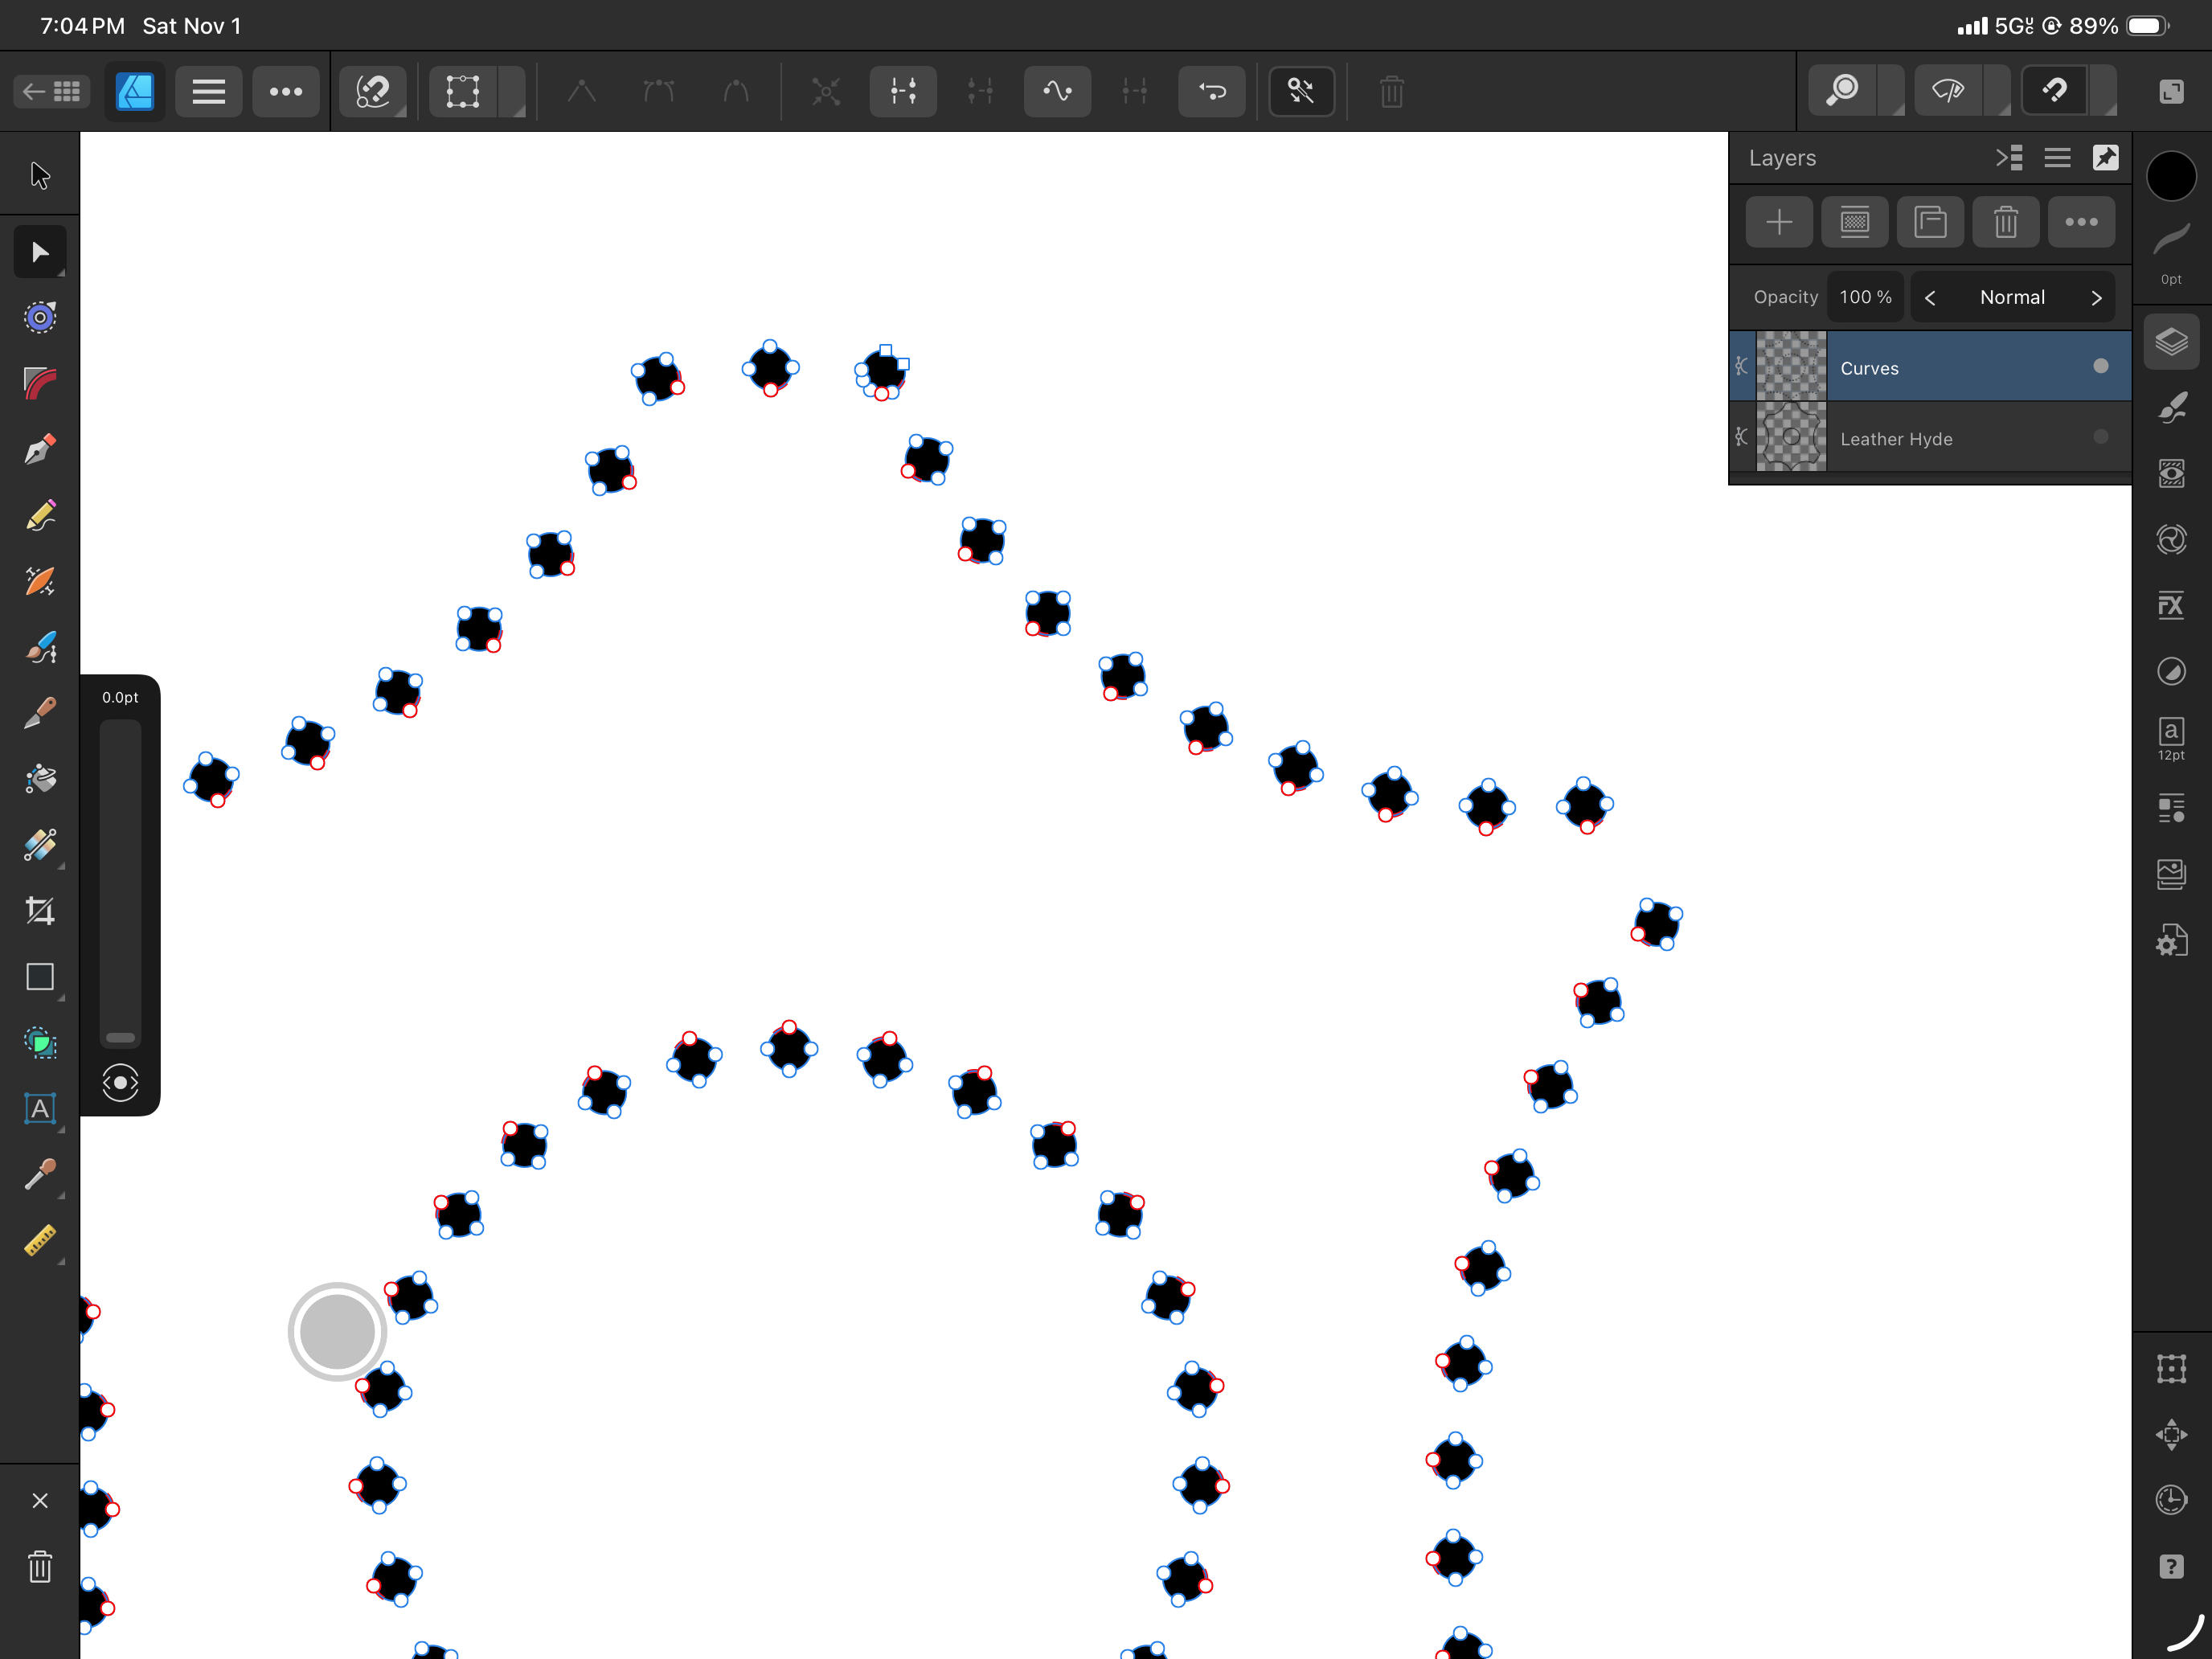
As a still-legit curve, it’s now legal to perform an Expand Stroke operation on it found in the (ellipses) Edit Pull-down panel. In MacOS/Windows, you’ll find it at Menu > Layer > Expand Stroke.

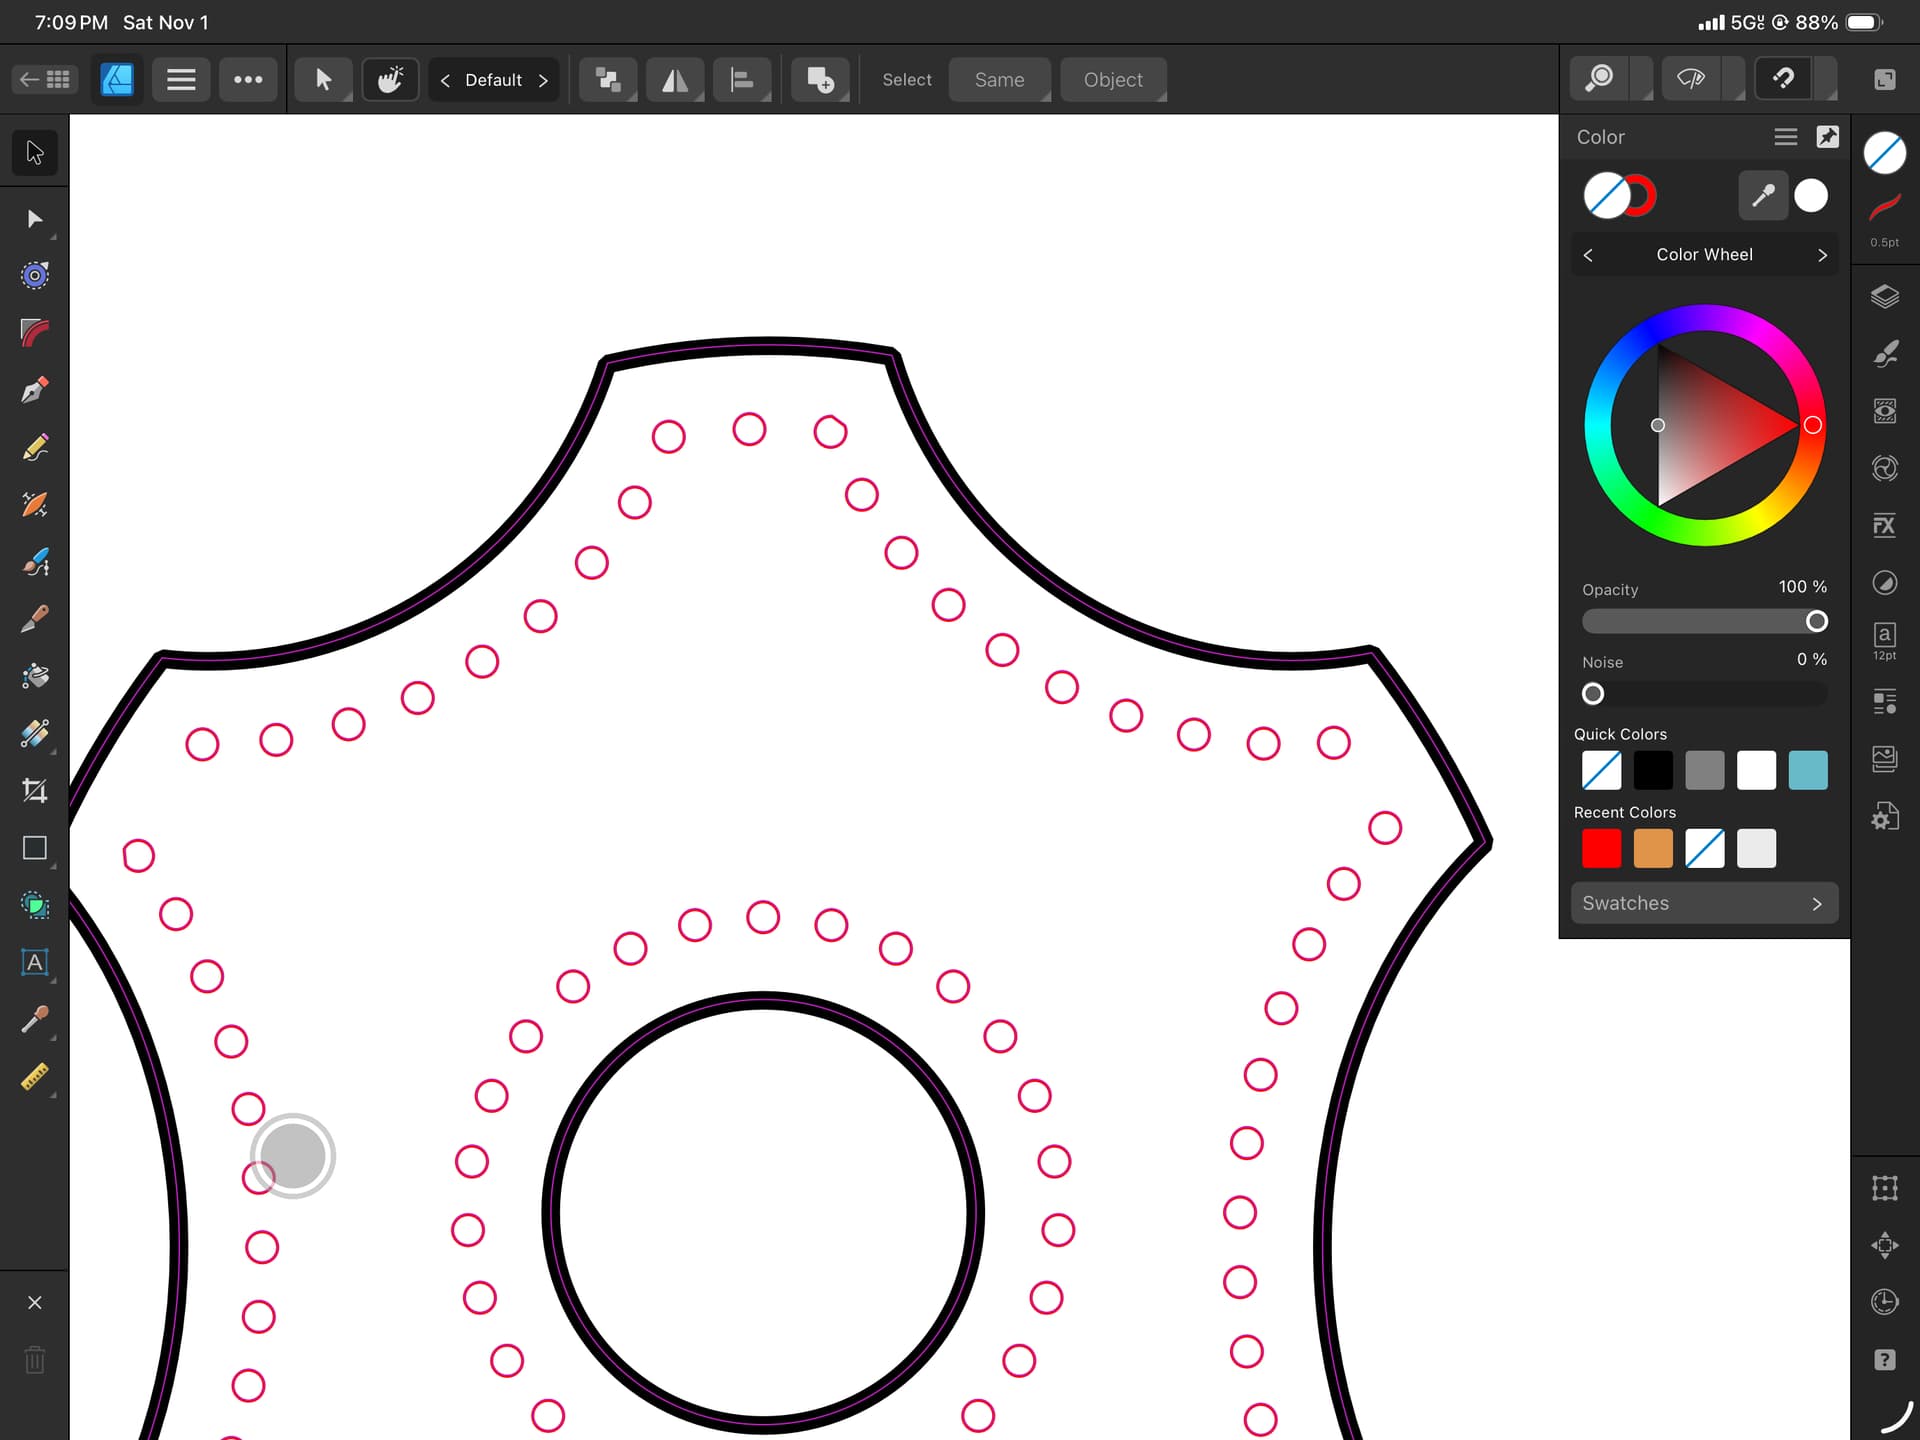
Lo’ and behold, those are now all proper vectors of their own. These vector dots are all combined into a single layer object. Now would be a good opportunity to go to the Color Panel and select their Fill to None (blue-slashed swatch) and it’s vector border to Red (which Glowforge typically recognizes as a Cut operation). Here you’re seeing the individual node points because the Node Tool is active.
To delete individual holes, be sure the Move Pointer Tool is active (Keyboard V) with the dot layer selected. Un-combine them by going to the Boolean fly-out and select Separate Curves. Immediately with ALL the vector dots still collectively selected in the layers panel, hit Command-G only if you need them cleanly contained in a Group. Command marquis-dragging permits selecting sub-items belonging to a Group as per standard UI convention. Hitting keyboard Delete key -OR- the trashcan icon at the bottom left in iPad will get rid of highlighted stuff.

In the Layers Panel, reactivate the appearance of the original perimeter shape and that concludes one of the slickest ways to elegantly create stitching holes. Today you’ve learned to adjust the size of the holes (stroke width), the spacing between the holes (gap), and its distance from edge (contour tool).
Repeating letter-“o” text along a path doesn’t provide much granular control over it’s spacing from the edge, but worse, Glowforge is forced to laser the outside and inside edges of each letter — additional wear’n’tear and laser time I’d like to avoid if possible.