Really struggling with a grayscale engrave =/

Untitled-3.ai (1022.4 KB)

Hello! I’m really struggling with this project, Trying to engrave a grayscale image, of my friends band logo. Was hoping to get a project done in time for fathers day for him, but after many evening with no success, thought i’d ask here. Image is attached, is there anyway to engrave the darker areas, and also capture the lighter gray areas. No idea what I’m doing, any help appreciated =/

Made on a Glowforge is a gallery for showcasing your prints made on the machine. I’ve moved this to an appropriate forum.

So I don’t speak AI, maybe you could post a screenshot of this to get more feedback?

Some general advice can be found in searching “prepare image engrave”, like this:

https://community.glowforge.com/search?q=prepare%20image%20engrave

As for this specific case, I’d need to see the image, so a screencap or non-ai source image would go a long way.

2 Likes

Would also help to know what material you are working with.

Many materials are not suited to “photographic” style engraves, but better with bold contrast images like simple logos.

sorry, couldn’t get the file to upload. heres a pic from my my phone.

1 Like

Suggest you make that a B&W image, or at least make the words all the same shade. It’s hard enough to read “city” on the screen, no way you’ll get a good engrave of that .

OK that’s a snap, you familiar with using curves? The idea is that you want to maximize the dynamic range of the logo by changing the contrast. The most precise way to do this is with curves, where you essentially ensure that the brightest parts of the image are white and the darkest are black.

If you have the original logo in png or jog or something you’d probably want to modify that in photoshop or whatever raster editor you like before bringing the image into your vector file. Presumably you want to put a cut outline around it?

just using draftboard, to try to get some kind of result. I figured i would be able to get the lighter areas to engrave light, and the dark areas dark. but have been having no success

nope, just trying to engrave. will be engraved on a solid piece of either maple or basswood plywood, if I can get that far lol.

I have AI and coreldraw. What your saying about range makes sense tho.

Hmm pop the logo up here as a jpg or png and I’ll give it a go if you like.

You should definitely read through those tutorials on how to prepare images, but since you’re pressed for time I’ll give you a quick assist here and you can figure out how to do it on your own when time permits.

2 Likes

RCR1_ImgID1

ok that comes thru as a png, but as its all color, just not sure how to work with it. sorry to seem needy, and am looking at tutorials now, just get overwhelmed with some of it.

How large will your end result be?

Part of the equation here will be resolution versus size. For really clean results, you’ll want to engrave at effective sizes of like 200 dpi bare minimum, more like 300+ if you can.

This image is only 345x289 pixels, so you’re looking at like a 1-1.5" engrave to get those kinds of results, larger than that and it’ll start to look jaggy.

You got a higher res version?

Never mind, I went and yoinked it off facebook at 960x960. We can get away with 3-5" square at this size, does that work?

(good coaster size, incidentally)

2 Likes

thats just the jpg im using from their FB page. Final result would be desired to be about 4x2, 2.25ish inches.

Cool if it’s going to be that size, this will work nicely.

1 Like

yes, im using it on a small box attachment, for the front of a wall mount bottle opener. Just trying to get their logo on the front of the bottle cap catcher box. Front of that box is 5x3"

All the help appreciated. Promise I’m not trying to be lazy, or have anyone render the image for me. I work in a sign shop and am learning the ins and outs of corel on my own time, so any pointers are much appreciated!

1 Like

So ok here’s how I did it in GIMP, but the steps are roughly the same in all serious raster editors.

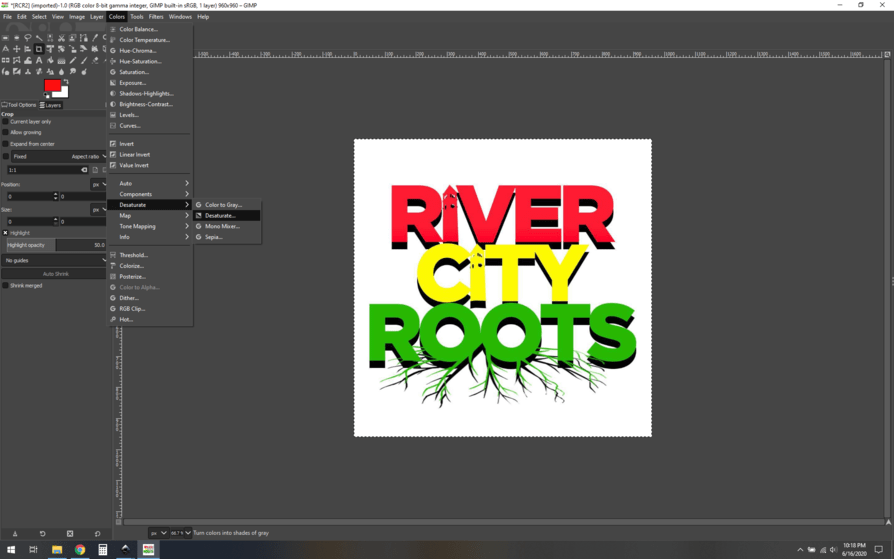
Load it up and use the desaturate function to convert it to greyscale:

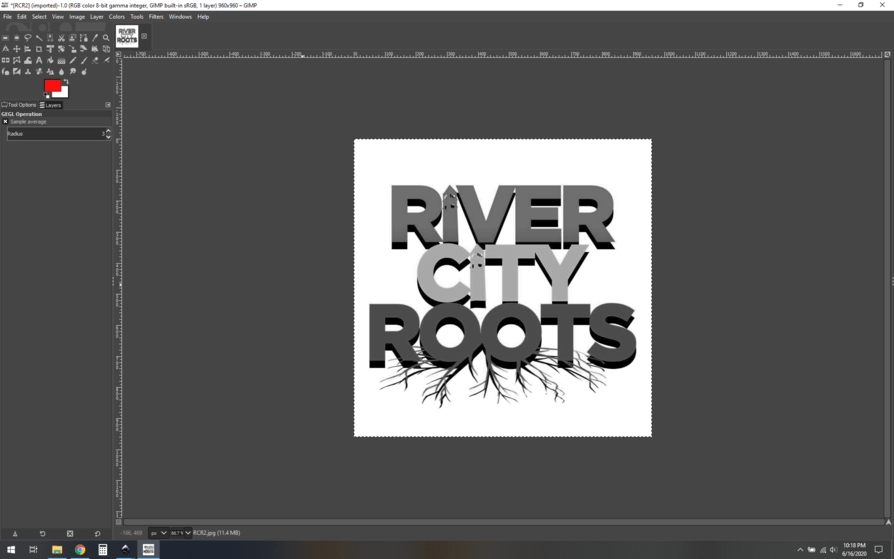
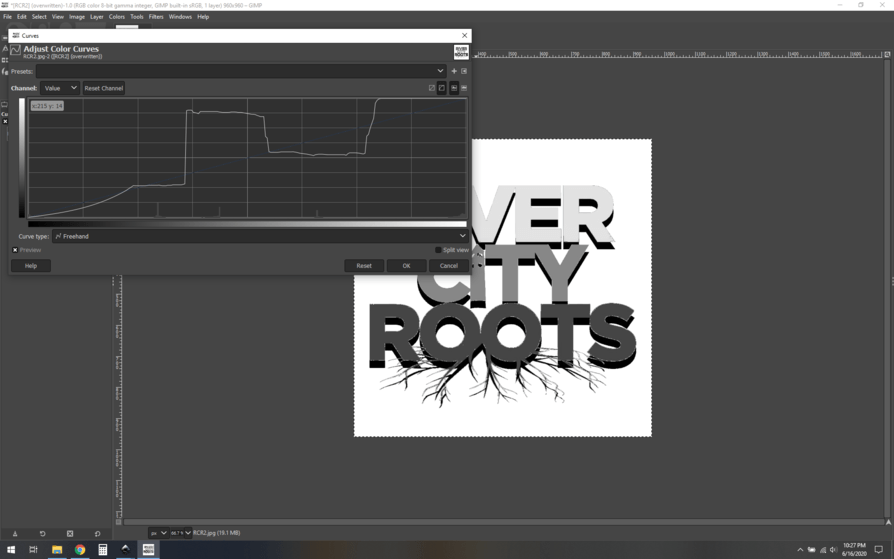
Cool, first step. Now we can see that we will want some separation between the three layers, so they are three different greys. It’s actually not bad as it is right now, but we can increase the separation between the layers and get a slightly more dynamic image by messing with the curves a bit.

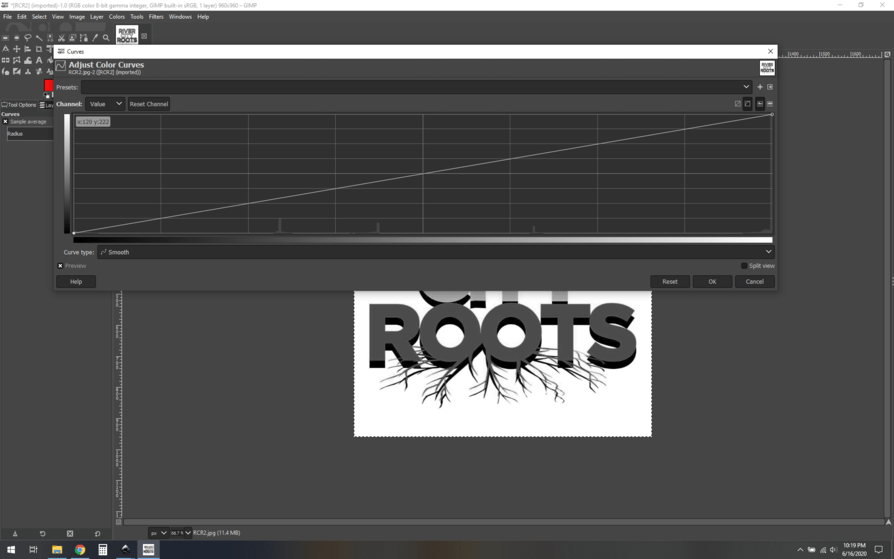
Let’s use curves to manipulate that. You open up the curves editor and you can see three well defined spikes at the bottom, those are the three greys that we see in the three layers, but we want to ensure they are uniform and distinct. This is where some aesthetic decisions come into play.

I did one treatment where I made the grey go from lighter to darker from top to bottom, by really messing with the curve like this:

You can see how I manipulated the brightness (the Y axis of the curve) in fairly straight lines across the three spikes, so you get three channels… and then almost as importantly, I ensured that all the noise in the white was removed:

Screenshot (383)_cr

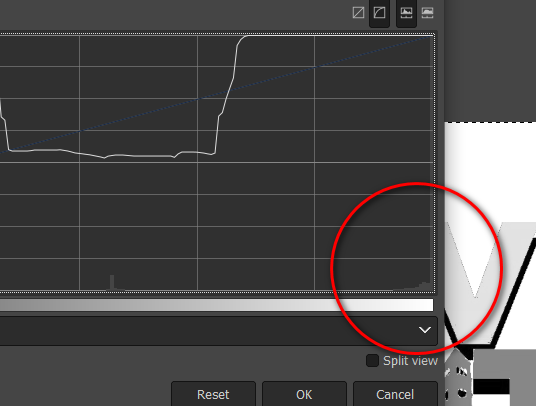
See that little “hump” in the bottom of the histogram, with a spike at the very end? Those are shades of white, and I made the curve pinned at the very top, so converting all that to pure white. This probably sounds like word salad, but once you play with it you’ll see what I mean. Googling “editing images with curves” will explain it a lot better than I can here.

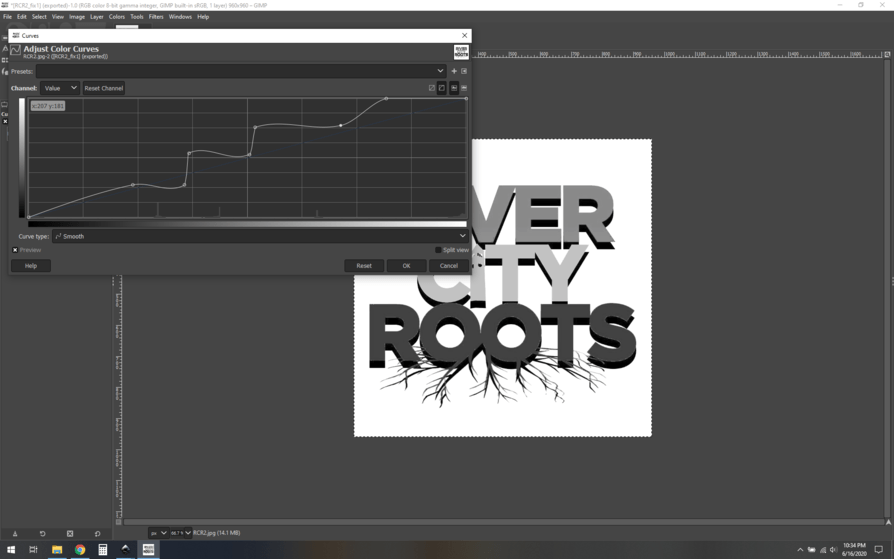
(here’s the other curve I used:

So anyway, here are your two quick and dirty fixes I made, you can choose whichever you like. The first one has some fringing I don’t love, but that’s down to some artifacts in the original jpg. I did a better job of it in the second one.

Next up will be testing it on some scrap material. Without getting into too much about settings, this should absolutely be done with a vary power or 3d engrave at 270 lpi or higher.

Import it into your vector editor and scale it as you like… Give it a whirl and see what you think.

5 Likes

omg thank you so much, especially for the walkthru!!! will get it running and send results!