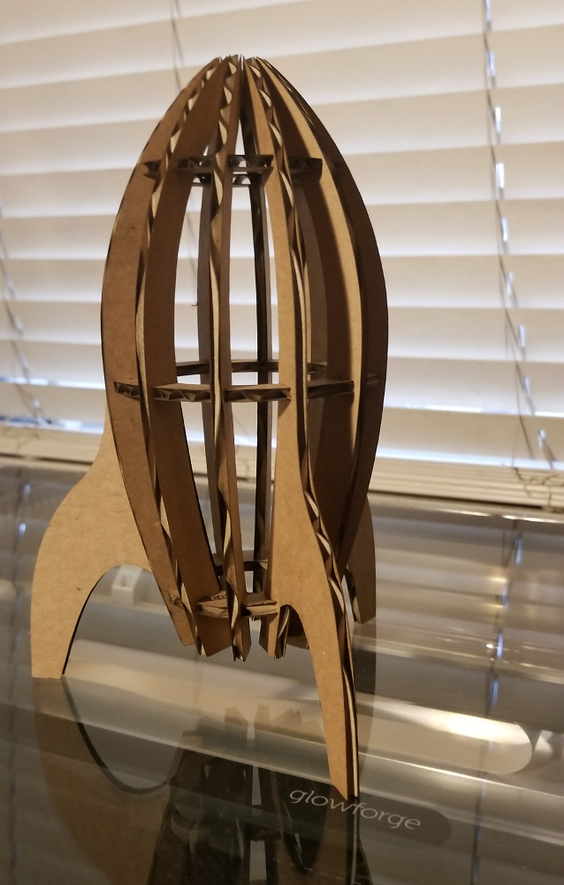
After playing with the glowforge for a while I wanted to get into making laser cut models. Several years ago I saw a vintage looking rocketship lasercut model in a toy store in Jerome, AZ and the shape and idea has been stuck in my head since so I decided to start there.
After watching and following a few Fusion360 tutorials I figured enough out to generate the parts and the result is decently retro.
it fit almost perfect over an edison bulb light I had that was already space themed.
I cut it with medium draftboard. Didn’t have the time or tools to make sure it was a good fit in the proofgrade material. I ended up printing two of the circle holding sections and it was a loose fit, but good enough to keep the kids occupied. Plus it gives them something to glue
I’m thinking about making a version that has shelves instead of an open center, so the kids can send their hatchimals to space.
I’m new to fusion 360, is it possible to share the actual cad files? I’d appreciate seeing how you put it together.
Regardless, Thanks from myself and all the kids over having a space themed pancake breakfast!
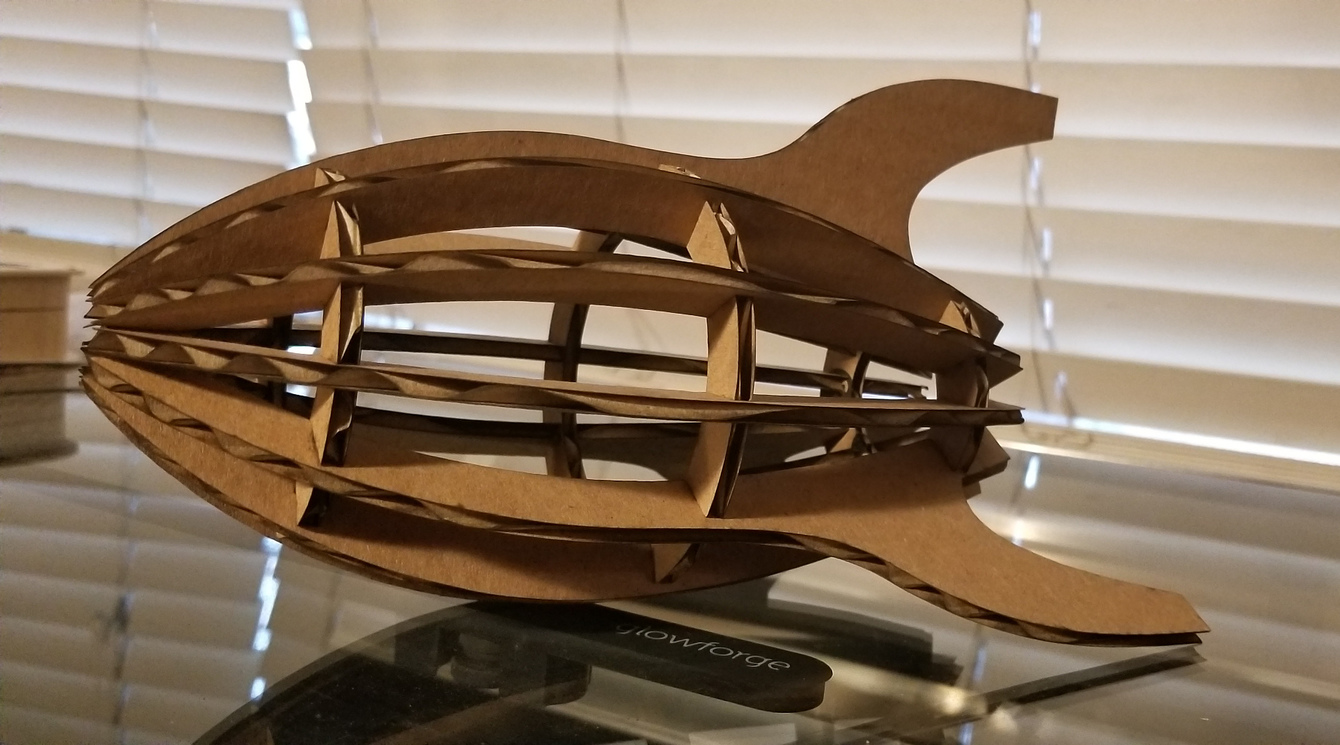
It looks great as a lamp. That version is slotted for 0.15 material, and I get a decent friction fit with cardboard, but yes eighth inch material would be kind of loose fitting. I made a version for some supposedly eighth inch plywood I get at a local craft store, but unfortunately that was about 0.1175 in width, not really near proofgrade dimensions at all. That kind of variability in “eighth inch material” is super annoying.
A hatchimals rocket sounds like a neat idea. You could take those svg files and remove the interior circles from the bulkheads so they become shelves for passengers. Next challenge, leave an opening in the side for a door.
It looks like there’s an option to download a version for Fusion360 (upper right corner), which hopefully will let you load it and look around. The design contains a parameter (modify -> Change Parameters) named “material_thickness” which will adjust the slots for a different source material width. Also note how I incorporated the laser kerf into the slot width calculation. Fusion360’s parametric nature is very useful for this sort of thing.
I’ll warn you though, I’m still learning Fusion, and the workflow for getting that design into the forge isn’t really optimal. I have to export the rib and bulkhead sketches generated by the last four steps as DXF files, then import those into Inkscape for layout. Unfortunately, splines in Fusion (which I used to generate the shape of the rib) can’t be imported to Inkscape. Fortunately though the slots and other straight lines do export, so I just fill in the gaps using Inkscape, being sure to keep the slots exactly the same size and in exactly the same relation to each other. I had an exported picture of the rib which I imported into Inkscape so I could trace over it in there. All a bit annoying, but it works.
In my second design I avoided using splines altogether, so the workflow to svg is much more straightforward.
Fusion360 is well worth your investment of effort though, it’s a very powerful modeling tool.
Hello, I think you lead me to my next project for a novice like me!
I never cut corrugated cardboard before. I happen to have .15 sheets. What settings worked for you? I checked and everyone seems to be different and I don’t want to start a fire if I start with the wrong starting point
For non-PG settings you’ll need to look over in Beyond the Manual – that’s the only place we’re allowed to discuss them, lest we upset the FNLs. A search for “cardboard settings” brought back this thread that should prove useful: Settings for Cutting/Scoring Corrugated Cardboard
Oh! I didn’t realize asking in free designs is a no no! Thanks for the link! I’ve just started venturing outside proofgrade and I’m so concerned. But the rocket is so cool, I want to try it!
I hope the rocket turns out well for you cindy. I think I originally looked up some settings for cardboard others had dialed in over in Beyond the Manual, like geek2nurse recommended.
As geek2nurse pointed out, there are a lot of cardboard settings in Beyond the Manual. A couple things to note. The first is that what works for one piece of cardboard won’t work the same for the next. Cut it enough and you can start to make fine adjustments to your settings just be studying the cardboard. The second is you’re fighting a battle between charred edges and cutting all the way through. Unlike draft board and plywood where the charred edge is either something that works or is something you want to make go away, with cardboard the charred edge adds the extra fun of sooty fingers. If you dial it back you wind up with something like a perforated cut. This is fine for a lot of things, but can be problematic on more intricate designs.