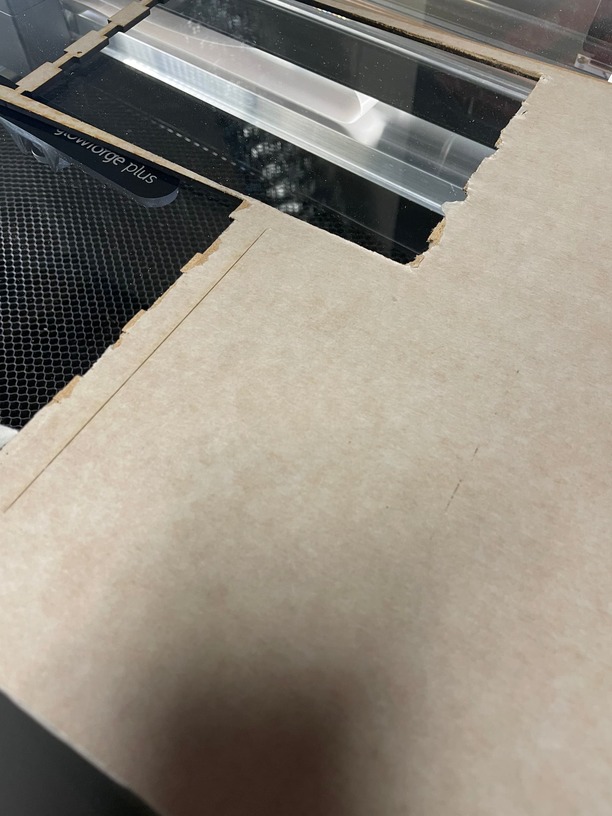
Hi! I just got my Glowforge about a month ago and have FINALLY been able to start testing print (thanks, Life). Having an issue that seems to be somewhat common by reading other posts going back a few years that my prints are not cutting all the way through on the right side.
As a n00b here, not sure if I had to create my own post for any kind of support protocol.
It’s almost like a gradient slope in how the cut slowly gets less deep. I’ve tried a nearly full sheet of Proof Grade Draftboard and then a smaller cut just on the right side of the same board. I was looking to to see if it just had an issue on the right or if it were a percentage based situation where it only cuts through up until like 40% of the width (hoping that makes sense).
It seems to be more of a percentage so was hoping someone else had this issue and was able to fix w/out having to send the unit back. I’ve followed the cleaning walkthroughs from other posts and it still didn’t work right.
Cleaned the lenses, looked for scratches, cleaned the crumb trey and ensured it was seated correctly and made sure the material was flat and such… I’ll keep fiddling but getting stuck.
Should I just put to run through the cut twice or will that create other issues?
Images attached, holes are from first cut and you can see where I cut out with a blade.
You have posted in the right place. Support will be along and they will sort it out.
A few things to help you continue working while this works out (and are good general practice)
1 - hold down your base material so that when you lift out the cut and it doesn’t lift out smoothly you can immediately close the lid and run your cut again - as long as you don’t move anything it will cut in the exact same place.
2 - your cut line on the 2nd photo looks a little thick - make sure that you didn’t put the lens in upside down (cup side goes up into the head) when you did your cleaning.
3 - when you say you cleaned the lenses - does that include the mirror on the underside of the left edge? The farther right the head goes the longer the laser has to be thrown - so that’s the first place the cuts get weaker, and that single mirror is the most frequently missed cleaning spot.
Lastly, the thing that’s in every one of those posts is that they’re going to want you to run the Gift of Good Measure on PG material - and post pictures of the front and the back along with the time you ran it. So do that. It’ll speed up their response time since they won’t have to ask and then wait for your response.
@ggunnett
I’m so sorry to hear your Glowforge is having issues cutting on the right side.
Could you tell me the date and time of the print?
There are several things that need to be checked if the laser doesn’t cleanly cut through the material. We’ve discovered that photos don’t always come through well in emails, so I’ve included several links that will take you to reference instructions and photos. Please turn off your Glowforge and check the following:
Once all these things have been checked, please perform the following test print one on the right side and one on the left of the bed?
Check the completed print:
If the Gift of Good Measure fails to cut through, take a photo of the front and back of the print and attach these photos to your reply.
If the Gift of Good Measure cuts successfully, please try another print of the design you experienced the issue with, and let us know the results.
Thanks for all of the tips! I went and cleaned everything again and as you guessed I, I had the lens in upside down and there was also this residue on one of the lenses that was 100% the culprit for faulty cuts! It looked like adhesive or something from install, but I got it clean with an electronic alcohol wipe.
2 Likes