Rounded Corner Box w/ stacked inserts

I love those corners. Brilliant!

2 Likes

Clever design. It occurs to me those corner pieces could be cut from scrap! :sunglasses:

2 Likes

stacked corners, what an ingenious idea! It looks very pleasing. Love the stain too.

3 Likes

Nice brain work …. And it’s a beautiful turnout!!

4 Likes

It has an extra layer of complexity. The stacked height has to be the same as the cut height of the walls. My test piece was 3.1mm and I thought it was close enough to 3mm, but as the layers stack up so does the amount that it was off.

I think there is room for variations. Since it requires some glue anyway, you could skip the finger joints and do all stacked corners, or maybe just do all finger joints and skip the “filler” piece.

7 Likes

I have never made a box like that, but it reminds me of the dodecahedron I made for my daughter, where I made similar “connectors” to your corner pieces instead of the usual 3d-printed pieces that require screws. I cut several test pieces to get the spacing/sizing just right, so the intersections had the precise gap I wanted when assembled.

I didn’t highlight the connectors in the thread but if you zoom in on some of the pics you should get the idea. I think very similar, in that they fit snugly into slots in each panel…

For me, it was worth the effort and a little waste material.

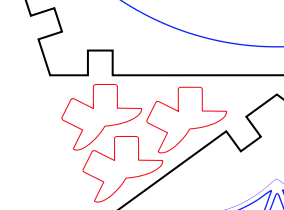
Here’s the idea. The square tabs slot into the notches on the panels, and the little wings just make them the perfect fit to the thickness of material I used.
image

7 Likes

I do need to get in the habit of creating test fit pieces for my projects. I did one for my VESA monitor mount and I had to adjust it several times before I got a good fit.

I get excited and just want to start cutting.

6 Likes

I avoid slots and notches wherever possible, but whenever needed, I have a small test piece with multiple sizes of each that I print in a corner for that specific sheet of material. Learned a long time ago not to trust previous measurements.

4 Likes

BTW. What do you use to create dodecahedrons?

Design? Inkscape.

I don’t think this was the final but it gives you the rough idea. I’ve got something like 40 files in the folder for this one. It took me weeks to get all the designs to a point where they could be cut - most would just have dropped out of the panels so you had to build in connectors and such.
image

10 Likes

I, too, was inspired by the 3D Printed Rounded Corner Box, but I don’t have a 3D printer, so I dismissed the idea as impossible for me. Your design has prompted me to consider new possibilities…

Thank you!

4 Likes

I have been wondering “why stack 1/8” pieces?" with 3/8 or 7/16 " material it would stack with much fewer pieces. I would not want to try that with Zebrawood, but hard Walnut, or Maple or something more exotic but fire-resistant could work as well. :grin:

5 Likes

Duh! Of course. That’s a great idea.

2 Likes

The thicker the material, the more pronounced the cut profile “sawtooth” pattern will be.

This project is a lot like any other layered box with multiple parts per layer, and has the same caveats. Take a more extreme example like my space invaders box:

The “pixels” aren’t squares because of the cut profile, and you can see it if you look closely.

If you zoom in…

image

I flip-mated these layers to eliminate the gap but the misalignment is all down to the inconsistent pixel shape.

Same thing with the spiral staircase box:

Note the stairs are not 90 degrees, but are slightly sharper, about 88/89 degrees:

image

Again, no gap due to flip mating and good kerf adjustment but the shape of the cut profile is pretty apparent even at 1/8” layers.

In terms of how it applies here, it makes butting stacked cut pieces against a straight cut edge have a noticeable gap on each layer. From the OP:

This gap is almost impossible to avoid even with registration pins and is exacerbated by having thicker layers.

I even experimented with alternating top and bottom per layer to get a more of a 1/4” “zig zag” pattern instead of a sawtooth pattern. It is a different and maybe better look but it’s still noticeable.

The only way I ever managed to get rid of the gap involved leaning into the cut profile and making each layer a bit longer to offset the cut profile, then make my solid wood panels that butted up against it have an edge profile of about 89 degrees. That makes the gap much smaller but it’s much more design work to scale each corner layer piece, and takes some trial and error to get the profile angle right.

If you don’t mind the gap, thicker layers will definitely speed things up, but that’s the tradeoff.

10 Likes

Sandpaper or needle files will also even out the kerf especially if you account for it in the cut.

1 Like

Yeah you could try that but again it’s really hard to get a pure 90 degree surface even using needle files, especially on an inside corner like that.

If your goal is to get to sub-kerf gap management accuracy level, hand filing isn’t likely to be the solution, and I’d think sanding would be even less accurate without some sort of mechanical aid. A cnc milling machine could do it but I think we’re far afield from a laser project at that point :slight_smile:

1 Like

That is one thing I use scrap for even 220 sandpaper glued tight to whatever shaped scrap works like a file and done before gluing can tighten that up, On the outside, outhangers are much easier to get an even curve as the outhangers will be there even at 1/8 inch and the plywood like layering of thin wood as an alternative to few (or one) layers using thicker wood is a design decision that could go either way.

2 Likes

I knew @evansd2 was going to bust me on the edges. :wink:

Looks like my order of operations was off.

5 Likes

Ingenius! I’ve been pondering this very challenge and was also not keen on stacking 100%. This looks so good :slight_smile:

2 Likes

Quite the clever build! Did you have to sand at all or did the cuts leave a great finish without any charring?