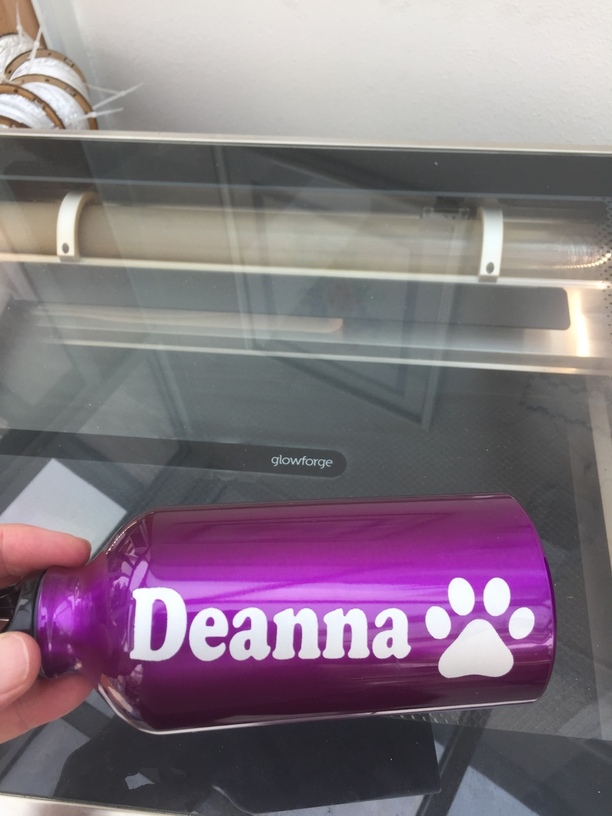
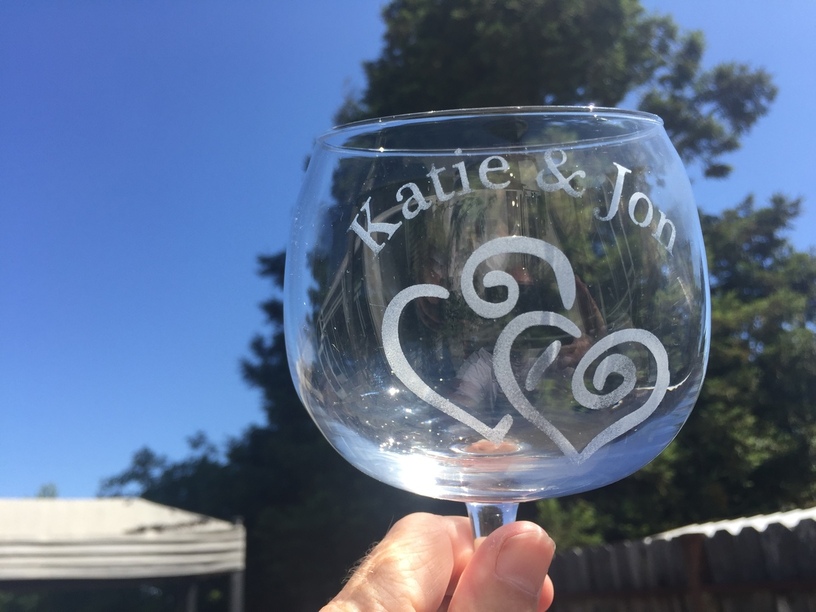
Daughter is going off to camp with a custom water bottle! Did the design in Inkscape, cut a rubber mask and sand blasted the outcome. Been experimenting with doing the same process on glass too.
Very nice! What kind of rubber did you use?
1 Like
https://www.uscutter.com/Anchor-BlastLite-Stencil-T226-22-mil-Wood-HDU-High-Tack
And yes, I saw that I didn’t get the mask stuck on quite straight on the waterbottle but it sure did sandblast easy.
3 Likes
Oh man…I had to ask! 
(There goes another $70.)
5 Likes
You need a sand blaster and compressor too 
3 Likes
I can squeak by on that one with the Armor Etch. (And don’t tempt me.)
2 Likes
May I ask how easy the stencil material was to apply to the compound surface of the glass? I do some etching (with Armor All etching cream) and Oracal PVC vinyl cut on a craft cutter. I have a bear of a time getting it on compound curves like the glass, any little ripple at the edge of the stencil and the item is scrap.
2 Likes
And if you already want a sand blaster, this is just enabling. You’re an enabler and an awesome maker of things. ![]()
3 Likes
I believe the mask material I’m using it pretty much the same as what people use with etching cream. Applying it to compound surfaces is a challenge but there are things you can do to help the process along. For one thing, any time a design can be broken up into separate elements that can let the important parts lay across the curves as needed and edges can overlap or have ripples on the overlapped edges. I haven’t tried the etching cream myself but I suspect sandblasting is a little more forgiving process when it comes to the edges. I can imagine the cream seeping under an edge where as the sand blasting is very directional. I’m still new at this myself. I’ve only made a handful of items with the sandblaster and most of those have just been experiments. My next purchase (thank you Harbor Freight on Wed with 25% off coupons) is a sand blasting cabinet.
3 Likes
Thanks for the information. I was thinking that sand blasting would be more forgiving than etching cream. One little crease, and the cream flows under. I don’t think you could overlap using etching cream.
Heat it a bit…not sure how it will affect the cut out portion, but I’ve “wrapped” many a game controller with vinyl and a bit of heat…lol
5 Likes
These are awesome, thanks so much for sharing how you made them!
Did you use some kind of transfer tape to transfer the mask onto the glasses? Or does the stencil you used have a backing? (If it does, how did you avoid cutting through it?)
What cut settings did you use? (I’m new to glowforge and haven’t tried non-proofgrade materials yet).
2 Likes
I tried both (with vinyl from a cricut, not using glowforge) and I definitely found that sandblasting was more forgiving. The sandblasting didn’t get under the stencil like the cream did, and it came out deeper and more even. I blogged about the results here.
4 Likes
I used this transfer tape for my glassware. Much easier on the pocket if you are experimenting. It also works well with fine lines. It has the perfect tac for pulling it off and repositioning if needed.
Transfer Tape w/ Grid- 12" x 50 FT… https://www.amazon.com/dp/B01M74JXPT?ref=yo_pop_ma_swf


10 Likes
Thanks for the transfer tape recommendation!
1 Like
Speaking of etching, someone needs to try this stuff.
https://www.rayzist.com/Film/Lazermask.php
- Stick it on the glass
- Put the glass in the laser
- Lase away the mask where you want the glass to be etched
- Etch as usual
So, no weeding or transferring steps, but your glass item has to be laser engraveable.
4 Likes