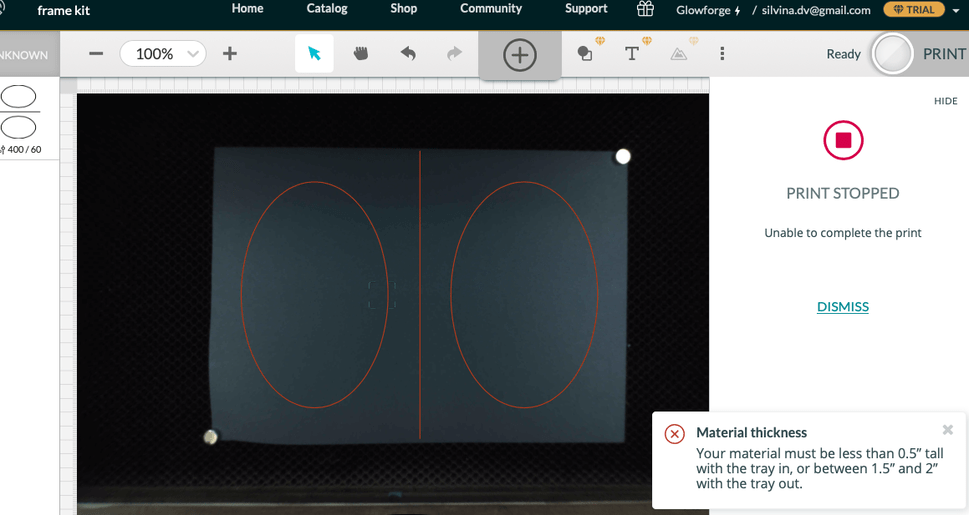
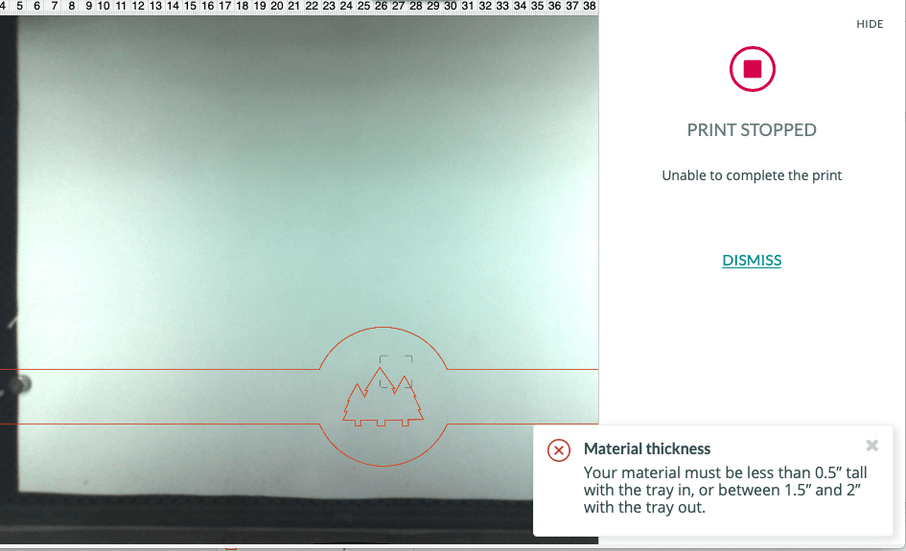
here we go again. I had this problem last week and they told me HQ did something and it was fixed. Now I have the same problem. It was working all fine all afternoon and now I cant cut the file. I’m trying to cut paper so I don’t understand what’s again the problem with the sensor. what can I do? Screenshot 2020-04-08 at 17.56.13|690x419
1 Like
I have the same issue, but constantly gives the error on paper.
1 Like
yes it’s just with paper as I can cut wood. I dont get it. had the same problem last week and it was fixed. Now again. I’m delayed with work. Again. Can someone from GF help me pls ???
1 Like
I’ve been having this problem ALL day. no matter which design which paper, what colour paper it doesn’t cut paper, saying that the material is TOO THICK, which of course it isn’t. I need help asap please
I can’t cut medium proofgrade acrylic. Last week it worked great. Now I can hardly get any cuts to go through. Help!!
I’ve clean the machine, gone back to make sure that I cleaned it correctly, and still nothing.
Thank you so much for the details. I’m looking into it now. As soon as I have more information I’ll update this thread.
I did want to offer a possible work-around that may get you unblocked from printing while we investigate.
-
Leave a small piece of material in the bed, like a small piece of Proofgrade scrap
-
Target that higher material with the Set Focus feature
-
Note: will introduce an incorrect focus height for the laser
-
This incorrect focus height may negatively affect the print results because the laser will be out of focus by the difference between the height of the scrap, and the actual material you’re printing on.
-
You can override the incorrect focus height by using the focus height in manual settings
-
You may need to run some tests various focus height to find the settings that work best for the material you’re using.
-
I hope this helps get you back up and printing for now.
We try to keep to one topic per post in the Problems and Support section. Can you create a new post with this question?
1 Like
Hi, I actually recalibrated the camera, and now it has been working like a dream. Thanks for your help.
2 Likes
hi there, try what you said. as soon as I started the machine this morning I put a piece of certified materials, the took it out put the paper and it worked. ONCE. now I’m trying to do what you say in the article and it’s not working anymore. Try different settings, diffent colour papers, piece, sheets, it’s not working at all…it’s driving me nuts.
It’is now day 3 with the same problem. I calibrated the camera last night. Cut one piece of paper. I thought it was solved. This morning, we’re back at it. Again same problem, see the picture. This is just ridiculous
I’m so sorry for the confusion.
They key is to use the Set Focus feature on the other material, and then print before opening the lid.
Another user with a similar problem said he had a lot of luck as long as the Set Focus target was at least 1.5 inches square. Also, the closer to center of the bed, the easier it was to hit the scrap target.
You can watch below the Print Head when you use the Set Focus feature, and see a small, low-power red laser. If that red dot is landing solidly on the scrap, you should get a measurement that allows you to print.
To summarize
1. A Bed layout like this is one option. You can experiment to find what works best for you.
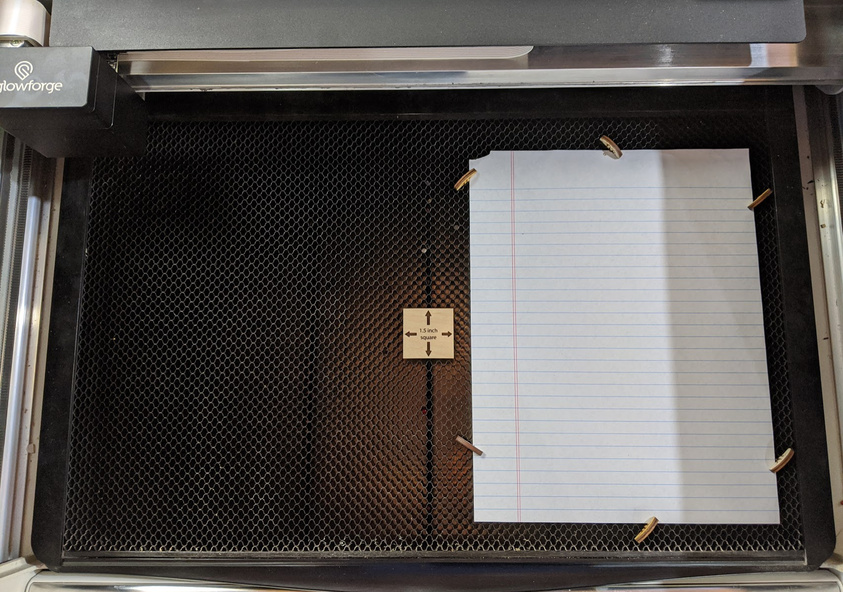
2. Use Set Focus on the small scrap
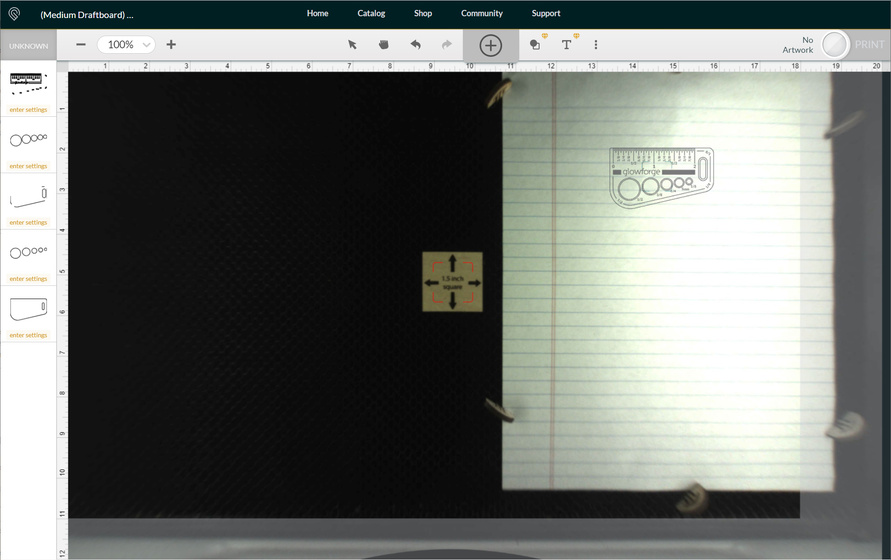
Choose the gear icon in the menu bar, then choose “Set Focus.” Note: if your Glowforge is Offline, or if a print is already running, this option will be greyed out.

Your cursor will now be a red target.
Usually the instructions are:
Click the spot on the material where you plan to put your print. The preview will be accurate where you click. If the material is not perfectly flat, it may not be as accurate farther away from where you click.
In this case, we want to target the scrap, which is a little bit taller (higher/thicker) than the spot you plan to print.
3. Set the settings for your material
Reminder: Using the Set Focus on a material of a different height will be cause the focus to be incorrect when you actually print on the paper, and you may need to adjust the Focus Height Manual setting. You may need to experiment to find the right setting for your material.
4. Print
Hi, I recalibrated the camera a couple of days ago which seemed to get it working again. It was working fine this morning and has now decided to stop. I’m getting the same ‘Material thickness’ issue. I recalibrated and cleaned it again, and then tried the fix mentioned above (using a piece of white paper next to my intended cutting material). When I click ‘Set focus’ the red dot falls on the white paper. The machine accepts this but when I click Ready/Print it comes up with the same material thickness error. I’m on deadline with a project and I need the machine to be more reliable. Is there something else we can try?
support suggested using thicker material such as a proofgrade wood scrap, not paper, as the target.
1 Like
Thank you for working those steps. I’m sorry to hear that you are still hitting this snag. As @johnj mentioned, utilizing a Proofgrade wood scrap in the instructions is the best way to perform the test.
Would it be possible to replicate the instructions my colleague @pip outlined with a piece of Proofgrade scrap, and see if the same error occurs?
Let us know how it goes!
Hi Marc, so yesterday I put a piece of wood and it did work. but after all afternoon working fine no problems. I got an orange light in the evening. Thought well I go to bed and tomorrow will be fine, and now I turned it on day later and orange light is still on. What’s going on…this is from bad to worst…
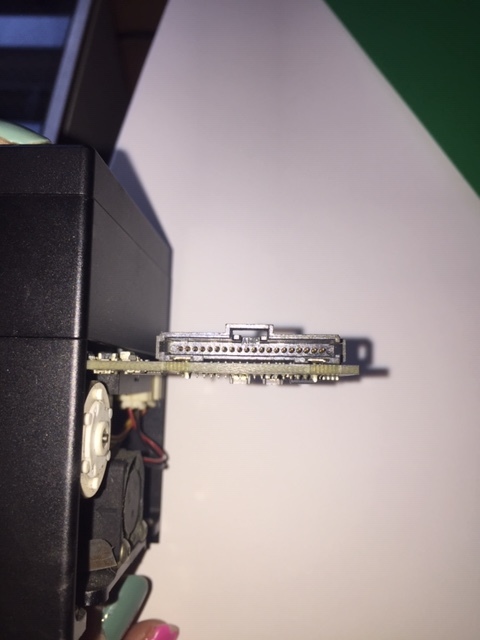
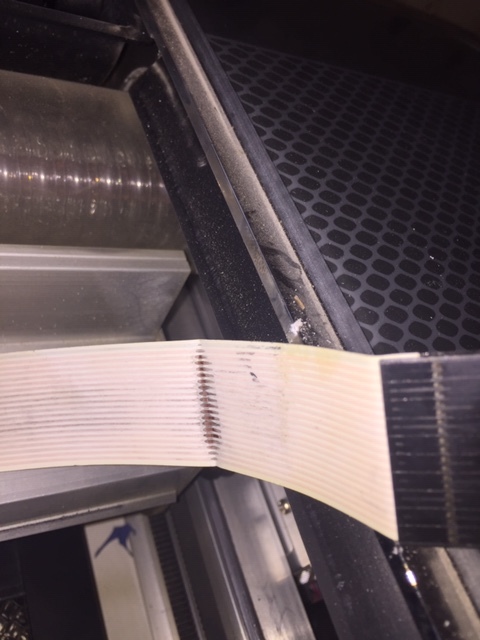
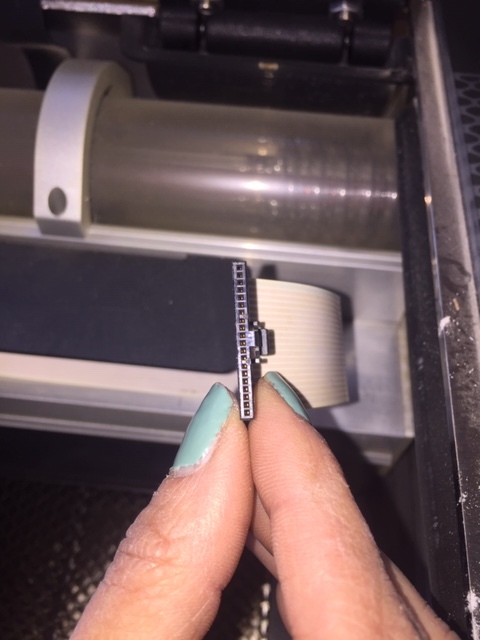
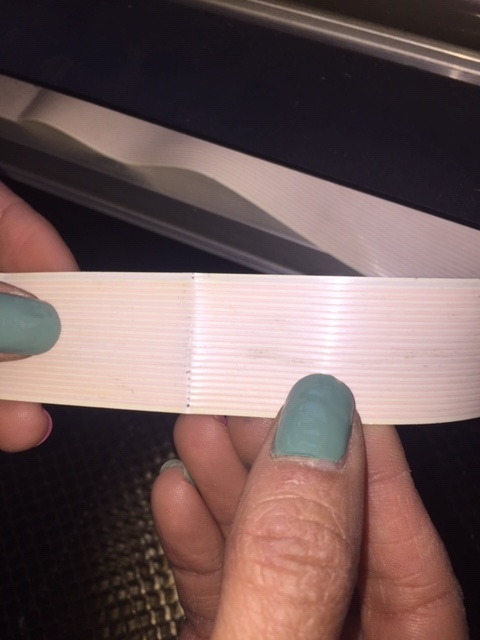
Hi, I’ve done the usual cleaning of the machine and other fixes. The forum says this can indicate an issue with the ribbon cable connecting to the head. I checked and, while the ends look fine, there appears to be damage to the middle, with the metal wires showing where the white plastic covering has worn away. It looks like I need an urgent replacement. Can you please confirm and let me know how quickly and where I can get hold of a cable? I’ve attached pictures. Thanks.
by the way , I tried to send support the zip file after I run these steps and the email bounced back…
- Turn your Glowforge off completely
- wait about 30 seconds
- Hold down the button on your Glowforge for ten seconds, until it glows with a teal color
- Your Glowforge is now broadcasting a temporary Wi-Fi access point. Connect your computer to “Glowforge XXX-XXX” (from your Wi-Fi Settings)
- Visit the following URL in your browser: http://192.168.192.1:3000/logs/zip 4
- A .zip file should download to your computer
- Reconnect to your usual Wi-Fi network and email the .zip file to support@glowforge.com 1. Let me know when you’ve sent the file over and I’ll take a look right away
I’m so sorry to see that you are hitting another snag. I’ve extracted the log files from your Glowforge once again, and compared it with the details you’ve provided. Based on the photos of the White Ribbon cable you provided, this is likely what is causing the errors you are seeing. This particular part cannot be replaced remotely, so I’ll reach out directly via email to send over the next best steps. I’ll now close this thread.