Satin Chrome Zippo and Cermark Tape


I just wanted to add my experience with Cermark tape. I had a small sample strip that has been collecting dust for a couple of years, and suddenly found that I needed it to mark some Zippo lighters. I couldn’t find exact settings for the tape, so after a leap of faith and some starter settings I found here in the forum…I was able to finish them.

I am using a GF Pro, but I found that using the recommended settings from the example did not stick; the Cermark rubbed off. I slowed the speed to another user’s suggestion for the Basic. My final settings were:

Power: Full
Speed: 300
LPI: 340

Unlike regular Cermark where you spray a couple thin coats, the tape works a lot like double-sided tape or 3M tape. You clean the surface with alcohol, then peel off a paper backing, apply to the surface, and then apply even pressure to get rid of any bubbles and to make it have even surface contact.

There is a glossy paper that remains on during your engrave, and it helps for clean-up, but I suspect that this paper is why I needed to reduce my speed in order to get the Cermark to stay.

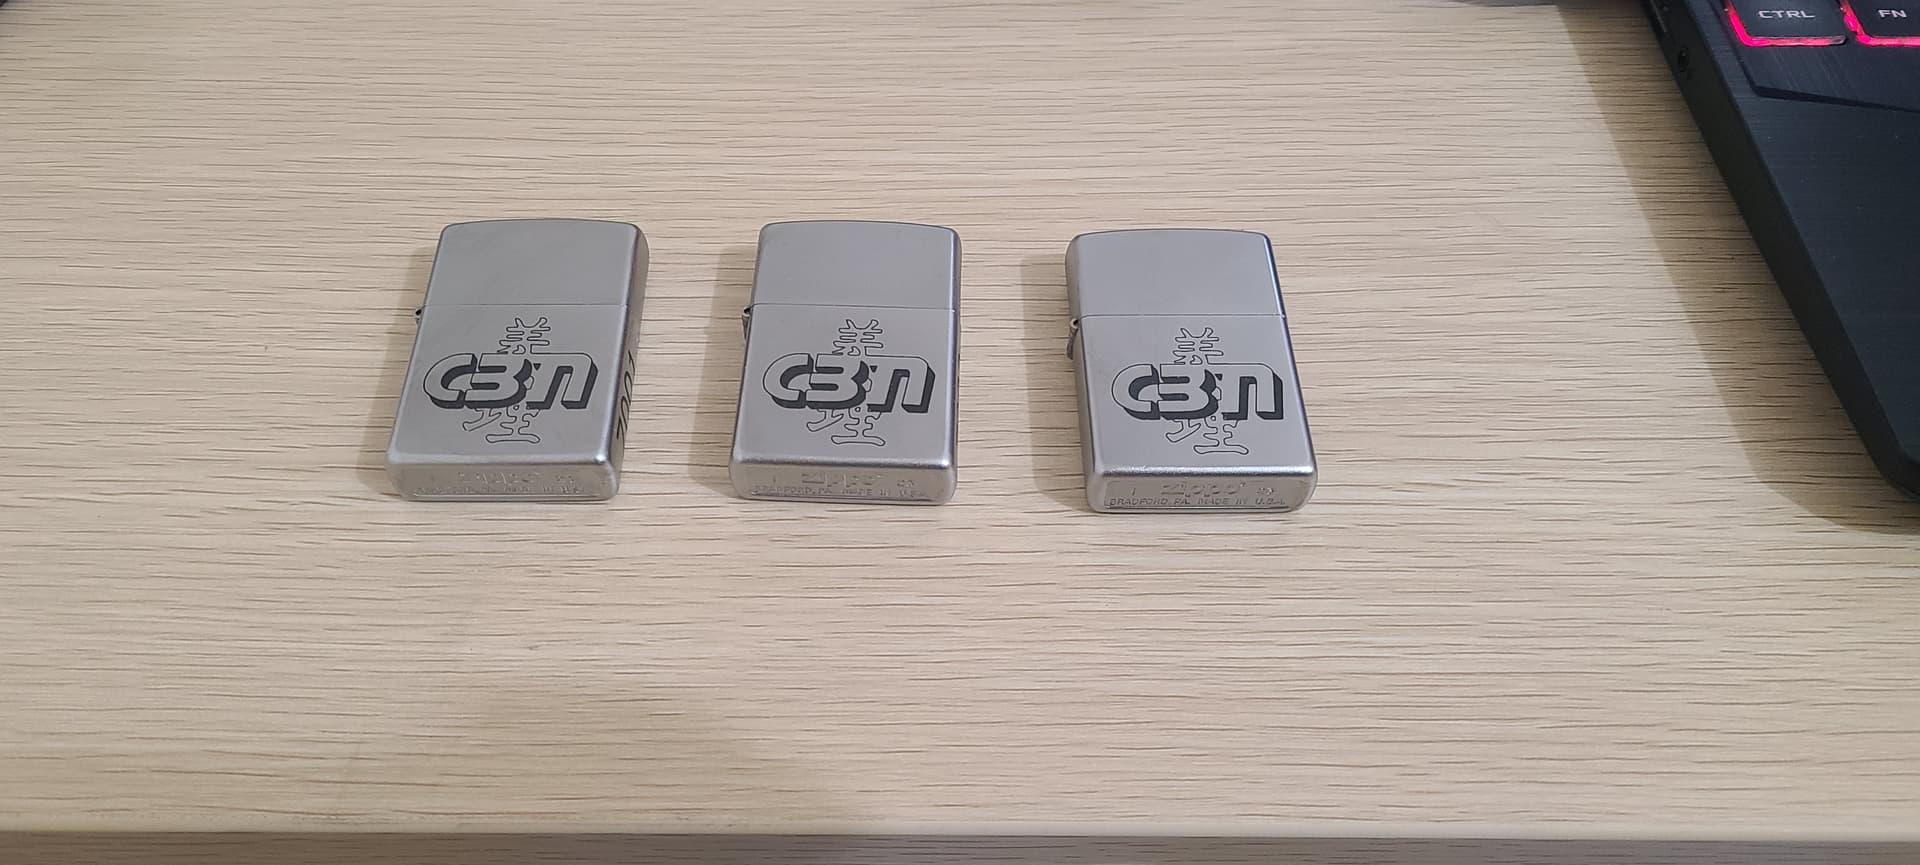
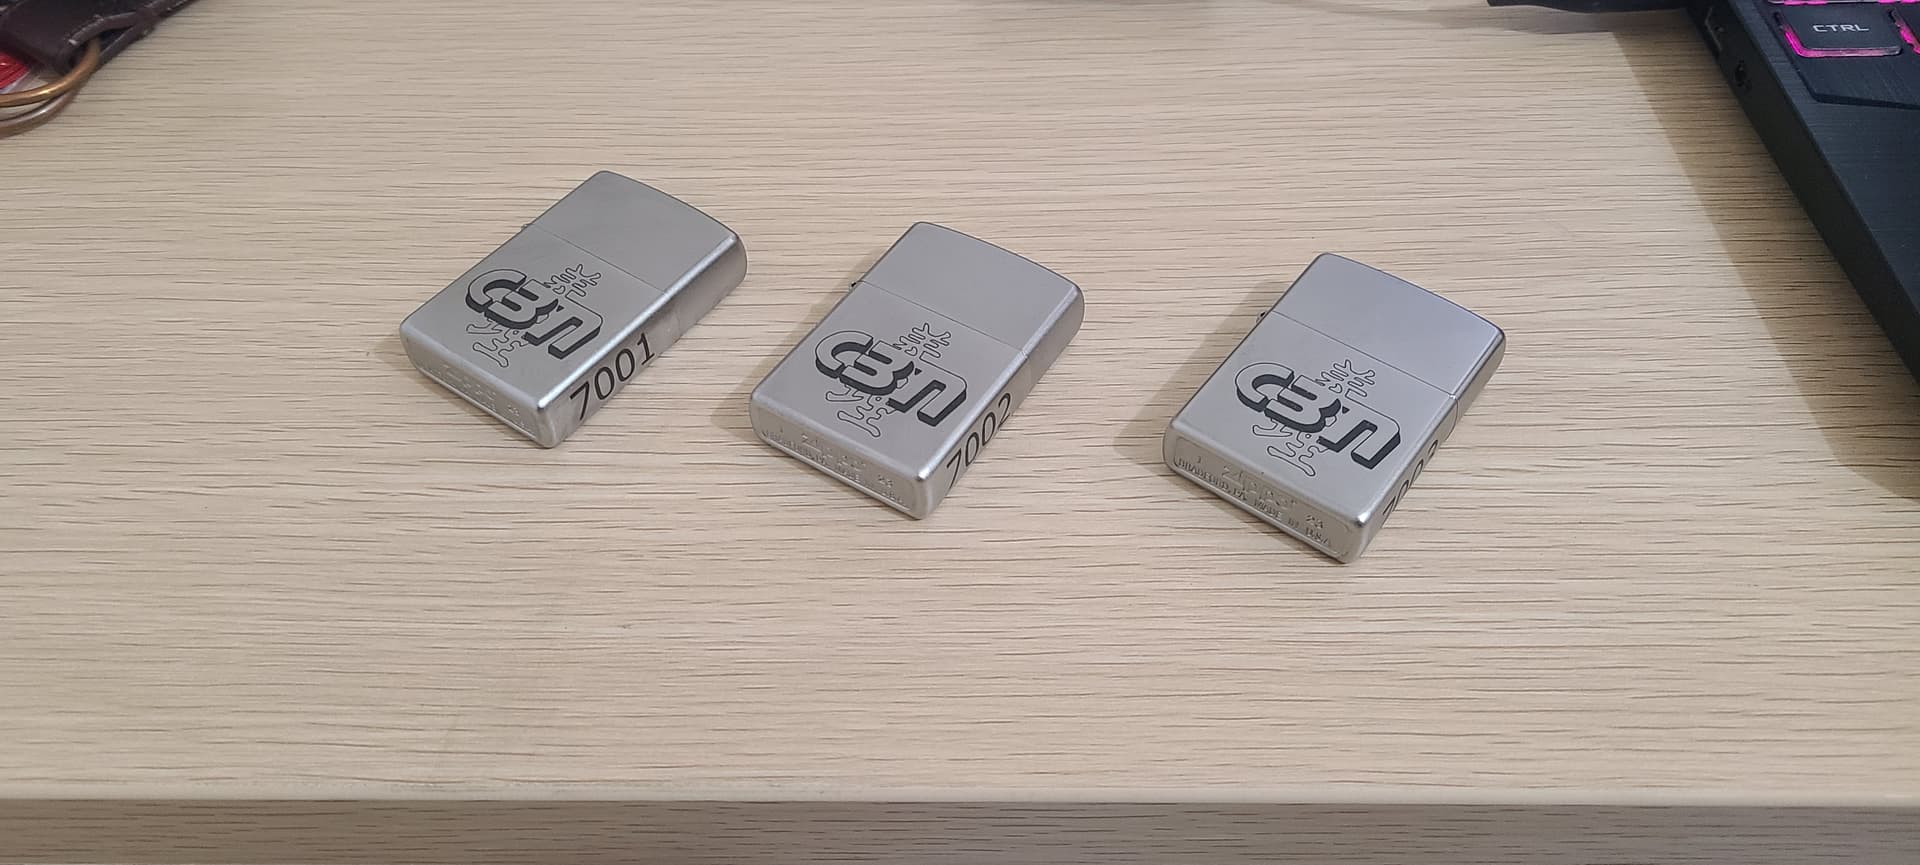
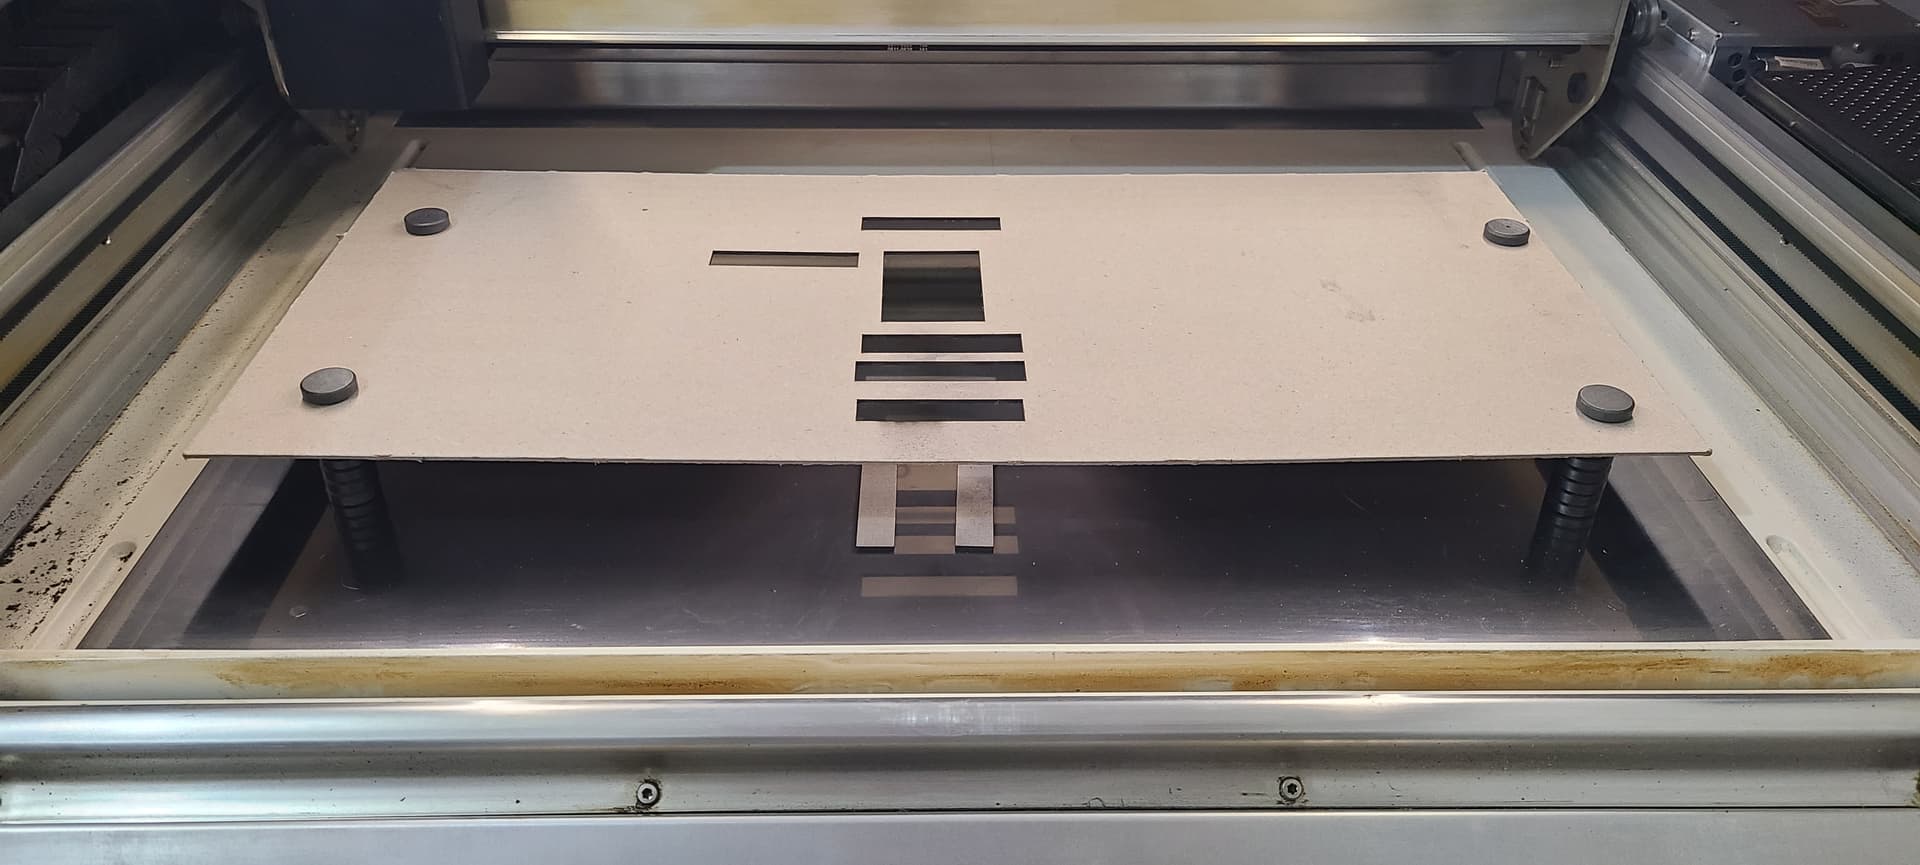
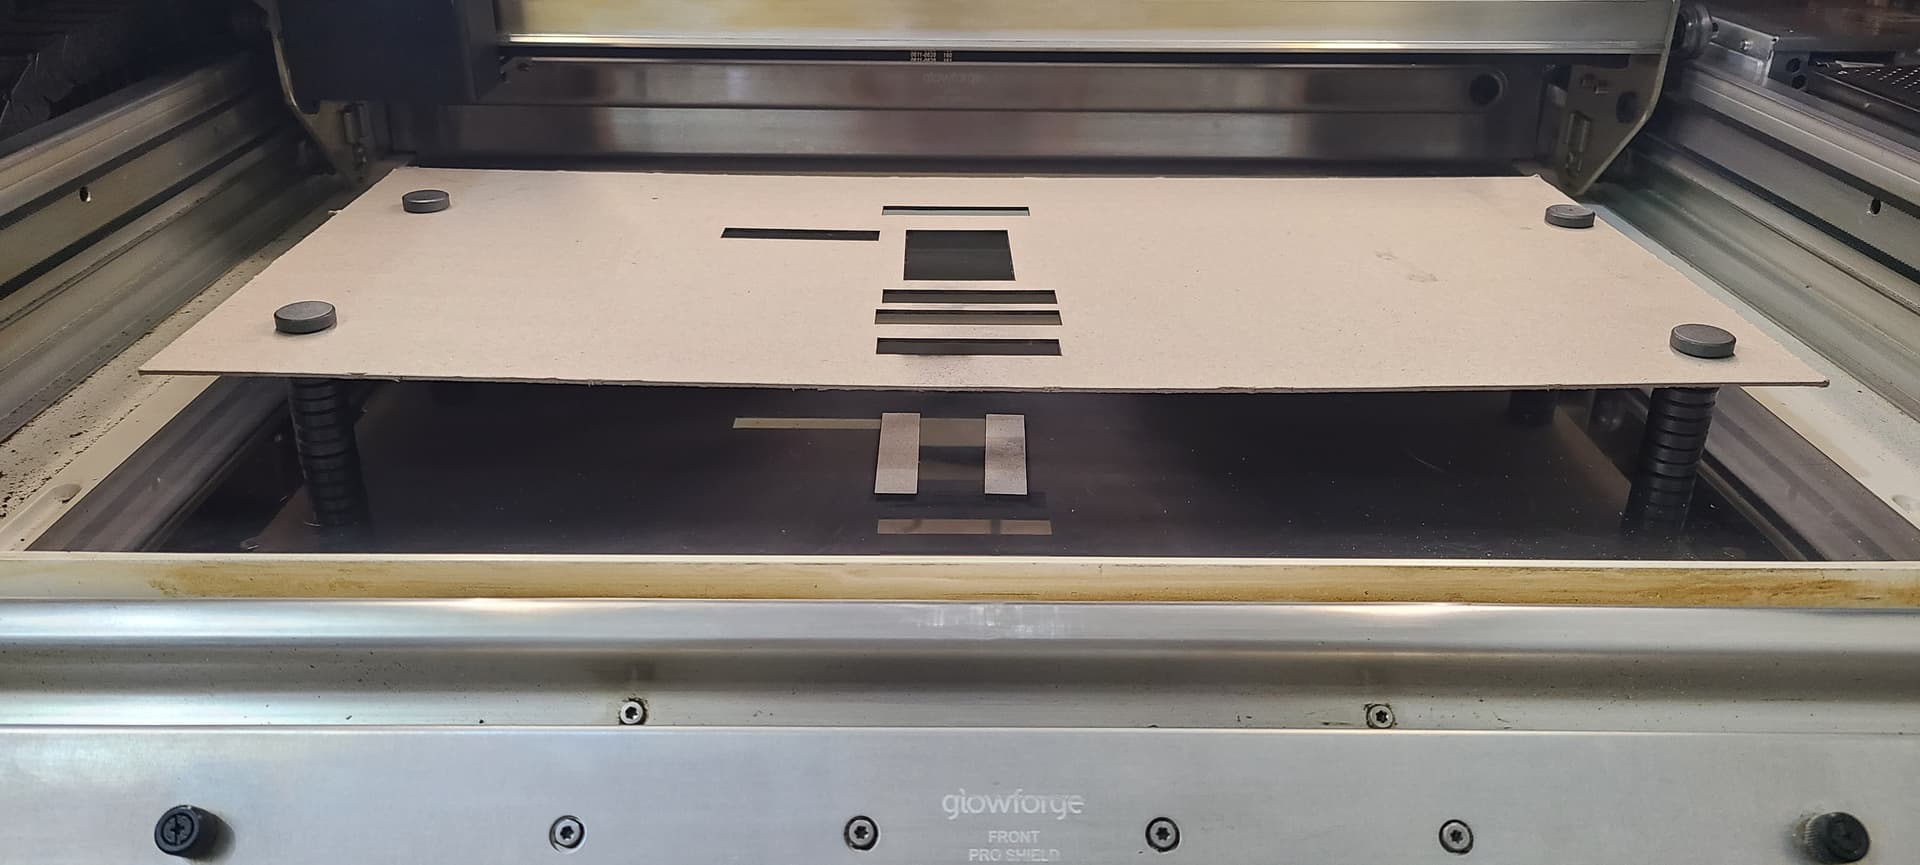
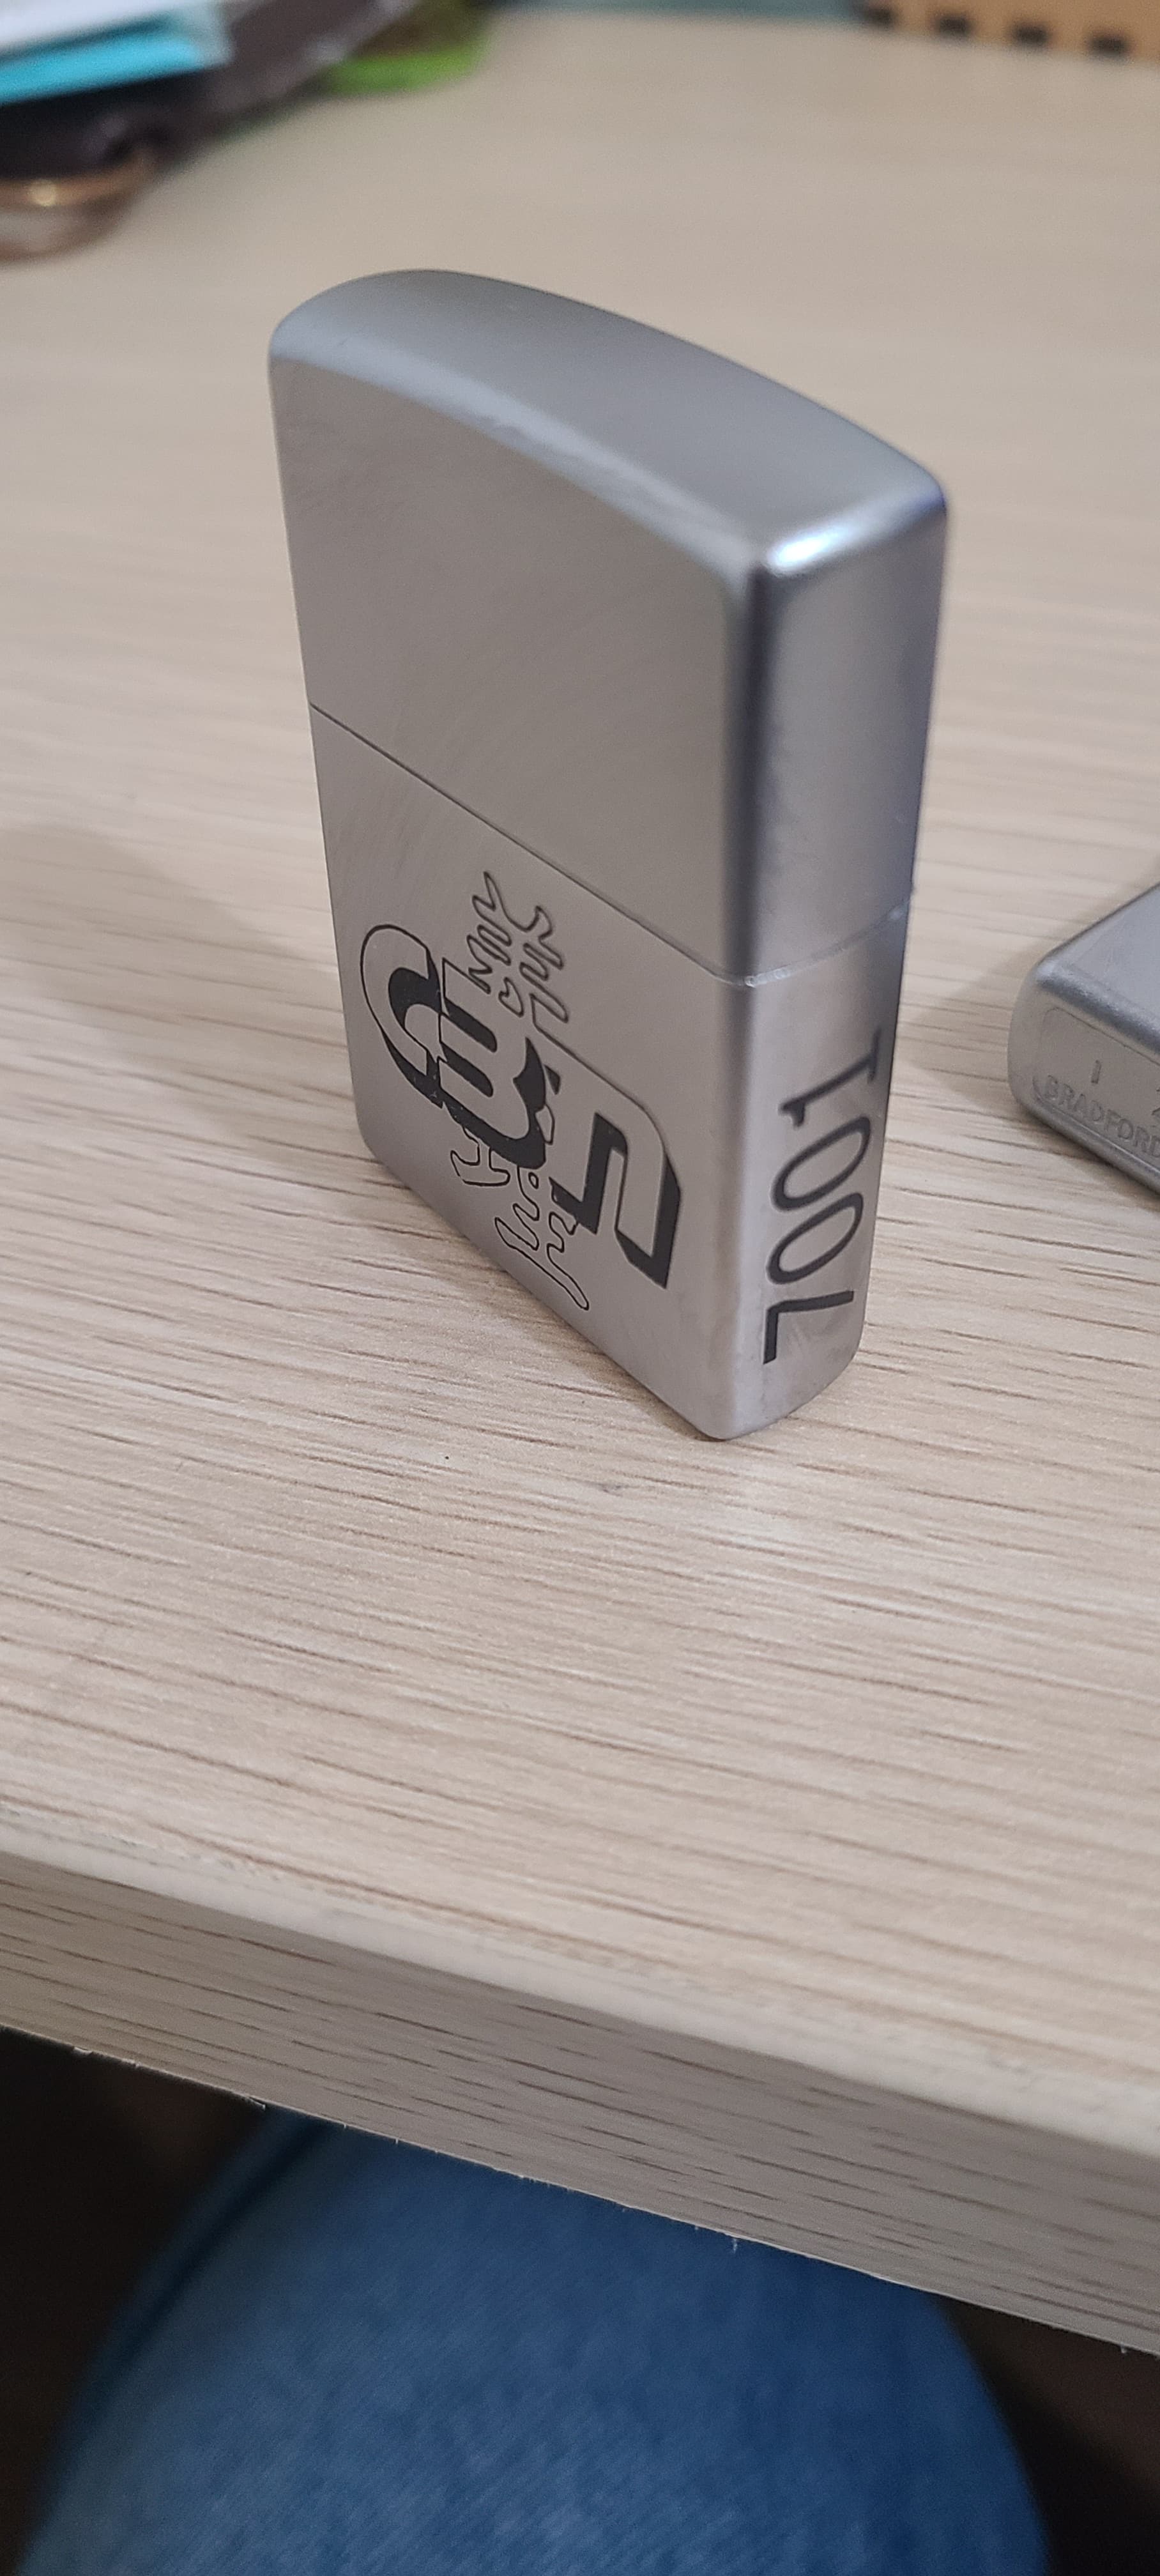
So, these are “satin chrome” Zippo lighters. And it was requested that I engrave the front and the side. I was able to lay the lighters on the crumb tray to engrave the front, but the side required me to create a simple jig to get it done. I used some random thick carboard packaging and rare earth magnets. You can see from the many holes that I needed to make adjustments to my measurements. I did lay the lighter in my jig to engrave the front too. I’m not one to take chanced lining up the artwork,

Also, the black dust on the side is all residue from this tape. Seems to create a lot for such a small area.

31 Likes

Those turned out really nice. I haven’t seen the tape but use the spray a lot.

12 Likes

The tape is crazy expensive. If i hadn’t gotten it for free, i never would’ve had it. I think i received like a 6-inch sample strip. Its like 6 inches by 2 inches.

12 Likes

Thanks for the write up, I know stuff like this takes a minute to do.

Great result.

11 Likes

This turned out great!

Thank you for sharing photos of your jig. Very cool.

6 Likes

Nice! Thank you for giving all the details.

5 Likes

The tape is about 20 cents an inch. If you’re adding $10, $20, etc in value to the product you’re personalizing with an inch or two of it, it looks very cheap through that lens. Wouldn’t take too many sales to cover the upfront cost of the roll. Harder to justify for hobby use of course.

7 Likes

That’s true. Though given this is the first time in at least 2 years that I’ve needed the 6 inches of it, the upfront cost of a roll was way more than I’d like to spend. However, i also hardly ever do metal marking. I’ve got a large, full can of cermark that I’ve never used because the tiny sample can had been more than enough for my needs (this includes materials testing) in the 5 years-ish I’ve had my machine.

I will say however, that if i did do alot of metal marking, the tape is the way to go. No hassle of spraying the layers just right, no excessive clean up. I really just peeled or scraped off the remainder of the tape and then wiped the small area with a bit of alcohol. I was able to do 3 zippos with one 6 inch strip- that would’ve been 5, but i messed up twice and had to redo two of them, so more tape was used than necessary.

@LauraZM my jigs are all single use. I wish i could do something fancy like @MyDogsThinkImCrazy’s grid layout. I gave away my 3d printer before moving, but i considered buying another one just to make the platforms to hold jigs at different levels-but in the end i did shat i could with what i had, and the trial and error is part of my thinking process…it would be amazing and strange if i got something right the first time.

I used the no focus math ruler that @dwardio created. After taking out the crumb tray, i stood the lighter on its side and saw where it stood against the ruler in the machine (it was just the right height). I grabbed a bunch of magnets and made a stack the same size as the lighter, plus one to hold the cardstock in place. This brought the cardstock to the same height as the lighter, which made it easier for me when placing the design, plus i didn’t have to worry about the jig moving because the magnets kept it in place.

While i was engraving the fronts, the person changed their mind about the location of the numbers. They were originally supposed to be on the hinged side, so the hinged would face up while engraving, which would’ve made things easier since it would lay flat and i made all my measurements to include the hinge in the design.

With it being on the other side, i needed to make adjustments to the design so that the numbers were more centered, since i no longer had the hinge taking up space.

Then because it would no longer lay flat, i used the rectangle cut outs from the card stock to place on either side of the lighter to lift it the height of the hinge so it would sit flat-luckily the cardstock/cardboard i used was the same thickness as the hinge.

10 Likes

The spray is expensive too but at least it lasts awhile.

5 Likes

I think I remember you telling me about when you got that tape! lol

3 Likes