It’s great for getting things close, but you might be off by a millimeter or two. We’re releasing some software improvements that will make this much, much better. The jig suggestions are great as well.
7 Likes
I can get it done with six layers and no double engraving. One thing I failed to mention is that I think you only need the engrave details on the two outer flower layers. I think if you engrave the flowers on all sides it might get too busy.
I also had an idea of cutting the flowers as a separate piece but still from the same cut. This way you could engrave and flip them. You would just have to make a symmetrical cut. I’ll try to do a quick illustration.
That is only for very flat materials. If there is warp, the misalignment can be expected to be up to twice the vertical warp distance toward the edges of the bed, even with a perfect lid camera system. Only unless multiple depth measurements are made of the material (ostensibly with the head camera) will warped material be able to be cut accurately.
3 Likes
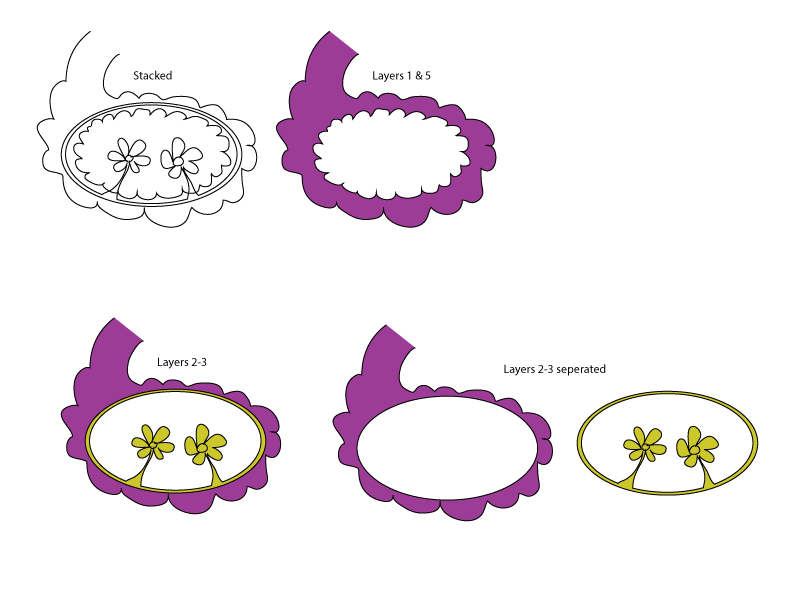
So you would cut the main outline like you have above with one exception - layers 2 and 5 would be flipped horizontally so that you can engrave the other side of the horns.
Then on layers 2, 3 and 4 you would cut an additional oval (or other symmetrical shape) so that you can flip it to reverse the engraving. Actually you could do this just on layer 4 if you wanted but I think it would be just as easy to treat them all the same. that way you can then flip just the flowers on layer 4 to get the engraving visible from the back side.
I believe you only want the engraving on layer 2 front and layer 4 back to keep the design from getting too busy. That is up to you though. You can still add layer 3 front engraved flowers if you wanted a bit more detail from the front.
The end result is that I believe you can get the level of detail you want without doing two sided engraving.
1 Like
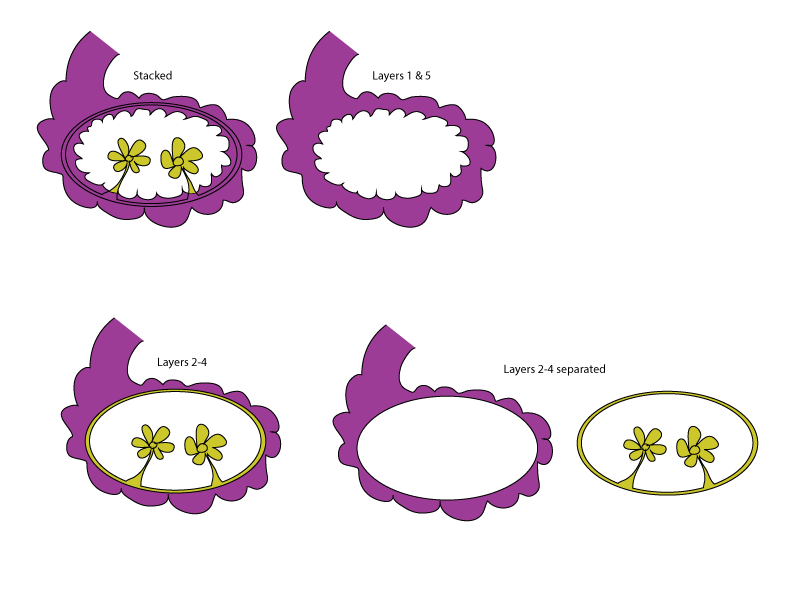
Oops, that graphic should be marked layers 2-4 on the bottom images, not 2-3.
Hah, I just thought of something else. You could hold layer’s three and four together with some strong neodymium magnets or maybe some dowels then offer different inserts for the innards.
3 Likes
So @brooklyntonia sent me the file and I tried the job today. It came out great! Some info on how it was done:
-
The current settings for score are a bit hot, so where lines begin, end, and cross show on the flip side. Therefore, I converted the score lines to engraves in Illustrator by giving them a .5pt stroke then doing a Path…Outline Stroke command.
-
The flip side engraving was manually positioned in the UI, for each ~2" square area that needed engraving. However there is an offset (easily determined by engraving a crosshairs on graph paper) that you need to take into account. For my machine, I have determined that if I zoom in to 450% and place the image exactly where I want it then jog with the arrow keys four times to the left and four times up, the engraving is precisely on point.
-
This is beta software and they are still working on both of these items. I expect that, long term neither of these compensations will be needed.
-
I masked both sides, but my masking is very low tack and I think that resulted in some staining under the mask.
-
Material & settings: 1/8" Baltic Birch plywood B/BB, actual thickness 0.132". Cut: Power 50%, speed 25 in/min, focus height 0.130"; Engrave: P 1, S 335, 225 LPI, FH 0.130".
Front side:
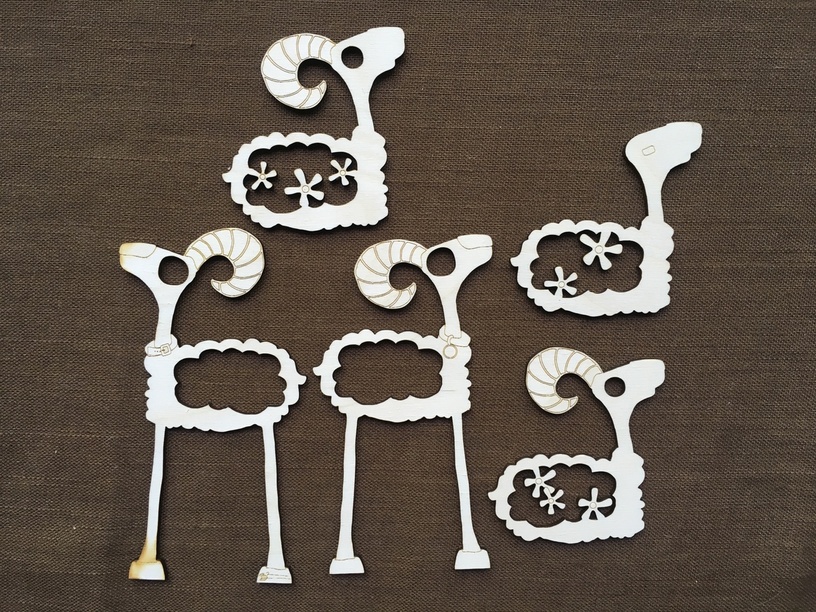
Back side:
18 Likes
Nicely done! 
1 Like
They look great! Thanks again!
2 Likes
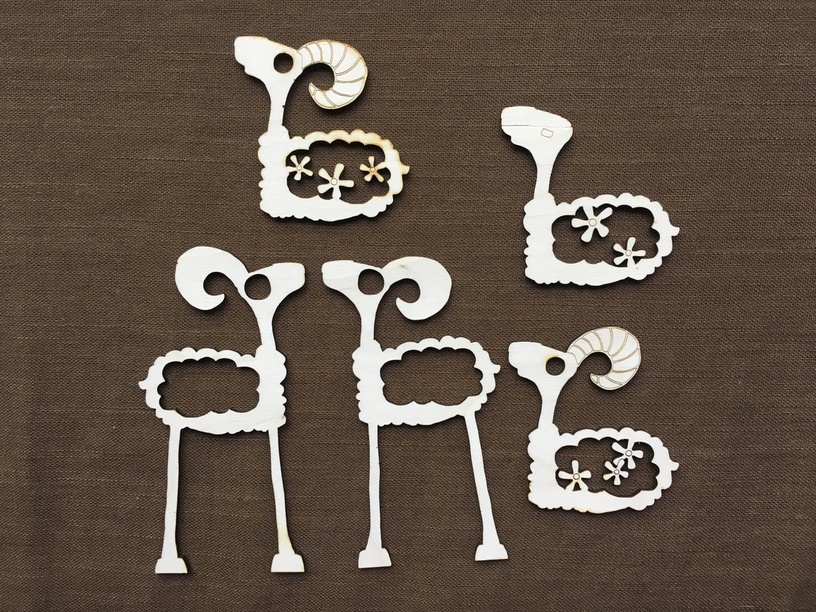
Thanks to @cynd11 I finished another art toy. It took me forever to make a choice on the colors, but I think it came out pretty good. The lines were sort of dotted instead of smooth. Was it rastered?
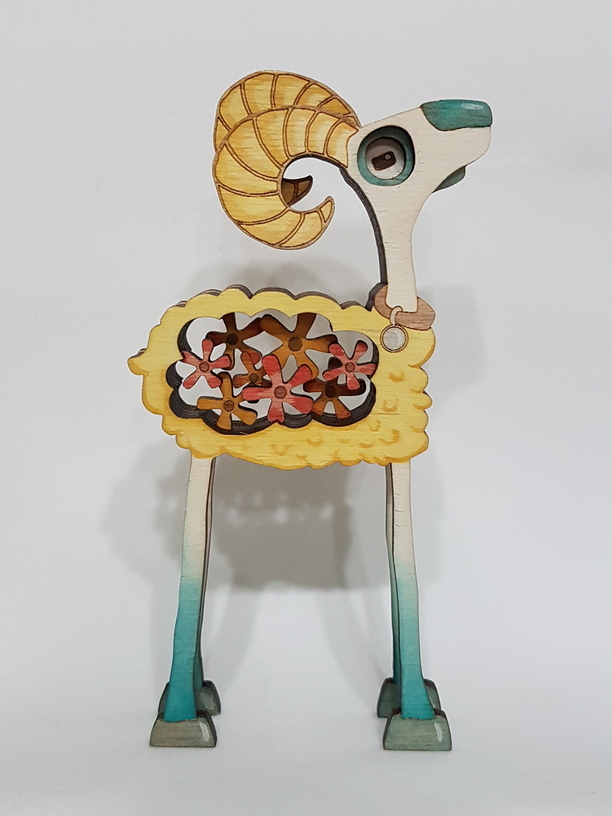
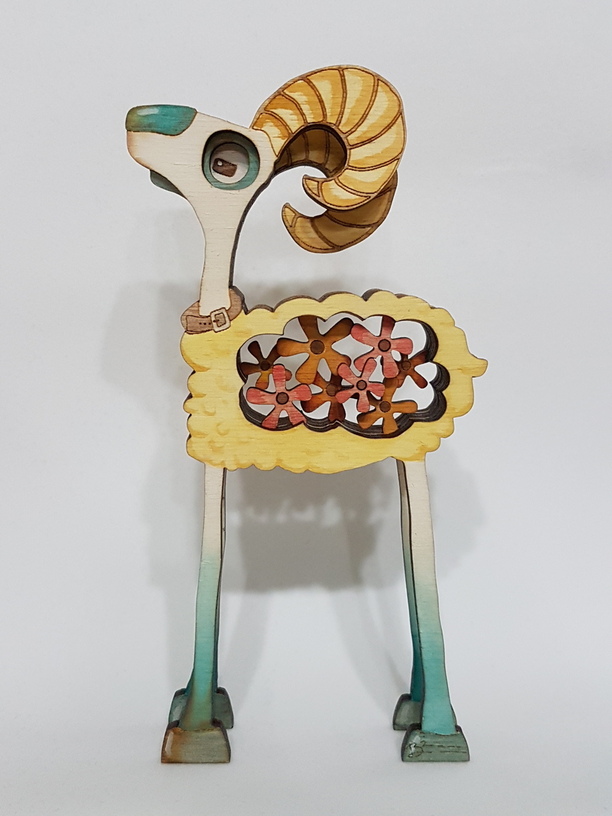
27 Likes
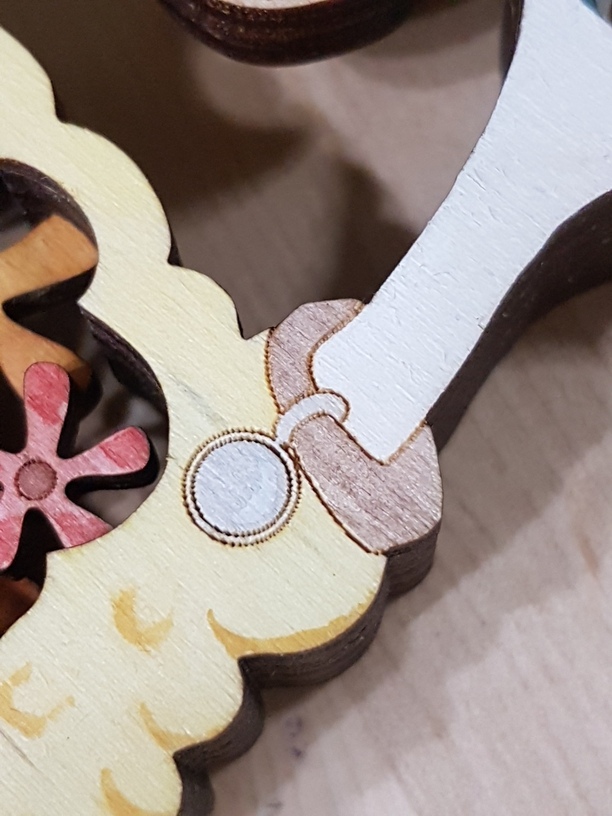
Yes it looks like it was rastered at quite a low LPI.
1 Like
Adorable!
Yes, the score lines were converted to 0.5pt engraves and the setting was 225 lpi. I gave all these details in my posting above.
2 Likes
I’m sorry, I’m still struggling with understanding the settings and terminology especially without being able to play with it myself. Why would you need to do anything to the file to engrave a vector? My FSL at school doesn’t require different file types for engraving. Also, can you not just change the power/speed to prevent it from being "too hot?"I might understand if the presets are too hot, but can they not be overridden?
At this point in time, both the lowest power of engraving and the lowest power of cutting are hotter than we would like. So scores can punch through material at turns, starts and stops. Lower power is on the horizon, and even appeared briefly for PRU users, but we are waiting patiently for it to reappear. The sundial just posted shows a pretty good score use.
1 Like
At this point in time the score settings burn through to the opposite side in places. Since this is a two-sided design I knew you wouldn’t want that so I converted the score lines to engraves 0.5 pt wide (probably should have done wider, would maybe have given less jaggies). You don’t really need to worry about this as lower power settings are on the way (we actually got to play with them for a day) and hopefully that will eliminate the scores penetrating to the back side. I’ve noticed also that this Baltic Birch is softer and needs to worked with at lower settings than the Proofgrade. I used the lowest power and fastest speed available when I tested scoring and they were still too “hot.”
3 Likes
Haha–beat me to it! Either you type faster than me or I’m too distracted by this cat laying across the backs of my legs.
3 Likes
Sitting here weeding. Five more minutes. One hour of total weeding on this project. Gorilla tape would work but is actually slower and I’d use a whole roll!
3 Likes
I’m certainly not complaining, just trying to understand what to expect. I still don’t understand what you mean by changing the score lines to engraves. I recall you saying something about my strokes being very small. I understand making the stroke larger for an engrave, but did you change the file type? Why outline the stroke?
Oops, I probably confused you there–the original file you sent had such thin scores (I think they were about 0.02pt) that I couldn’t see the figures, so I thickened them up a bit when I worked with the file in Illustrator. That is a different issue that had no bearing on how they worked in the laser interface.
I’m not sure what design software you are using, but if it’s Illustrator, in order to convert a score line to an engrave line, you need to convert that line to a closed figure. Think of it as a straight line that is converted to a very thin rectangle. The way I do that in Illustrator is to change the stroke of the line to whatever I want the thickness of the engrave to be (in this case it was 0.5 pt), then choose Path > Outline Stroke. This command converts your stroked line to a filled object (with stroke of none) with the fill color the same as the original stroke color. I hope all this makes sense.
The file type was still saved as an SVG for the Glowforge interface.
Edit: I just realized that I did not make it clear that the Glowforge interface doesn’t care what the stroke thickness is, which behavior may be different from what you are used to seeing in the lasers you are currently using. You could send two lines with very different stroke widths and they would both be interpreted the same, as a cut line. The way you specify different operations in the GFUI is by color, not by layer or stroke width.
3 Likes