That’s Perfect! Thanks for sharing!!!
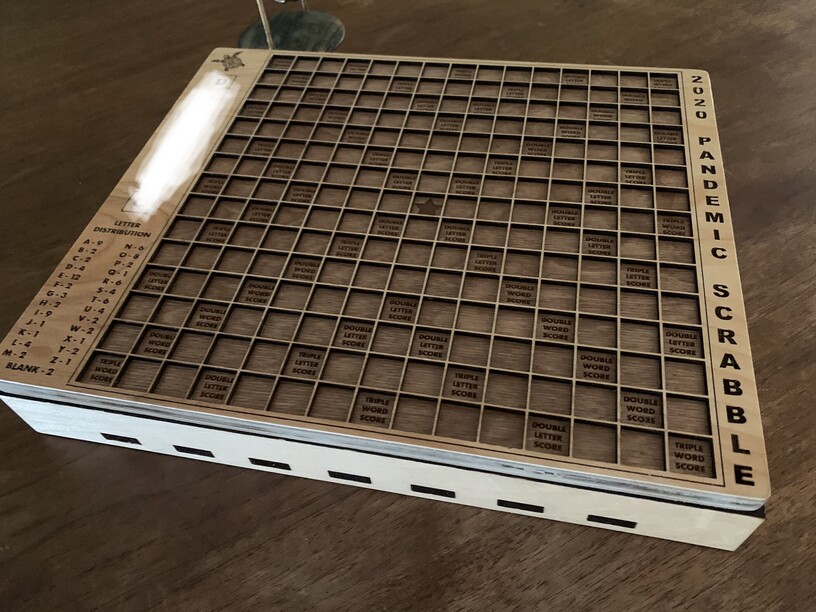
You are NOT slow! That’s correct all the red lines are cut lines, the green lines are score lines and black is engrave. So yes, the first image gets glued on top of the second image. The first image is made with 1/8" thick board and bottom is 1/4" thick board. I also made the tiles 1/4" thick so they would stick out and be easier to grab the tiny squares when placed on the board.
Hoped that answered your questions.
7 Likes
Thanks
Image Godz 113
Manuel J Hernandez
IS there a link to this file? If so I don’t see it. 
No link. Just right click on the images and select SAVE AS and choose svg
1 Like
Ok so my mind isn’t quite wrapped around this yet. Do you have a finished picture? I am new, my GF hasn’t arrived yet so I am still playing with the softwares. How do I change the personalization? THank you for your service and file sharing.
1 Like
What software do you use to create and edit your svg files?
Awesome and ty vm thats a very kool start to the day!!!
1 Like
Love this so much. THank you for sharing your work with the forum! I cannot imagine how impressed your dad was with this gift!
1 Like
I do not want to offend or detract from your excellent work, but I took the liberty of rearranging the tile file to use less wood and to take less time printing. This version engraves the letters and point values, and then uses a grid to cut out the tiles rather than cutting each tile individually. The print time for your file was 1 hour 15 minutes with a lot of wasted wood. This file prints in 30 minutes 39 seconds and produces a few scraps at the ends of the rows and columns so none of the individual tiles have any “double cuts”. There are no blank spaces between the tiles.
One of the things I discovered on your original file was that the letters Q through Z and the blanks were slightly larger than the letters A through P.
15 Likes
Awesome! Thank you! It’s way easier this way!
2 Likes

How do I get this file to print on my glowforge plus.
Right click the file and save as an svg file on your computer.
That’s awesome! What size board did you make that?
I started off with 1/8 inch for the top, and quarter inch for the board, then when I did the engrave on the back of the quarter inch the pictures came out too light, but I didn’t notice it until I pulled off the backing, then I tried to line it up by eye and re-engrave, then the photos looked terrible. Then I tried to sand it down which was not very successful, then I decided to cut out another 1/8 inch and a sandwich it to the back with the engraved photos, so it is a giant hot mess of plywood, but it looks good with polyurethane on it. We just played today and the tiles were a snug fit, but I blame my polyurethane.
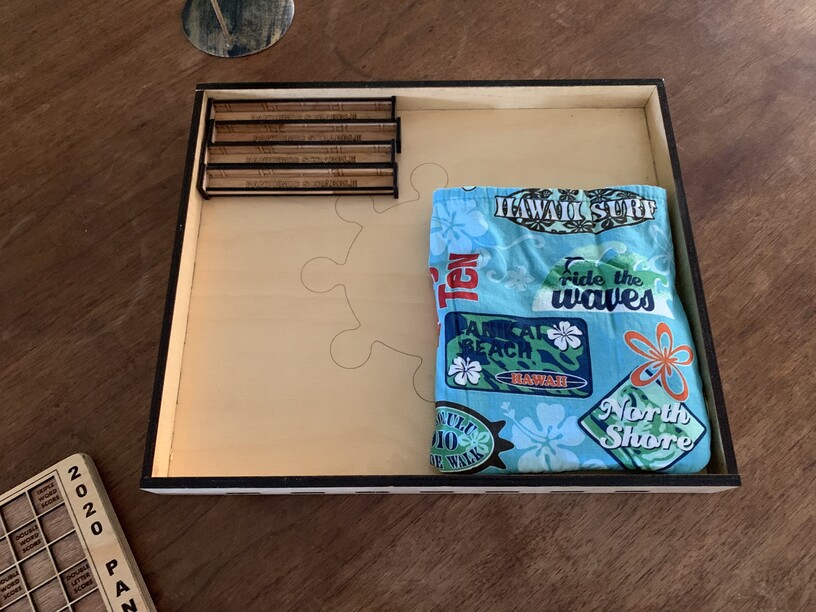
What I really need now is some Lazy Susan parts. This is such labor of love gift with all of the work that went into it! I had to sand the tiles as they didn’t pop out of the 1/4 inch baltic easily.
3 Likes
those images are awesome what software did you use to make them?
1 Like
I am looking to make a large scrabble board wall art like
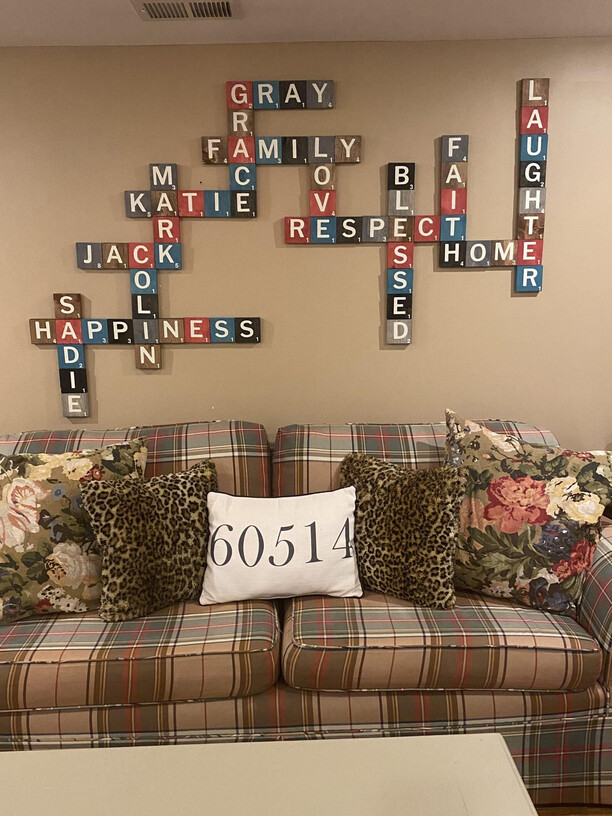
but I am thinking I want the board to be attached to the wall and the letters to be free so they can be changed often.
any ideas?
4 Likes
I used this iphone app and then adjusted the grey to make it blacker.
2 Likes
HI, how can I download this pls?