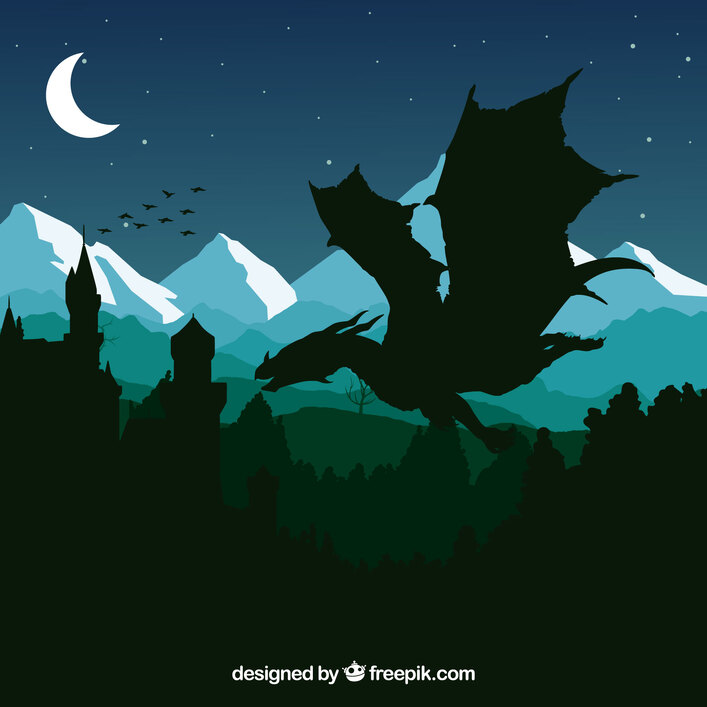
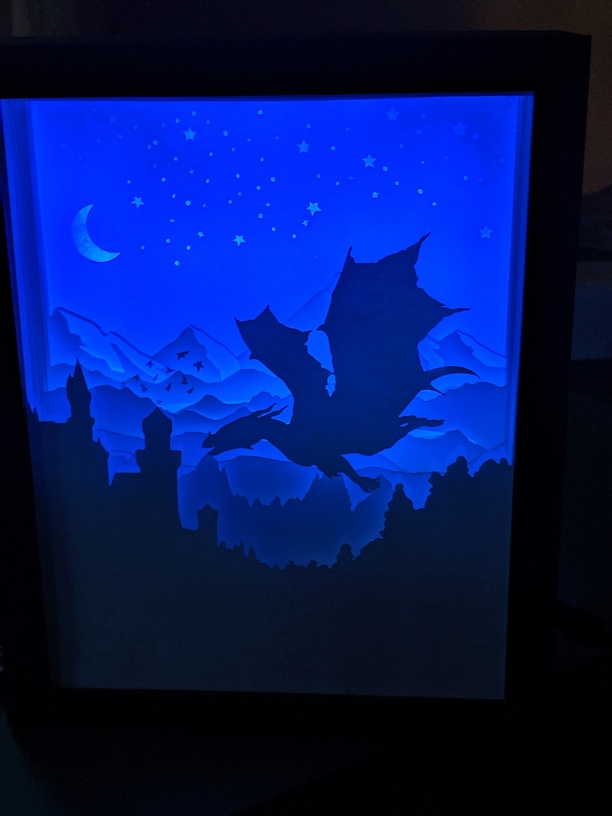
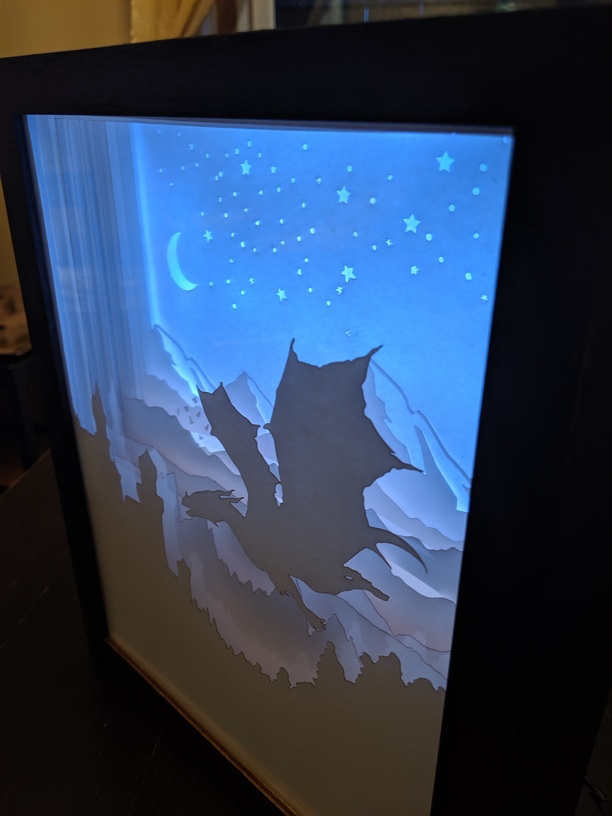
This is the second light box I’ve made using my GF! The original picture design was from Freepik.com. I took the AI file and used it to make layers. I had to add borders and change a few things on the original design. I ended up with 10 layers in total.
The dragon was glued onto a transparency, as was the layer with the birds flying. The rest of the layers were cut from 65 lb. white cardstock. Layers have strips of foam core board in between to separate them.
In order to reduce smoke staining and charring, I engrave cut all of the lines that aren’t straight. I used “stroke to path” in Inkscape and then engrave cut them.
The vertical and horizontal lines I cut.
I also cut the frame on the GF using 1/8" baltic birch ply.
Both of your lightboxes are really beautiful. I bet they are even better in real life. I would love to try one but I wouldn’t even know where to start. Someday… maybe.
Thank you! The easiest way to get started is to buy files from Etsy or somewhere similar. There are a number of really nice designs there. Each layer is cut from card stock. And then you just need to put spacers in between the layers. I used foam board…that stuff that is paper on the outside and some kind of light foam in the middle. But you can also use mounting tape.
I joined a group on Facebook of people that make them and that’s been helpful for asking questions and seeing how other people do it. My next step is to make some of my own designs. They are a lot of fun to make and build and they look amazing when they are done.
I can try to answer questions if you have any. Not sure I’ll be able to but I’ll try!
Beautiful work! FYI we’re not supposed to post non-PG settings except in the Beyond the Manual section. To comply, you can either move this thread over there, or make a separate post there with the settings and then link to it from here.
I really wanted to be able to use the white card stock without the smoke stain. Fortunately, owners had already posted about doing engrave cuts on white copy paper and then some other fabulous people on the forum helped me with technical details. Cutting the straight lines, rather than engraving them, cuts down on the time dramatically. Most of the layers only took about 8-12 minutes by doing a combination of engraving and cutting.
I looked at a paper masking tape…but it’s expensive. And I think it would take longer to mask and peel everything than the actual engrave cuts. Plus I’d worry about the cards stock ripping.


 But I do appreciate when people are trying to be helpful.