Prompted by a FB post a few weeks ago, I decided that one of the next wallets I would make would be stained with an interesting technique. It just so happened that my sister had requested me to make a wallet for her boyfriend’s upcoming birthday, and had reminded me to make it before it was too late (I’m quite forgetful, and had in fact forgotten about it, so good thing she reminded me!). She wanted it to be an ocean themed wallet, and immediately I knew that I had to try out this new to me dyeing process. She took a bit too long in choosing what fabric she wanted me to use while I waited in the store, and I ended up buying even more fabric. If you’ve seen my other post, then you know I already have a ton of fabric . I used this video on youtube as a guide, and learned very quickly on what works best for me.
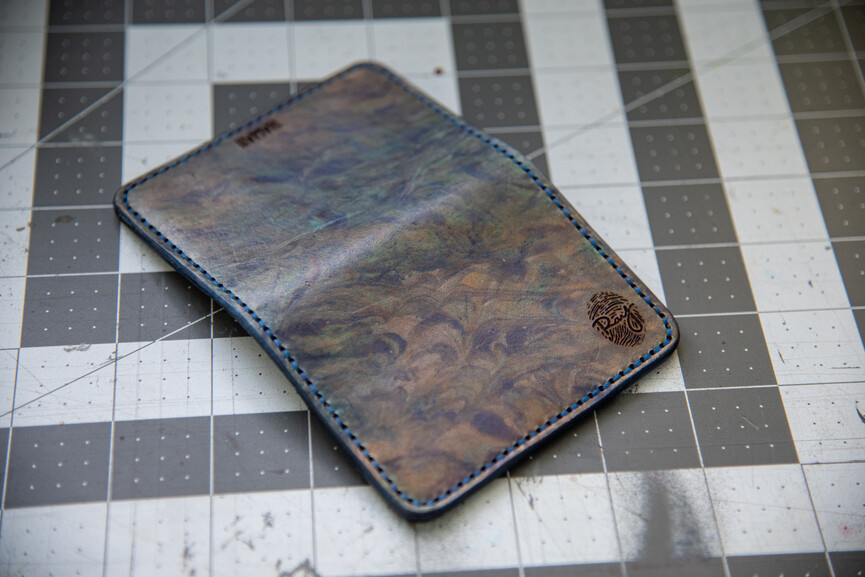
I wasn’t unsatisfied with the front, I just was more satisfied with the inside panels. So after doing the inside pockets, I did a second pass on the face. Looks much better than it did originally.
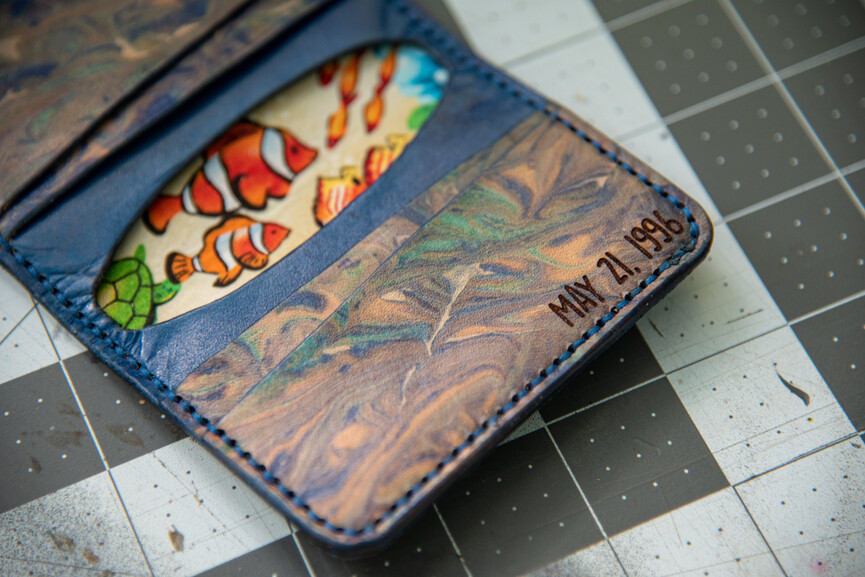
You can see that the pockets are a bit more defined with the marbling - I followed the video, but what I found was that I needed to use more drops than she had, and to mix less.
I felt as though the marbling was a good way to express ocean currents or waves, and with that in mind, I think the wallet succeeds in getting that message across. I made the very inside pocket a solid blue to represent the deep ocean, while the swirly outsides represent more of the surface.
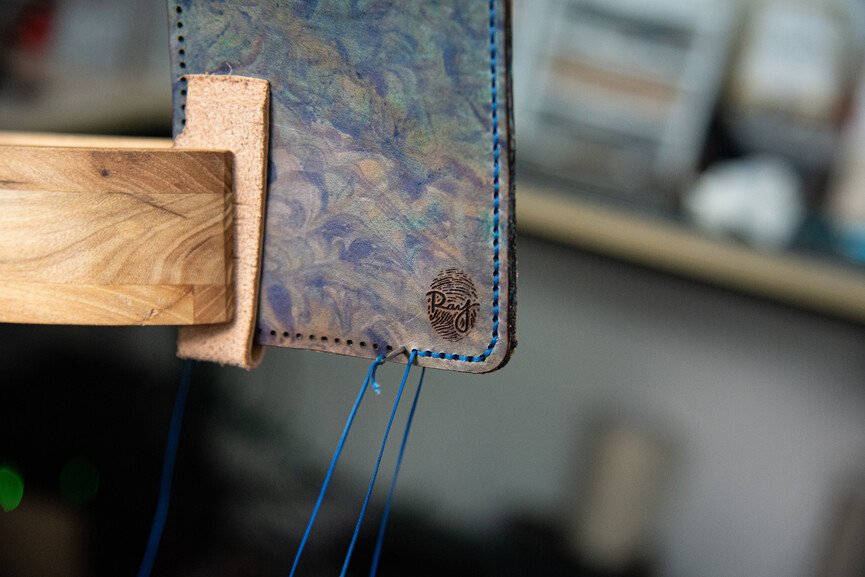
Of course I handstitched the wallet since I still have not bought a machine, but I’m not complaining about that. There’s something very therapeutic when going into a flow state while stitching by hand.
That’s about it for this one. Hopefully I convince one of you to try this technique out - it’s really quite fun and reminiscent of childhood creativity
Ooooh, with brown stains, you could replicate that style really easily! Guess I’m going to need to order a dark brown to go with my tan. My wife will not be pleased with me ordering more leather working stuff, especially since I just got in two large sides of leather
She sparingly used the drops, where I did not. I’d say I did at least twice as much she did, and when mixing, I did an infinity swirl where the swirls overlapped like this:
Both. I I typically dye my leather after I cut and engrave my logo and the Hawaii mark, so that I’m not wasting any in the scrap pieces. I also usually do multicolored wallets, so it’s easier to color the pieces after. This wallet was the same, but I have a few wallets that are cut waiting to be colored and put together, so I decided to take one of those and stain it with this process. It was only after I was done that I remembered my sister wanted the date inside. I put some masking on one of the the pockets and put it back in the Glowforge and didn’t notice any problems with doing it afterwards.
That’s what mine looked like at first, probably because I followed what she did pretty closely, glad I decided to give it a second pass. I should have taken pictures of the process, oh well, this won’t be the last time I do this!
 Guess I’m going to need to order a dark brown to go with my tan. My wife will not be pleased with me ordering more leather working stuff, especially since I just got in two large sides of leather


 Truly a work of art! Love it!
