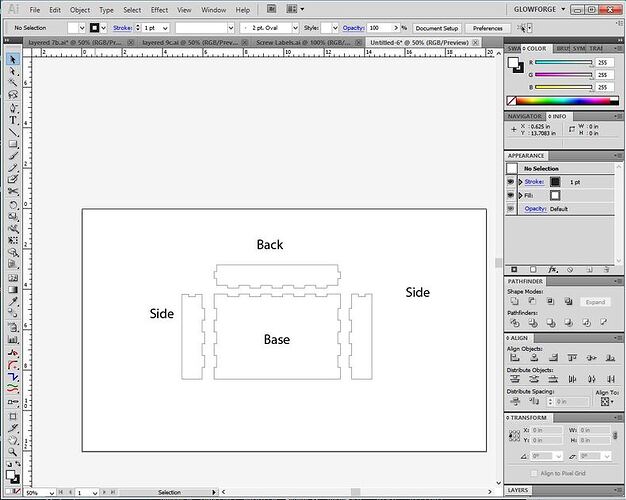
Pretty easy in Illustrator actually, if you don’t want to get too fancy for something like kerf adjusting at first. (I basically just do a lot of laying out, aligning, copying and rotating before joining parts.)
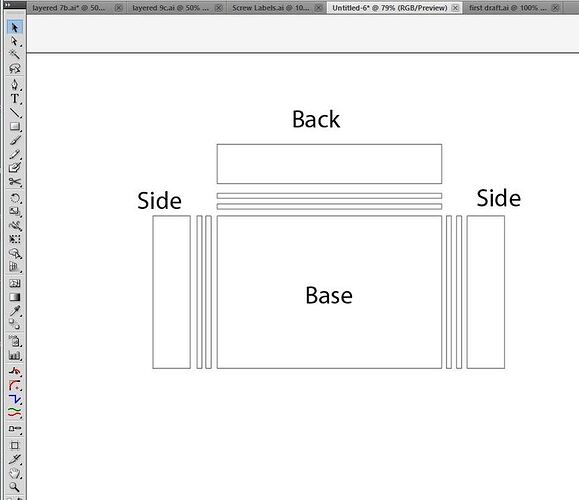
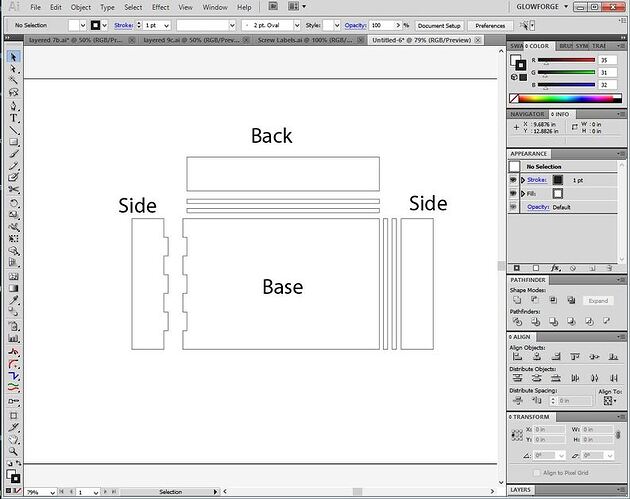
For a simple tray for instance, I’ll lay out the parts as they are going to be assembled, with everything aligned top bottom and center.
In between each of the parts, I’ll insert two small rectangles for the tabs, exactly the width of the material thickness. (So usually 3.4 mm for medium PG plywoods and draftboard.)
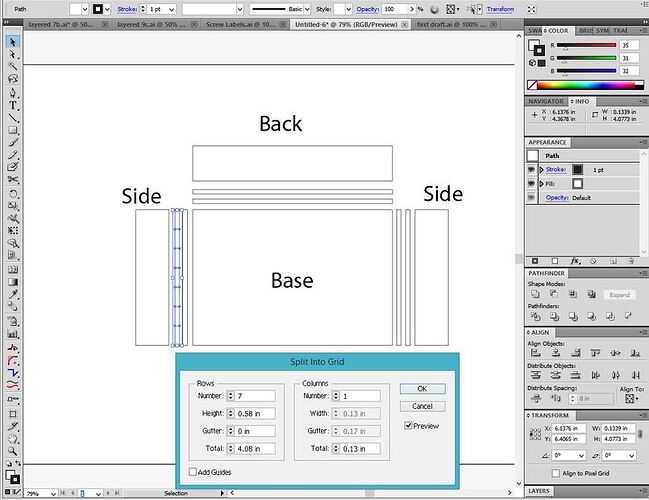
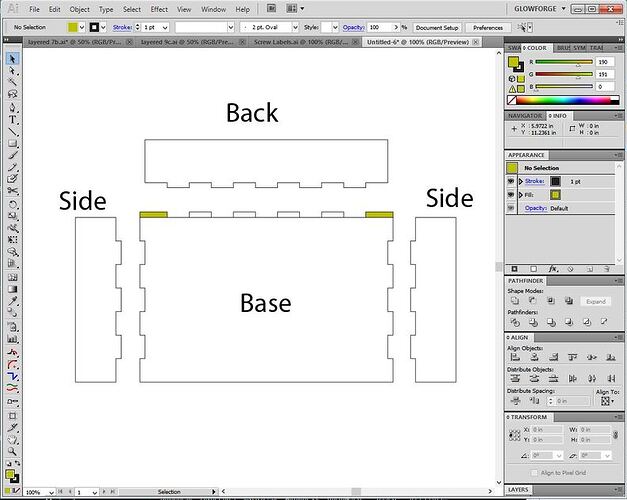
Then I’ll turn the thin tabs into a grid, both the same. (You can just do one and then duplicate it if you prefer.)
Object>Path>Split into Grid > 0 Gutter and however many tabs you want.
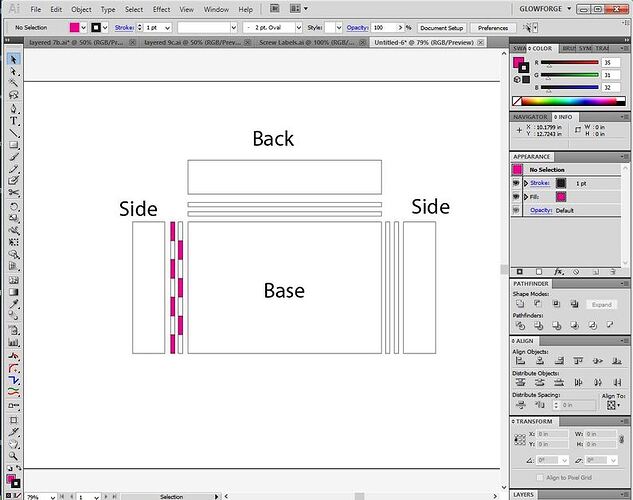
Delete the alternating tabs.
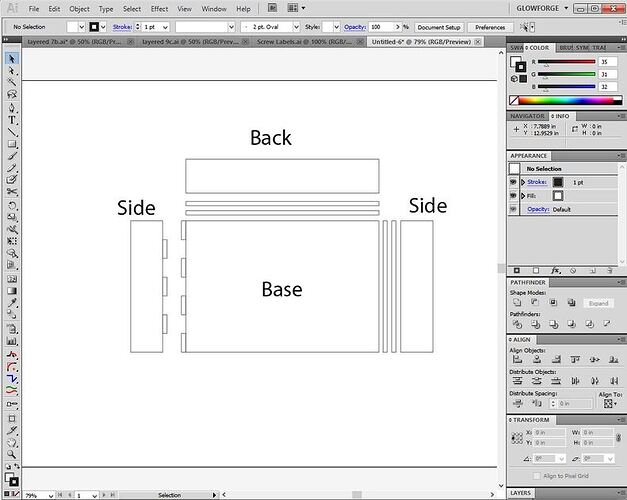
Then shift the tabs towards the side and base, overlapping the shapes by a hair, and use the Unite tool in the Pathfinder palette on them to combine the shapes.
Boom shakalakalaka.
After you do the sides, you do need to make one adjustment to two of the tabs on the base or back to extend them out to meet the edges of the box, or they leave a little gap. Adjust whichever one has the tab extensions at the corners. (And it depends on which ones you deleted.)
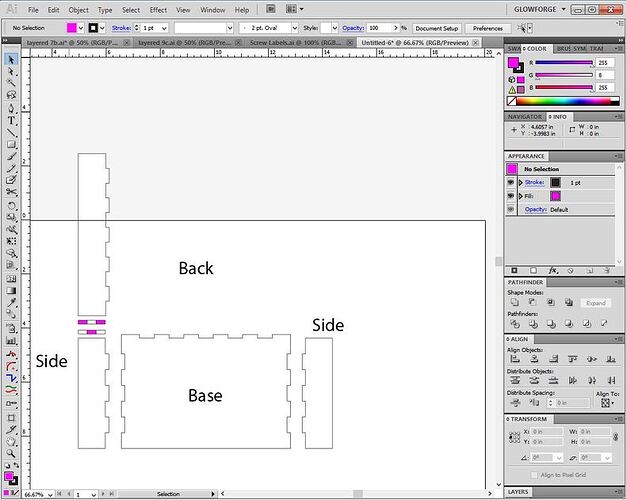
If you want to put a tab into the sides and back, just rotate the Back 90°, align it with one of the sides, and do the same thing to add the tabs.
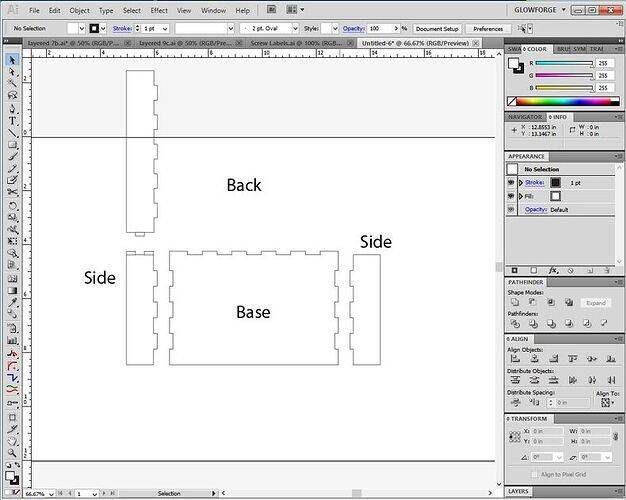
Unite the tabs.
And do the other side…done! ![]()
