Shelf Design

Howdy owners,
I am looking for some direction. I am an illustrator user and i am beginning a design for a small two tier shelving unit for essential oils.

I am looking to create the design myself to understand the process of creating the lines with the tabs that interlock.

So here is the question designers, how do you create the lines? Repeating pattern? Copy and paste?

here is my beginning file.
first draft.ai (1.5 MB)

Any help would be great!
@Jules @markevens36301 @wenning08

2 Likes

Sorry,that puts me out.

2 Likes

Pretty easy in Illustrator actually, if you don’t want to get too fancy for something like kerf adjusting at first. (I basically just do a lot of laying out, aligning, copying and rotating before joining parts.)

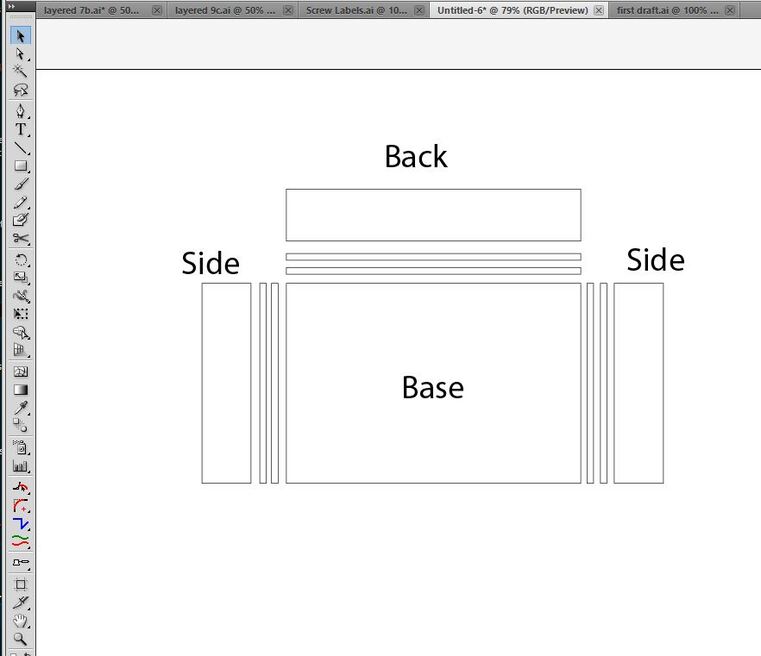
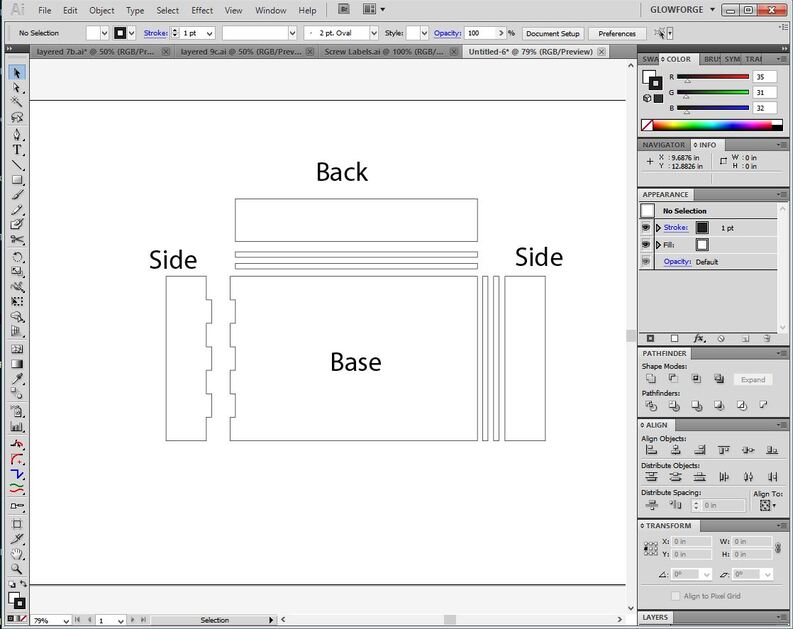
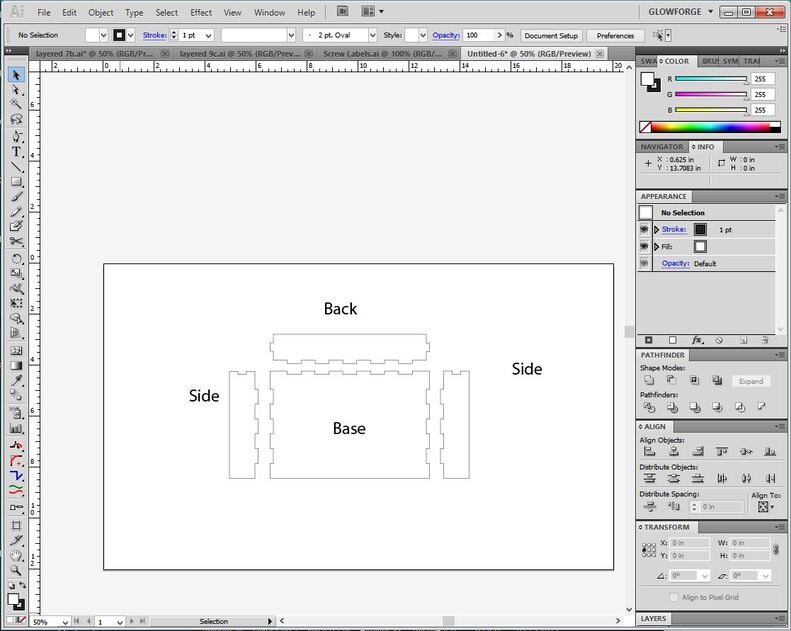
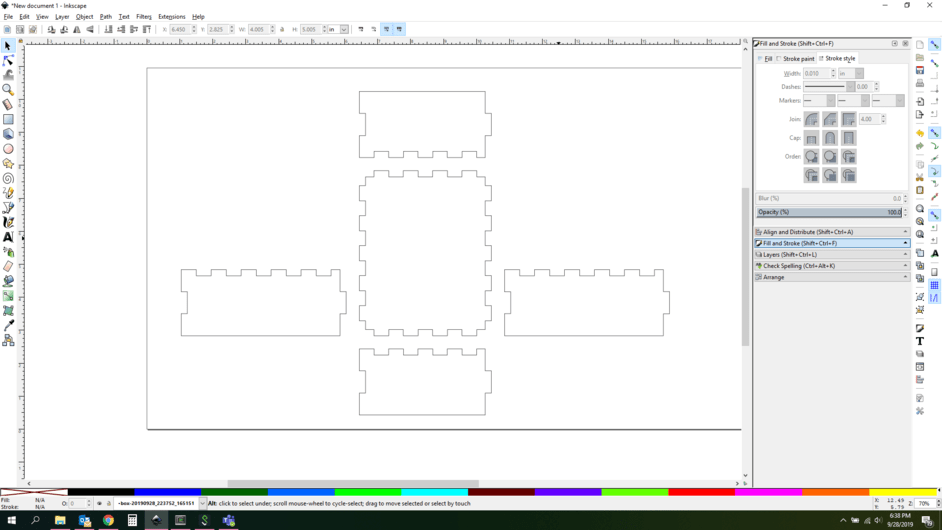
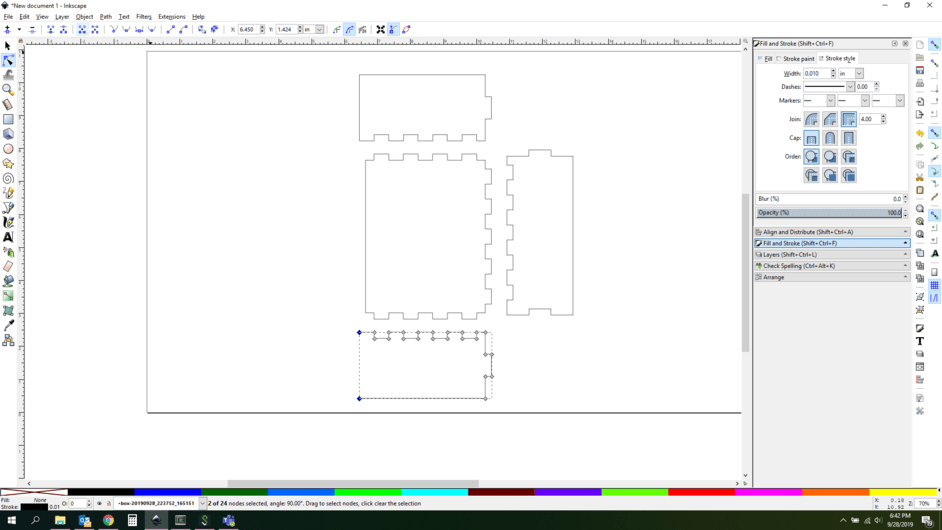
For a simple tray for instance, I’ll lay out the parts as they are going to be assembled, with everything aligned top bottom and center.

In between each of the parts, I’ll insert two small rectangles for the tabs, exactly the width of the material thickness. (So usually 3.4 mm for medium PG plywoods and draftboard.)

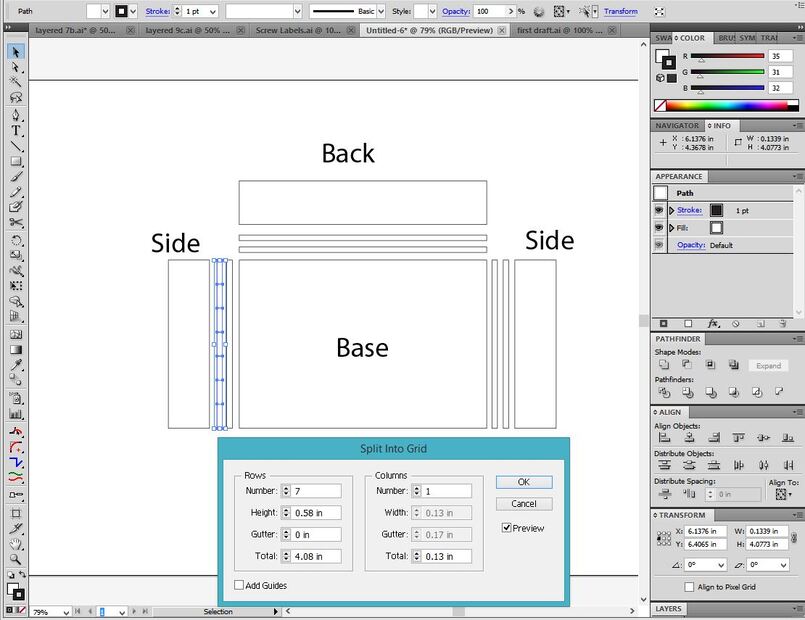
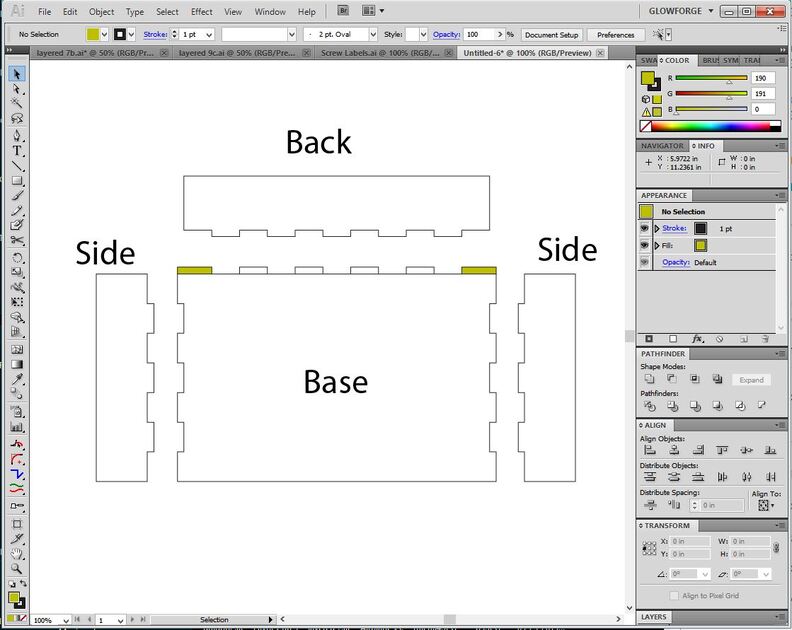
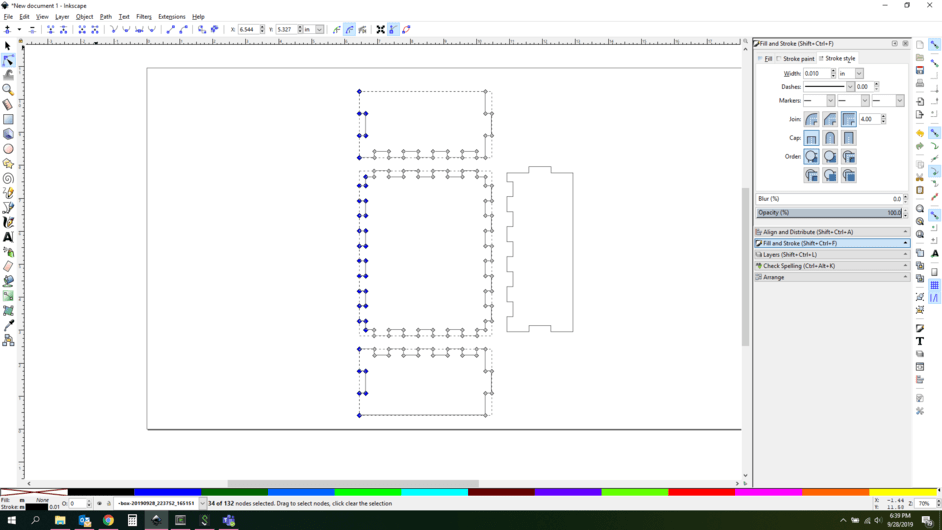
Then I’ll turn the thin tabs into a grid, both the same. (You can just do one and then duplicate it if you prefer.)

Object>Path>Split into Grid > 0 Gutter and however many tabs you want.

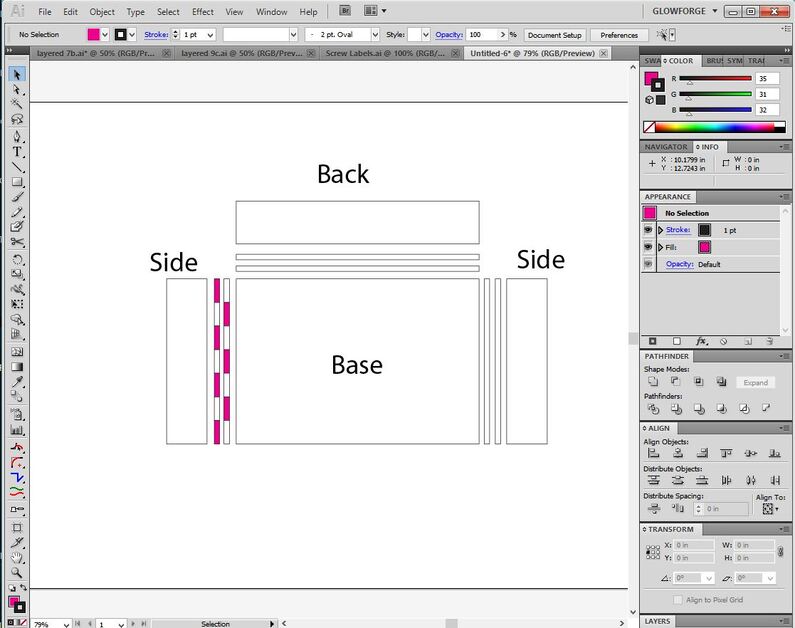
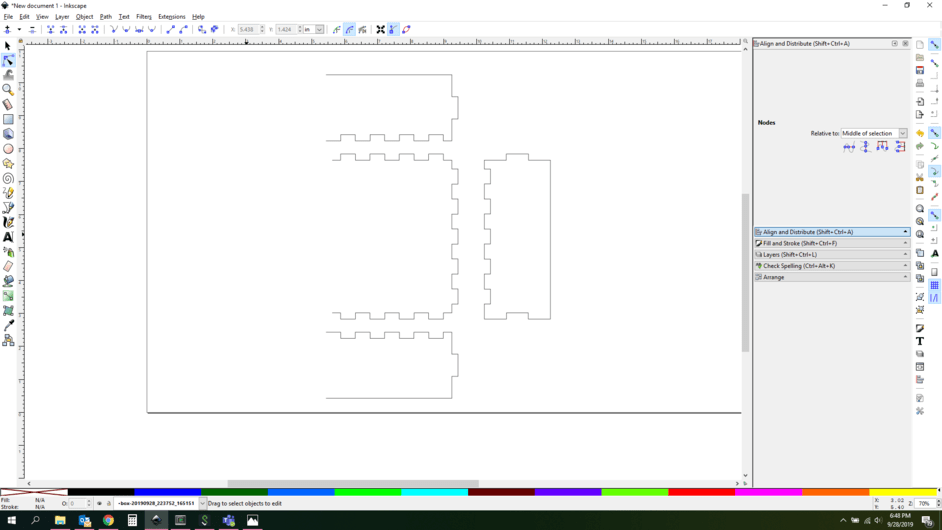
Delete the alternating tabs.

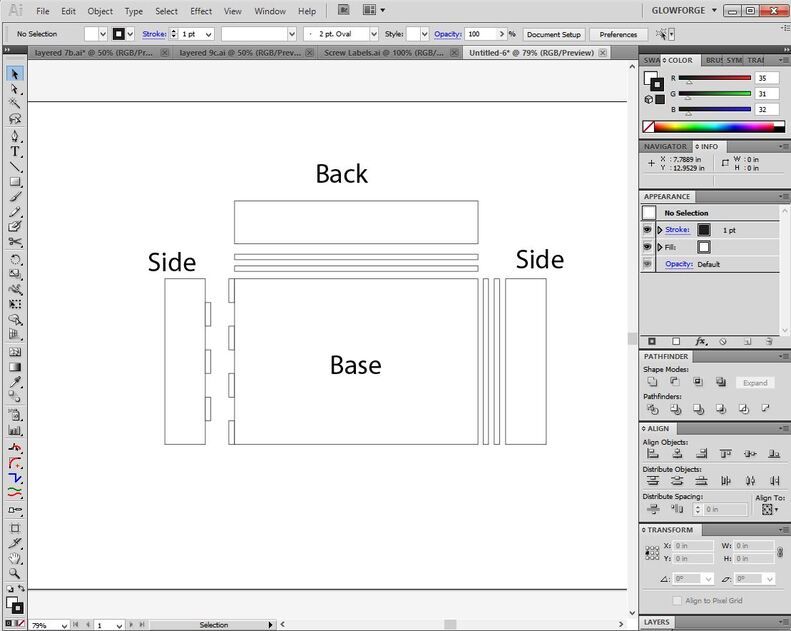
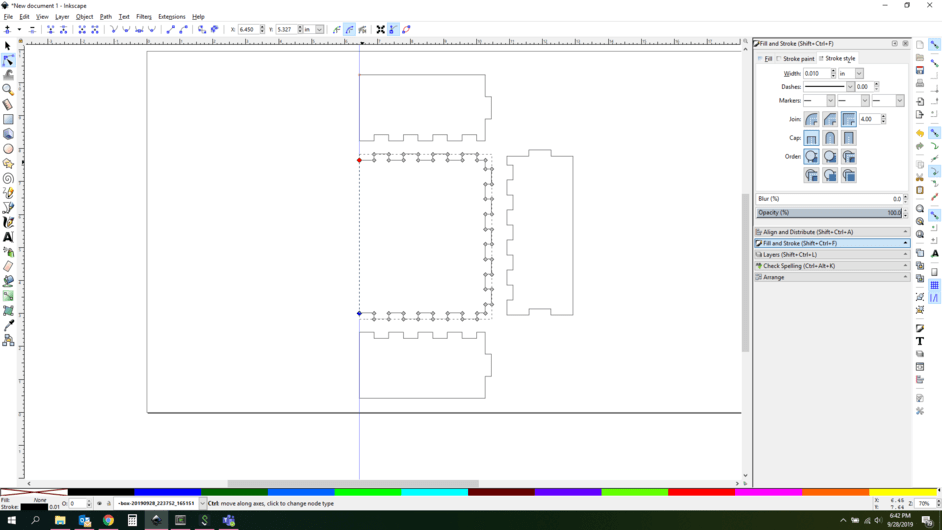
Then shift the tabs towards the side and base, overlapping the shapes by a hair, and use the Unite tool in the Pathfinder palette on them to combine the shapes.

Boom shakalakalaka.

After you do the sides, you do need to make one adjustment to two of the tabs on the base or back to extend them out to meet the edges of the box, or they leave a little gap. Adjust whichever one has the tab extensions at the corners. (And it depends on which ones you deleted.)

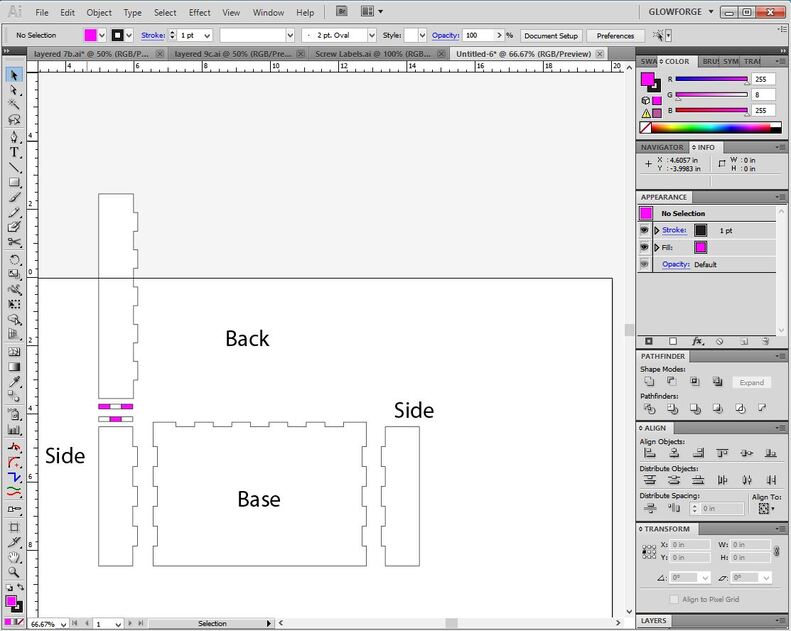
If you want to put a tab into the sides and back, just rotate the Back 90°, align it with one of the sides, and do the same thing to add the tabs.

Unite the tabs.

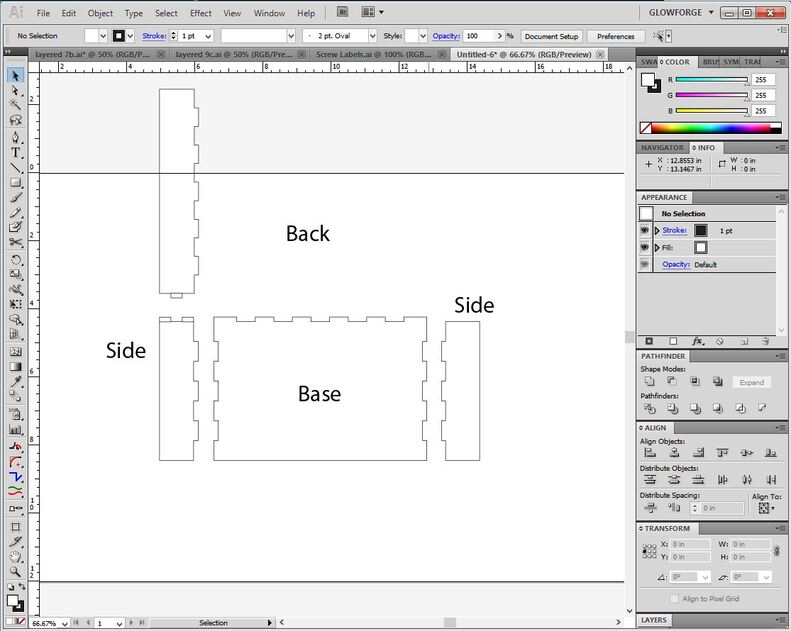
And do the other side…done! :slightly_smiling_face:

23 Likes

That is the most in depth answer I could have asked for . Many thanks! You are the best!
I will post pictures.

5 Likes

Personally I find it a lot simpler to subtract. This isn’t AI-specific, but if you’re just making what is essentially a box that is missing a few sides… I start with a generated box from whatever box generator you like and then remove the tabs from sides as necessary by deleting nodes and forcing the remaining line to be straight.

It takes a lot of the drudgery out of it, and goes a lot more quickly for me. It also simply and easily handles kerf adjustment, you simply add the kerf setting to your box generator.

I just tested my method, once I had the box generated it took 56 seconds to do the rest (in Inkscape, but there are analogous commands in AI).

Starting point a box generated with no top:

Select the proper nodes and then use the “delete segment between two non-endpoint nodes” command in Inkscape. Selected…

And now segments removed.

Now join the end nodes together (“Join selected end nodes with a segment” button highlighted blue upper left)

Now all that’s left is to align the nodes on the bottom of the shelf to match the sides. I use a guide, and drag the nodes straight across to match.

All done. Quick, painless, kerf adjusted. No muss no fuss.

10 Likes

Everyone else beat me to it, they did a very detailed job too! You got this!

3 Likes

I understand that you are thinking in the box. Here is something out of the box.

1 Like

Thank you for the input. I have not yet launched inkscape but i think i am about to. Super Helpful!

1 Like

I am not using Autocad at this point but if each tooth was a block and you used the measure command with a block, It would be really easy. Put the insertion point in the middle and add one and subtract the other and you could have it be almost instant.

This topic was automatically closed 32 days after the last reply. New replies are no longer allowed.